The Robotistan PicoBricks Zero to Hero Development Kit strikes us as a product worthy of your time. With well though-out projects, huge community support thanks to the utilisation of a popular platform and good IDE support, it’s quite a capable package. At its $49, $69 and $89 asking price for the Base, IoT Expert and Zero to Hero kits, respectively, the PicoBricks lineup offers a lot to those looking to embark on an maker journey.

NVIDIA’s GTC 2023 keynote has just ended, with GTC itself ending on March the 23rd – which means an array of exciting new industrial announcements just went live. You can always watch the full keynote at the following link, but we’ve also curated a selection – which you can find in this article – of the most important announcements given during the event.
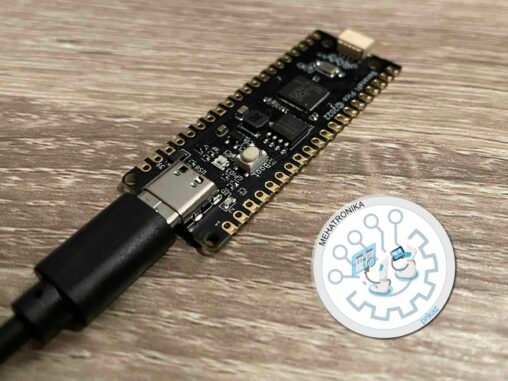
Banana Pi’s BPI-Pico-RP2040 is a cleverly designed iteration of Raspberry Pi’s Pico design. Experience gained over the course of two years allowed the Banana Pi team to present their own idea of a RP2040-based development kit. We’ve received our unit from the manufacturer for review purposes.
It’s worth noting that in just over two years since its January 2021 release, the RP2040 netted itself quite a lofty market position. Even though it’s based on the ARM Cortex M0+, a decade-old platform, it has many specific peripherals and unique features which set it apart from the droves of M0-based systems releasing as of recent – look at some of Ti’s new MSP chips (MSPM0G and MSPM0L series) or ST’s STM32C0 chip series, to name but a few.
However, as we stated a moment ago, Raspberry Pi did something special with the RP2040. It’s the only (at least known to us) dual-core purely Cortex M0+ chipset.
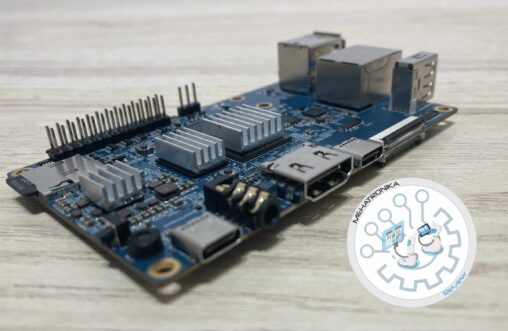
Yet another SBC landed on our review desk. This time around it’s the Orange Pi 5, a recently released RK3588S-based high-end model from Orange Pi – a company whose main products are ARM-based SBCs oriented towards makers. These are the most common type of SBC – with significantly more rare x86-based ones forming the majority of the rest (RISC-V CPUs are also used in single-board computers, rather seldomly, however).

The LattePanda 3 Delta is a gorgeously made Windows 11-capable x86 SBC with great performance and heaps of connectivity options. None of the competing ARM-based systems come quite close, and most of the x86-based systems don’t offer nearly the same level of polish. The $279 asking price is also impressively low, especially with current inflated market prices in mind.
We’ll be direct – don’t skip out on this one!
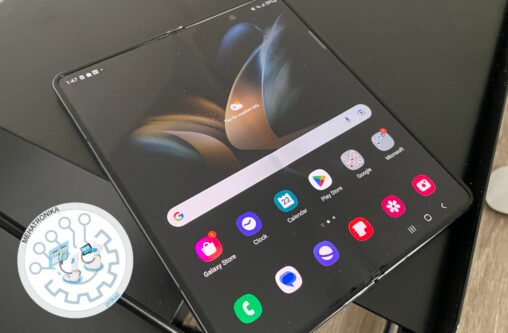
The Galaxy Z Fold 4 is Samsung’s best and latest. It’s their absolute flagship, packing all the tech they’ve got. It’s impressive, and it’s got the highest productivity potential of all the mobiles on the market right now, but its near-$2k price tag puts it in the same ballpark as much more powerful traditional phone-and-laptop combinations.

Miniware makes tiny things. The company specialises in shrinking usually bulky and hefty equipment into tiny pocket-sized gadget while sacrificing the least amount of features. Naturally, this is a tricky feat which requires a good bit of engineering know-how.
Best known in the maker circles for their TS-series soldering irons, Miniware is a company which produces quite the array of products – from tiny portable oscilloscopes and logic analysers to SMD tweezers (our review here) and more. So far we’ve had quite a positive experience with their products, and the general community consensus is similar.
This is why we’ve already got high hopes for the review unit we’ve got in our hands – the MDP-P906 PSU. The manufacturer provided us with the unit free of charge, but does not in any way influence our opinions stated here.
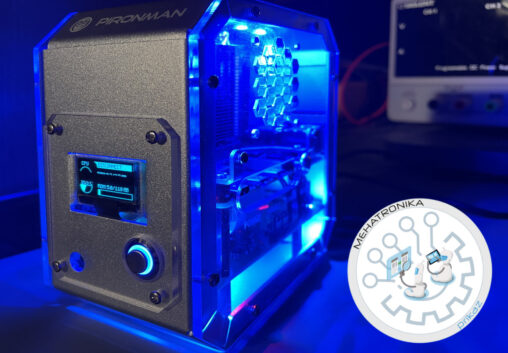
As single board computers progress and become more and more powerful, so does their use as a desktop replacement become ever more viable. We’ve talked about this before – with several companies marketing their products as capable of such feats while accomplishing the task with varying levels of success. We’re not quite there yet (with the exception of some Intel-based SBCs which encroach upon the desktop territory both in performance and price), ARM SoCs are quickly catching up to their x86 siblings and in some high-end cases even surpassing them.
But as technology tends to do, what once was the very summit of our prowess has since slowly trickled down and seeped into inexpensive parts, enabling the advent of many technologies in the consumer field. With that being said, it’s not hard to fathom the incredibly low prices and (relatively) powerful performance modern SBCs bring. Sure, the Raspberry Pi was the trendsetter and before its debut it had been incredibly difficult to obtain any serious “disposable” computational power. Nowadays, however, with so many contenders available, the SBC form factor is a market in its own right.
Despite the fierce competition, the latest entry in Raspberry Pi’s portfolio, dubbed the Pi 4B (our review of it can be found here), remains one of the most powerful and the most popular board on the market. Naturally, a wide array of accessories for the model have popped up, some of which are quite necessary thanks to the Pi’s poor thermal performance. Cases have also been popular from the inception of the SBC as protecting a computer’s guts from dust generally seems like the right idea.
In a market saturated with boards, cooling solutions for the former and boxes to shove the former two into, how do you stand out?
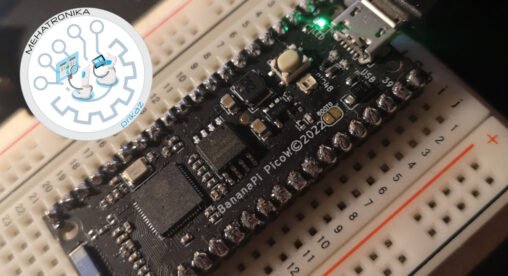
Sinovoip, the company behind the Banana Pi series of development kits and SBCs had an interesting product idea: to create a Raspberry Pi Pico pin-compatible development kit based on the 240 MHz Tensilica LX7 ESP32-S3 dual-core SoC. Instead of a dual-core RP2040 with 264 KB of SRAM, we have the LX7 based chipset with 512kB of SRAM and 2.4 GHz support, alongside Bluetooth 5LE (no fancy Pio state machine stuff, however).
We have the speed, processing power, pin-to-pin compatibility, the same dimensions, and ultimately the same target audience. Even though the ESP32-S3 features 45 GPIO pins, the form factor has to sacrifice quite a few of them, breaking out only 24. A Neopixel LED has been added on-board.
Unlike the RP2040, which can be programmed using CircuitPython, MicroPython and C (Processing), the BPi supports CircuitPython, C and Espressif’s own IDE.
CircuiPython is pre-loaded on the board is geared towards STEM projects. All Adafruit ESP32-S3 Feather examples worked perfectly – with potential small changes of GPIO pin numbers. Standard WiFi connection examples also worked perfectly first try – so its safe to say that the board is fully compliant.

In the last issue we’ve taken a look at two of Würth’s excellent boards designed for the Feather ecosystem – the MagIC3 FeatherWing and the Sensor FeatherWing. Both of these offer great features and ease-of-use for a low price. In our tests, both units delivered exemplary results and demonstrated the flexibility of the format.
Today we’re taking a look at two more Würth boards which were generously provided by the manufacturer – in different form actors, but both based on their own Calypso WiFi module.
The Calypso module itself is a shielded subunit with castellated connectors intended to be used as a complete WiFi subsystem for embedded devices. At the heart of the Calypso lies a networked MCU containing a 802.11 NWP and an ARM M4 core. Additional timing and RF external antenna-driving circuitry is also located under the shield. What truly sets it apart, though, is the ProWare firmware which controls the entire TCP/IP stack and network connectivity.
Calypso’s main goal is completely delegating all connectivity processing from the main MCU or application processor onto its own subsystem, thus freeing up system resources. Compared to most other options which communicate using wide parallel connections and require the main controller to constantly maintain the connection using SDK routines, Calypso uses a simple UART connection and AT commands. This is akin to the way Würth’s sensors handle data – offering pre-processed digital data streams instead of raw values which require additional software calculations and conversion.
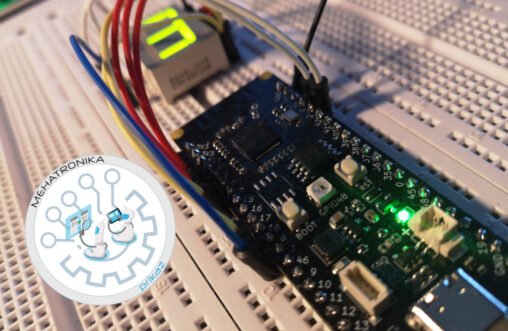
Sinovoip’s Banana Pi family has gotten another interesting member. In our hands today is an MCU development board with the newest Espressif ESP32-S3 SoC – a dual-core Xtensa LX7-based chip clocked at 240MHz. The board’s called BPI-Leaf-S3 and shares the form factor of Espressif’s own ESP32-S3-DevKitC-1 system, with which it shares the pinout. This does make it a drop-in replacement for the latter in projects. There’s 512kB RAM and 2MB pseudo-SRAM on MCU, alongside 8MB of external Serial NOR Flash.
ESP32-S3 SoC, like all ESP32 chipsets, has integrated radios – namely the 2.4 GHz, 802.11 b/g/n Wi-Fi and Bluetooth 5 (supporting the Low Energy Physical Layer – with long range and fast 2 Mbps data transfer). Out of the 45 GPIO pins available on the SoC, the board breaks out 36 (among which pins with specialised SPI, I2S, I2C, PWM, RMT, ADC, UART, SD/MMC host and TWAITM functions are available).
The board also features RST and BOOT keys as well as one Neopixel RGB LED on pin 48. What sets the Leaf apart is the USB Type-C connector, a 3.7V Li-ion battery port (with a charging circuit – akin to those Adafruit’s Feather boards have) and a separate four-pin I2C (GND, 3V3, SDA, SCL) connector for attaching hardware to the main SoC serial bus.
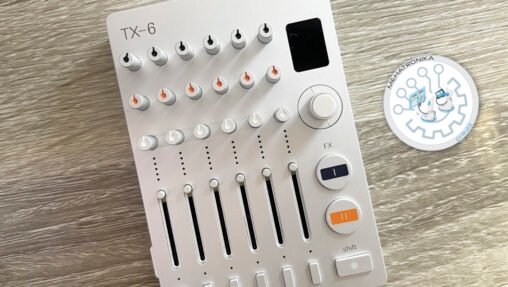
Each time we get a bit of teenage engineering kit, it takes us on a journey during our review. The Swedish company seems to make just about anything they feel like making – which includes everything from serious, albeit quirky music devices – to adorable record cutters and singing dolls. This playful variety is what defines the brand – and what makes the brand. Reviewing their more “serious” products in the past – we’ve still stumbled upon heaps and heaps of personality. It’s certainly interesting and charming to see a brand push out products they truly want to.
This philosophy definitely gave rise to the TX-6 – a tiny battery-powered portable mixer with a bunch more features packed right in. It’s just… a peculiar device which has so much going on under the hood that calling it a “mixer” feels almost wrong – for it is so much more than that.
But a mixer at heart it is! The six stereo channels (which can be also used as up to 12 unbalanced mono channels or 6 balanced mono channels), six channel control strips and a two-slot effect processor define the main workflow of the TX-6. The inputs for these are found along the top edge – spaced incredibly tightly alongside the USB-C port used for charging and digital audio. On the bottom side there are two buttons (which we’ll explore shortly) and three outputs – a main audio out, an auxiliary out for effect loops and a cue out for monitoring. The sides are mostly empty – save for a single white flip-switch and a status LED right next to it. The whole chassis is built out of a solid block of aluminium. It might seem like a vanity-driven choice – but given its size a relatively heavyweight material needed to be used to stop it from flying off the table upon the slightest tug at any of the cables connected to it (faux leather was also put on the back to provide some grip – while it looks visually stunning, rubber feet might have worked a bit better for this). An adorably tiny OLED display wraps the design up – and displays useful data by utilising a clever UI.
Before digging deep into the TX-6 – it’s worth noting once again how tiny this device is – its 9cm by 6.2cm footprint is minuscule. It’s so small and compact that the headphone adapter almost looks like it should be a volume knob (and that’s what we thought it was upon originally seeing the design – not to mention that it’s larger than the actual master volume encoder).
Teenage engineering has generously sent us the TX-6, alongside a set of slimline cables and a matching bag for the mixer. However, all opinions stated here are our own and were not directly influenced by the company. So – without further ado – let’s dig into each major set of features the TX-6 has and see how it performs.
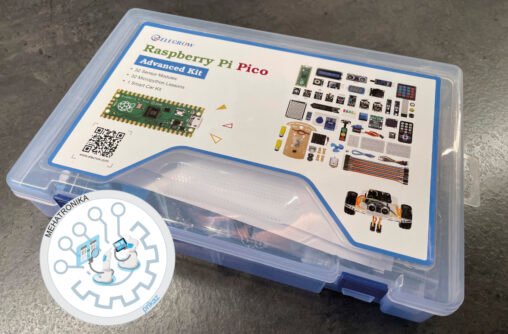
STEM (standing for science, technology, engineering and mathematics) kits have become increasingly relevant as educational institutions slowly switch from traditional to more hands-on learning experiences. With us today, we have the Raspberry Pi Pico Advanced kit from renowned makerspace company Elecrow – which has extensive experience in designing such sets, especially aimed at younger audiences. We feel that the equipment provided here, as well as the online documentation have been carefully selected and thought out.
The focus of the set is the Raspberry Pi Pico MCU board which is at the heart of most projects – usually based around sensor input, some processing and output on one of the peripheral devices provided.
The kit contains 32 modules which can be combined in a variety of ways. There are also 32 projects documented online which are designed to teach the user a variety of concepts in programming and electronics.
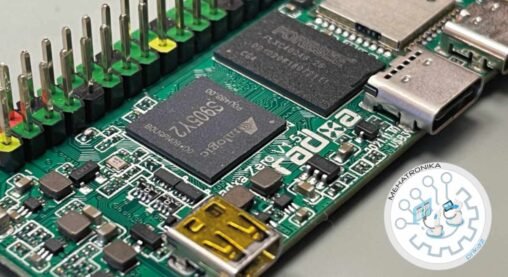
We’ve taken a look at the Raspberry Pi Zero 2 W. We found it to be a great cheap SBC which is seriously feature-packed. For just $15, you get a quad-core A53 CPU, 512 MB of RAM and 2.4 GHz WiFi and Bluetooth 4.2 connectivity. It’s a great deal – and a drop-in replacement for the older generation small-format Pis. All of this netted it a very high 9.3 out of 10 in our review.
The Radxa Zero, which we’re taking a look at today, is a direct competitor in the small-factor SBC market – offering the same footprint as the smallest Raspberry Pi. However, multiple upgrades make it a more attractive, albeit more expensive (in some configurations) offering.
For starters, what’s holding the Zero 2 W back is the RP3A0-AU chip’s integrated 512 MB of RAM. And that’s your lot. While simpler projects might get away with that – good luck running any hosted application on one (it’s a whole another debate on whether running something like that on a Zero is justified, but…)
The Radxa Zero comes in a few different RAM configs, starting from the low-end 512 MB one, and going all the way up to 4 GB. The 2 GB and 4 GB RAM models also come with on-board flash storage, which can go all the way up to 128 GB for the highest-end configuration.
Since there are quite a few configurations of the Radxa Zero – and memory isn’t the only spec differing between them – let’s start with what remains the same across the board – even on the lowest-end configuration.
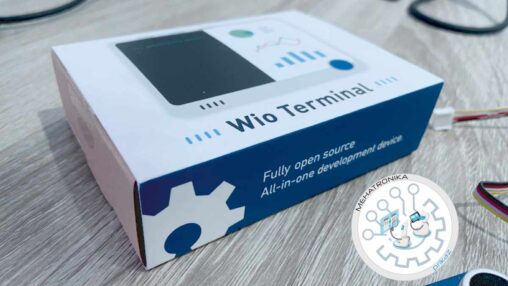
Seeed’s Wio Terminal is an all-in-one contender in the educational development kit market. By interfacing with the real world, these boards allow programs to come to life and enable students to visualise concepts easily. Dev boards are of great appeal to the hobbyist community, as well – enabling makers to create complex devices with minimal involvment in hardware design. These two communities – the education market and the maker space – have been actively utilizing this tech for over a decade now. The ease of use enabled brands like Arduino and Raspberry Pi to gain traction and their almost legendary status in the industry which they have today.
The tools available at any price point continue to evolve rapidly. In the 90s, it would cost millions and take years to build some of the hardware components we mass-produce for pennies nowadays. It simply makes sense that – a decade later – we move on from the classic bare-bones MCU board format and get something more – at least in the price bracket.
See, the price of an Arduino Uno has mostly remained the same – at around $28. It features the beloved ATMega328P, an 8-bit, 20 MHz, with 32K of flash, 2K of RAM and a whole 1K of EEPROM. It’s not a lot – but there’s a suprising amount of things which can be (and have been) done with this chip. The great support and tens of thousands of projects are what draws people towards the Uno – and what’s cemented its rightful place in tech history.

Foldable phones have been all the hype in recent years. Strictly speaking, these are not a new idea. The first concept foldable phone was the Nokia Morph – which never saw a functional prototype developed. In the early 2010s, Samsung and LG – the forerunners of OLED tech – developed functional displays which could handle some bending. While the early-to-mid 2010s were filled with prototype foldable devices, 2018 was the year when the first commercially available foldable hit the market – the Royole FlexPai.
What the FlexPai did was prove to the world that there was a place for a foldable phone in the consumer market – but what it did not achieve was perfection. The screen was fragile and easily damaged, the specs weren’t anything to write home about and the hinge – the lifeblood of any foldable – proved to be a much bigger issue than anticipated.
A hinge is an obvious ingress point for dust and water – so early models often had serious durability issues. Part of the smartphone’s ubiquity lies in the simplicity of its design – no motors, bearings or other mechanical moving parts which can easily break or malfunction. This is exactly why models with pop-out front cameras are traditionally seen as unreliable and why many curious ideas like the LG Wing never entered the mainstream.
While Royole had introduced their first foldable a year before Samsung had its first contender – Samsung’s 2019 Fold was the first true noteworthy device of the sort. Nevertheless, early review units had issues with the protective foil on the screen, as well as numerous reports of gritty hinges. Also, the crease. The crease is simply a part of life for foldable owners. This line naturally occurs on all inwards-bending displays. Samsung engineered their hinges to bend the displays at rather sharp angles (which is good), which sadly does increase the prominence of this line, visible at every angle except a straight-on view of the screen.

Samsung’s entry-level flagship phones are often overlooked due to the more apt Plus and Ultra models. However, year after year, these standard S-series models keep offering great performance and many of the exciting new features expected from the next generation flagship. That being said – the death of the beloved Galaxy Note lineup and its merger with the Galaxy S Ultra lineup did limit some of the most unique features – like the S Pen to the highest-end flagships the company makes.
While models like the Galaxy S21 FE (or even the mid-range Galaxy A73) are focused on bringing older higher-end specs for relatively low prices, entry-level flagships are all about top-notch core specs, but without all the non-essential bells and whistles. At its starting $749 price, it’s an intriguing choice for those searching for a sub-$1000 Android flagship.
At this price range, there are several other options, however – including the Asus Zenfone 9 and the Pixel 6, retailing for slightly lower prices, as well as the OnePlus 10T, usually going for a bit more. We can’t go without noting the iPhone 14 as well – retailing for $799. The competition in this price range is stiff – so the Galaxy S22 has to put up a valiant effort.
And the looks definitely don’t disappoint. While visually reminiscent of the S21 FE, the S22 features a Gorilla Glass Victus Plus screen and back (no more plastic backs!) and an aluminium frame. This frame feels almost like steel, and the entire build feels substantial in the hand. There’s a good selection of colours – Phantom Black, Phantom White, Green and Pink Gold. Exclusively through Samsung, there’s also a choice of Graphite, Cream, Sky Blue and Violet. These exclusive colours harken back to the S21 design with the camera bump being a discrete colour. In late Q2 2022, the S22 also dropped in a Bora Purple – the same striking hue available on the company’s new foldables.

Following the success of the Galaxy S20 FE and the general popularity of the Galaxy S21 series, Samsung has once again taken to producing a new FE-series device. These “Fan Edition” phones usually come later in a series’ life cycle and pack a punch at a mid-range price. And the name? It stems from Samsung’s claim that feedback is collected from users to create the best compromise between features and price possible – with the fan-favorite features making the cut.
In theory, this is a similar concept to Apple’s iPhone SE lineup – offering flagship-level performance with a lower price-tag while sacrificing some non-essential features. Unlike the SE, however, the S21 FE doesn’t sacrifice its design or display.
In fact – the S21 FE uses a 6.4-inch Dynamic AMOLED 2X (marketing talk for an AMOLED screen with HDR10+ support and better color accuracy) – quite similar to the one that the S21 uses. This means its screen outperforms older Samsung devices and is a significant step up, even for people coming from mainline S20 models.
Oddly enough, Samsung tends to use two different chipsets in its flagship phones depending on the region the unit was sold. Usually, their own in-house Exynos SoCs have been used on international models, with some regions using a Snapdragon chip. With the S21 FE, however, international models now use the Snapdragon 888 (the same chip all the S21 models use), while (as far as our research can tell) Exynos 2100-based handsets are only sold in Australia. This is good. Snapdragon chipsets have always slightly outperformed their Samsung counterparts.
The triple camera setup on the back seems unchanged from the decent system found on the back of the S20 FE. This means it’s behind what the other S21-series phones offer – but above Samsung’s non-flagship offerings.
Like the standard S21, the S21 FE comes with a plastic back (which does, however, feel pretty decent in the hand), aluminum frame and a Gorilla Glass Victus-covered front panel. This should make the front as durable as the panels on the iPhone 12 and 13 range. Clearly, no expense was spared on this front.
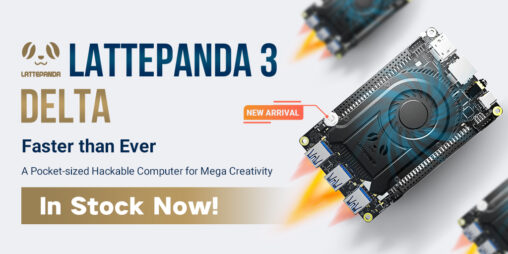
The LattePanda Team launched the world’s thinnest pocket-sized hackable computer – LattePanda 3 Delta with global electronic components distributors. The collaboration will ensure that the product choice for LattePanda 3 Delta is passed on to customers through quick, easy online selection via the website of global electronic components distributors and LattePanda.
“LattePanda Team is so proud to cooperate with the global electronic components distributors for this joint launch. It delivers an exciting message to our customers that they can gain fast, easy access to our high-performance and hackable LattePanda 3 Delta anywhere in the world. Our collaboration will assure even higher levels of customer service,” said Sandy Zhang, CMO of LattePanda Team.
LattePanda 3 Delta is poised to define a new era of computing and drive mega creativity for tech enthusiasts and industry innovations. It gets a significant performance boost by upgrading from the Celeron
N4100 of the LattePanda Delta to the Intel 11th-generation Celeron N5105 processor with up to 2.9GHz burst frequency, maintaining almost the same pinout and layout as the previous version to allow for effortless system migration or upgrading by replacement. Compared to its previou version, the CPU of LattePanda 3 Delta speeds up to 2 x faster while the GPU speeds up to 3 x faster to support usage like playing a 4K HDR video and running heavy games.

Continuing our series of reviews on SBCs and SBC accessories, we stumble upon yet another screen from a well-known brand in the field – Elecrow. While for most applications, SBC programming and setup is done via a command-line interface, but most end-use applications still require a GUI of some sort. This is why the market for purpose-built SBC monitors is so large -offering many options for different use cases and price points.
The screen we’re taking a look at today is on the budget end -retailing for around $70 – but offering proper capacitive touch and an IPS panel, as well as low energy consumption needs which can be easily be met with even USB power.
The resolution of this panel is 1024 x 600, which is a bit on the low side even with the relatively small screen size. While a full HD screen would be ideal for high quality content, lowering the load on SBC GPUs by using lower-resolution screens is always beneficial for performance.
We loved the simple connectivity provided by the screen – with a single USB cable used for both power and touch control – and anHDMI port used for signal. The main video codec is a Real-
tek-branded chip which should deliver reliable performance. There’s an odd hardware backlight switch, which is odd given that the screen isn’t transflective.
While the screen can’t hold an SBC on its back, it has simple mounting holes which allow for it to be fixed inside a functional device securely. This is great, especially given the low and compact profile of the unit.

Great gear comes pack with an array of connectivity options. No matter how powerful or great a piece of kit it on its own – mixing and matching it in different and surprising combinations can greatly extend the sonic potential and uniqueness of sound produced.
Modern systems use these ports for external sound control. Parameters and voltages from one bit of gear, much like in industrial systems, can be used to control parameters in another. Depending on the type of instruments, these signals can be digital or analog. Digital signals carry synchronization messages and data, while analog signals carry sound or other raw values. By using a network of oscillators (VCOs and DCOs), filters (VCFs) and envelope generators (analog circuits which help shape signals), a music setup processes and shapes sound much like a factory control system would process its data flow filled with sensors, actuators and control points.
Luckily for us today, all three bits of kit in the title are crazy powerful and are also equipped with a variety of IO functionality which makes them perfect for this small demonstration of integrating Teenage Engineering’s gear in a traditional existing creative setup.
The minilogue xd is a powerful synth. It’s the evolution of the already insanely versatile minilogue, adding new features and a more robust core. In the future, we plan on a full review of synth, but of interest to us today, though, are the two CV inputs on the back which can be assigned various roles. One of these is controlling modulation parameters, essentially opening up the synth design to external patching. Without further ado, let’s try a few fun things with these three bits of kit.
Bring in the POM-400!
Measurement equipment is a key part of an electronic workbench – and there’s no doubt good equipment is necessary for any serious work in the field. Companies like Tektronix, Agilent and Fluke are among the biggest and most respected brands in the field – with an iron grasp over the market. Many of these mainstream options can be bulky or impractical in some usage scenarios.
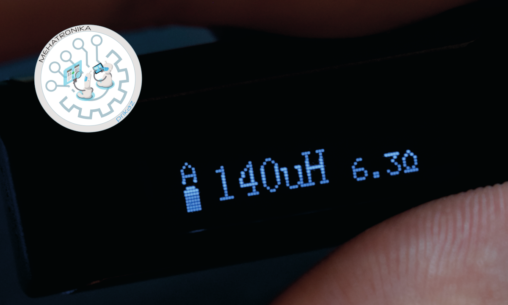
This is why today, hauling from China’s edesign we have the D71 Smart Tweezers -a lightweight piece of measurement kit meant to be used for quick checks and component identification – for an impressive $70. It’s clear that a lot of engineering has went into making these as compact and affordable as possible while maintaining an appropriate level of accuracy in measurements.
The attractively-styled box opens up to reveal a nifty hard-shell carrying case in which the unit itself lies within. Well, calling it a “unit” is a bit of a misnomer – as the DT71 features two distinct parts in its construction – the tweezer tip base (which contains the two batteries powering the DT71) and the measurement processor which simply attaches atop with a 4-pin TRRS jack. This provides enough connections to enable full differential measurement – one of the big highlights of the tweezers.
But what do they exactly do? Quite a lot, actually! The basic functionality is that of an LCR meter – measuring resistance, capacitance, inductance, frequency, voltage and also offering diode testing. There’s also a built-in rudimentary signal generator and a nifty auto-identification mode which also supports secondary readings (likely due to using a more complex waveform while measuring). The battery life is great – easily reaching 12h of constant use on one charge. Standby battery drain is negligible, especially with the controller head unplugged.
Physically, these are gorgeous. There’s no springs or other mechanical tensioners. Instead, e-design decided to put in two sets of magnets which perfectly balance out and offer just the right amount of resistance to emulate a physical spring. This both offers a better feeling device and a higher quality construction with less moving parts prone to wear and tear. One minor design quirk is the capacitive button used for all operations.
We love calculators. There’s something charming about these tiny computers which were first contacts with programming for many aspiring developers. These devices were the desktops of the 1960s and the smartphones of the 1980s – with the market flourishing in this era with various and wonderful models, culminating in some of the most recognisable designs.
With the advent of smartphones and other portable computers, calculators have fallen from their former glory. They still, however, retain an important place in education and specific scientific and engineering fields. This market is nowadays dominated by a few brands – with Texas Instruments, Casio, and to a lesser degree Sharp and HP having a firm grasp on the field. This makes it quite interesting and exciting that in Q3 2017 a completely new company – called NumWorks – appeared with their premier model – the NumWorks model N0100 calculator – simply branded the “NumWorks Calculator” (which we’ll also call just the “NumWorks” in the rest of the article). A quiet revision upped much of the specs and gave the calc a much-needed memory boost. This newer N0110 model paved the way for many new features in later software revisions.
Before digging into the review itself, we’d like to mention that this NumWorks N0110 has been provided by the company to us free of charge for review purposes. As always, all opinions below are our own and are in no way influenced by the company.
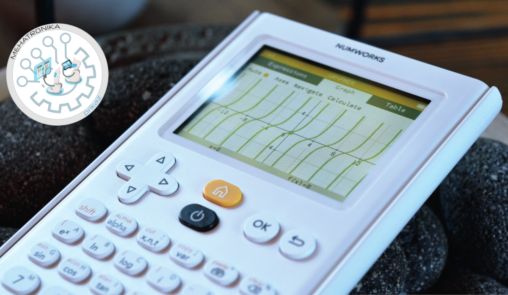
First things first – the N0110 is sleek. That is the most immediately noticeable thing about this device. It’s modern, it’s slim and it’s pretty. Even the box design is simple and unassuming in an elegant Apple-esque manner (makes sense given that CEO of the company is an ex-apple software engineer). Under the lid is a playful and beautiful calculator with a novel yellow-black marking design with grey accents. It’s such a striking pretty design that every other calculator we’ve tried (except the HP Prime) absolutely fades in comparison.
The buttons also feel great and responsive. The font used on these is also great and extremely sleek. The screen is not laminated, sadly, but it does not present much of an issue, as it’s plenty bright and has surprisingly great viewing angles.
The integrated 1450 mAh Li-Po battery is also as excellent as the screen and keyboard – providing the user with somewhere between 20 and 24 hours of constant use. It also charges quickly. And for charging, there’s a yellow USB cable provided in the box. Yellow! Absolutely bananas.

Second in the series of Würth’s add-ons for the Feather ecosystem is the Sensor FeatherWing – featuring four of Würth’s own sensors on-board – those being the WSEN-PADS absolute pressure sensor, the WSEN-ITDS 3-axis accelerometer, the WSEN-TIDS temperature sensor and the WSEN-HIDS humidity sensor.
All of these are connected via an I2C bus to the main Feather board. There’s also support for two SparkFun QWIIC devices and two WE-Sensor devices, thanks to the four connectors (one of each is pre-mounted, and two more are supplied).
As with all FeatherWings, this board is compatible with a wide range of microcontrollers. We successfully tested it with M0, M4 and ESP32-based systems – and it worked flawlessly.
There are two separate interface libraries that can be used with this FeatherWing – the platform.io Arduino-like library and the classic Arduino library. We’ve tried both of these, and they are both excellent and offer all the main features of these sensors.
The platform.io library worked perfectly – and we managed to run all the examples without any hiccups whatsoever. The Arduino library (well, in reality, it’s four separate libraries that Würth has provided) doesn’t offer support for reading more than one sensor at a time/per sketch – so we decided to tinker a little and fix this.
Namely, certain methods were defined multiple times in separate library instances, so we’ve unified the four libraries into one to take care of this – while preserving all the examples in a new folder architecture. If using multiple stock libraries is required, it can be achieved by including the header file under a namespace. This process didn’t take too much time, though, so we don’t consider it a huge deal.
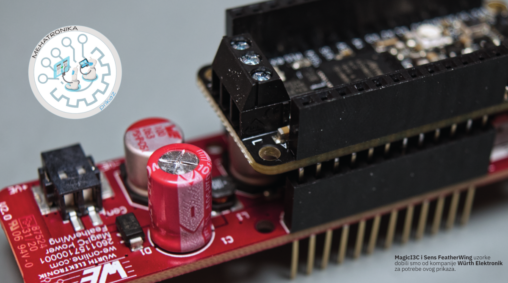
Feather is Adafruit’s system of development boards, available in a wide range of MCUs and peripheral options. FeatherWings are what they call the add-on “shield” type boards that stack above or below the main board to extend its capabilities.
Wurth Elektronik created four of these add-on boards to showcase some of their industrial-grade technologies in an approachable, easy-to-use factor. Today, we’re looking at the first of these – the MagI3C FeatherWing.
Normally, Feather boards are powered by either a USB connection or with a battery (there’s on-board charging circuitry, too). There’s also the option of supplying 5V directly to the GPIO header. While this is more versatility in the power department than most competitors, it’s still a far cry from being industry-ready.
This is where the MagI3C FeatherWing comes in. Powered by the namesake MagI3C modules, it offers a stable output voltage in a wide variety of input scenarios.
Digging a bit deeper into the inner workings of the module, we see some interesting chips populating the circuit. Firstly, the MagI3C FDSM (a fixed output voltage step-down regulator) takes any input voltage between 6 V and 36 V and brings it down to 5 V. An additional VDMM (variable output voltage step-down regulator) brings those 5 V further down to a pre-set 3.3 V. This second chip can be enabled or disabled via an on-board switch, and is meant for FeatherWings that require 3.3V power. The power is delivered to the MagI3C board via a no-screw terminal, which accepts wires of various thickness. There’s also a USB connector on the side, allowing for power delivery through a standard microUSB cable.

Dymo’s versatile industrial range of Rhino labelling tools offers an array of materials and colours suitable for a variety of applications. All of the labels are tested and certified to withstand tough industrial conditions – which include extreme temperatures, direct sunlight and exposure to water, oil or other chemicals.
Currently, Dymo offers vinyl (both standard, coloured and self-laminating), polyester, nylon, non-adhesive and shrink-wrap tags. Each of these have unique properties making them most suitable in specific scenarios.
What separates the Rhino line is the cartridge technology – most office label printers use thermal paper or tape which, while cheap, isn’t a permanent labelling solution. Such labels are very sensitive to higher temperatures – and on top of that they have a tendency to fade after a while. Rhino tapes use thermal transfer technology – meaning that the ink is transferred from a separate heat-sensitive ribbon onto the label tape. The ink ribbon runs parallel to the label tape and is advanced along with it, providing a fresh surface each print. This method has serious advantages over the conventional one – as it opens up a whole library of possible label materials and colours while also enabling the printed labels to be thermally stable.

Nucleo U575ZI-Q is an STM32 Nucleo-144 development board with STM32U575ZIT6Q MCU and connectors for Arduino, ST Zio and morpho accessories. The MCU is from the U series – Ultra-low-power Arm Cortex-M33 with a built-in FPU unit. It runs at 160 MHz and has 2 Mbytes of Flash memory. On the board itself is a USB output/input port for further connections and data transfer.
The combination we made was done on purpose. We added the X-Nucleo GFX02ZI board with a full-color LCD screen with a resolution of 320×240 pixels. At the moment it is the only STM Nucleo board that supports “out-of-box” this display through TouchGFX Designer which you can download for free from STM.
TouchGFX Designer itself is extremely pleasant to work with and it is very quick and easy to create custom applications. It generates code that you can further use and modify in STM32CubeIDE.
Unfortunately, the X-Nucleo GFX02ZI display does not have a high resolution, if it had a lower resolution, the usability of this assembled kit would be called into question. If our idea is to create a device based on an Ultra-low-power Arm fast and powerful MCU, with the presence of a USB connector on the board itself to connect additional peripherals: keyboards for example… this combination can give you hours and hours of pleasant and revealing work on STM ARM platforms. It is definitely recommended.
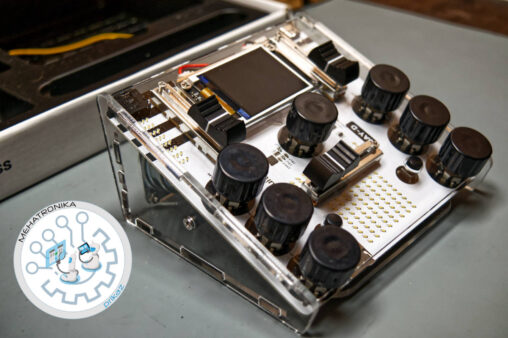
We’ve had our hands on the great CircuitMess Chatter in the previous issue. It’s a lovely DIY-assembled development platform with surprising versatility and a great beginner-friendly IDE called CircuitBlocks (based on MakeCode and PXT-Blockly). Even after finishing the core building part of the experience, there’s more to discover within these – and we were especially surprised to find full support for the ESP32duino packages which enable even Wi-Fi projects.
Today, CircuitMess sent us another of their great kits – the Jay-D STEM box. It’s the second box in the series – but it’s still available to order and is one of their most beloved kits.
Opening the box, we’re greeted with a familiar array of PCBs, acrylic parts and electronic components. There are also two speakers included – which makes sense given the nature of this DIY kit. Which we haven’t mentioned yet – right.
It’s a little mixing desk! Complete with crossfaders, digital effects, and all the basic features you’d expect. We find the concept here extremely appealing and satisfying – and who wouldn’t want to assemble a piece of music tech! So, without further ado – let’s get to it.
Once again, the most finicky SMT components have thankfully been pre-soldered to the board. Sadly, we can’t see a middle schooler using a hot air rework station, no matter how fun and rewarding as tricky soldering manoeuvres are. That being said, any old soldering iron will work just fine for the work required here. We’d recommend having a solder pump or a braided copper solder wick on hand, as well, just in case whoopsies happen. Some electrical tape also helps in cases where the component just refuses to stay in place. The holes on these PCBs are well placed, so this shouldn’t be an issue, though.

SBCs are great. Reading through our extensive list of SBC reviews we’ve created over the past few years, one can notice our own love for these little systems enabling everyone to deploy IoT systems and create various server-based projects, among other things. At the same time, certain models have proved themselves worthy of serious industrial use thanks to their wide IO arrays and reliability. SBCs also draw impressively little power, with the most power-hungry models rarely requiring more than 15W under top loads, making them very easy to power.
Sadly, that power is usually provided by a switched-mode power brick attached to a nearby outlet and delivered through a USB port – which means that there’s nothing between a power outage and your data being lost or services being fully interrupted. Short of a full-size desktop UPS, there’s not much that can be done to combat outages – but given the fact that compact size is one of the biggest upsides of an SBC, it’s easy to see why a large, bulky battery backup box is somewhat inappropriate in most use-cases.
In today’s review we’re taking a look at a solution to this problem – SunFounder’s PiPower – a tiny, easily attached and sleek UPS system designed for SBCs. While it’s not the first device of its kind, it’s certainly the neatest one we’ve seen so far. SunFounder sent this device free of charge to us for review purposes.
Inside the box are quite a few parts – all the screws and standoffs, an acrylic backing plate, a screwdriver and the PiPower module itself. Two high-quality braided cables (one Type-C and one Micro USB) for connecting the UPS to the SBC are also included in the set – which is a great touch. These cables are extra-short, which is great for keeping the setup tidy (can you even easily get such tiny cables commercially?) and for keeping the overall footprint small.

We’ve already the overheating tendencies of modern SBCs a few times in the articles we’ve written in the past. Seriously, these little powerhouses need some sort of cooling – be it passive or active – to retain their peak performance for a reasonably long time.
Some of them come with stock heatsinks, while others don’t. The latter group is thus often left by most users to overheat and throttle, seriously lowering performance. Sitting at a not-so-nice toasty 80°C, while technically safe, is not the best practice and certainly does not do any good to the CPU.
Most solutions for cooling single-board computers come in one of two flavours: a small heatsink or a small heatsink with a fan bodged atop. While this is reasonably effective for low-TDP SoCs, it leaves a bit to be desired, especially when overclocking.
SunFounder had something different when they sent us the Raspberry Pi 4 IceCube cooling solution. It’s a proper little heatpipe-based system with a radiator and an RGB (everything has to be nowadays) fan. It looks like a miniature version of a proper desktop cooling setup – and it’s adorable. The mounting was pretty straightforward – as the cooler holds itself suspended on four arms right above the CPU, RAM, ethernet controller and the USB controller. The IceCube uses rather thick thermal pads to couple the bottom of the heatsink – which does make using thermal paste a bit of a challenge – but in our tests the provided thermal pads worked a treat!
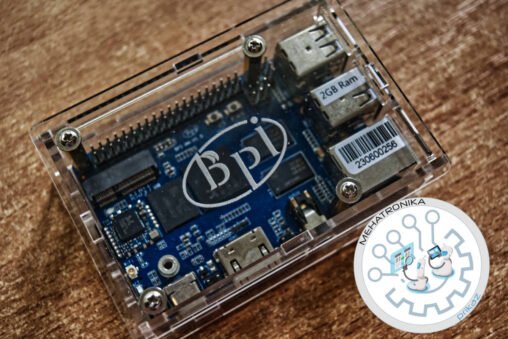
We’ve already had our hands on the excellent Banana Pi M5 SBC in our previous issue, and have explored some of its capabilities. Today, we’re taking a look at its smaller sibling, the Banana Pi M4, and the differences in features and price that might make it more enticing for some.
The Banana Pi M4 used in this review has been provided to us by the manufacturer for review purposes.
Single board computers are somewhat of a different category from other computing platforms, as they tend to end up embedded in some other project or product or used for running a specific service. This makes their use more specialised, and thus shifts focus from pure performance and benchmarks to some other factors – like power envelopes, port selection and cost. Given that today’s SBCs are all incredibly powerful – strikingly fast compared even to last decades’ high-end desktops – many, if not most projects hardly utilise the power under the hood. For this reason, slower but cheaper and/or smaller systems, like the Raspberry Pi Zero, have proven so popular among hobbyists.
The Banana Pi M4 sports a slightly unconventional Realtek RTD1395 SoC, which features four Cortex A53 CPU cores alongside a Mali 470 MP4 GPU. Realtek is usually known as a producer of Ethernet controllers and audio codecs, but their chip division certainly holds its own in the set-top box and HD media device market. The M4 also comes with 1 or 2 GB of RAM and 8 GBs of eMMC on-board storage, the latter of which being a signature feature of Banana Pi computers.

As a demo project, we created a little Wi-Fi enabled display stand using the SunFounder 10.1″ LCD touchscreen, Banana Pi M5 and the RTK8822CS BPI WiFi adapter. The display setup was extremely smooth and easy, but the WiFi module setup required some additional steps.
After installing the WiFi module on the back of the M5, we enabled the environment overlays for the “wifi_bt_rtl8822cs” layout.
After doing this, we had a great little touchscreen-enabled wireless IoT device, capable of connecting to various databases or websites and displaying dashboard data.

SBCs have been changing industry and maker spaces for quite a while now – and while many projects are developed using CLI tools and SSH access, sometimes a more graphically impressive solution might be needed – especially when user comfort is important.
This is when many of us reach for a proper display – and while SBCs work great plugged into the TV, it’s not always convenient to hog up hardware already in use for a project. Here SBC screens come into play – a somewhat niche group of products that usually add display and touch functionality to these little computers – turning them into fully-fledged standalone devices.
Some SBC screens, like the Official Raspberry Pi display, use hard-to-come-by cables or obscure ports which limit their usability to a single model or family of computers. This is why HDMI-based screens offer a big advantage when board compatibility is key.
SunFounder sent us their 10.1” HDMI IPS display for review. This unit is on the larger side for this kind of equipment – and being HDMI-based, has a large list of devices supported. There’s another trick up its sleeve – the touch controller works over USB, which further increases compatibility – there’s basically no device on the market that doesn’t have USB!
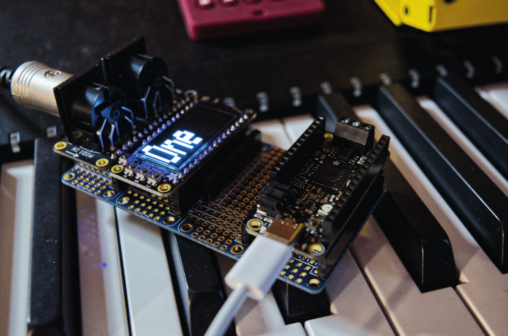
And now for an unexpected demo…
… we are an engineering magazine, after all, so we wanted to create a bit of a crossover project to finish this review off. We grabbed one of our favourite MCUs – the SAME51-based ATMEL ATSAME51J19 and got to work!
We wanted to add a little OLED-based display to the OP-Z and use it for displaying the current beat inside the bar. We decided to use the MIDI protocol for this, as it gave us the necessary data out of the sequencer.
Using the USB-MIDI library we listen to start, stop and clock signals. As per the standard MIDI implementation, the OP-Z sends 24 clock pulses per quarter note. This means in order to get accurate beat sync we just need to count those pulses.

In the past issue, we’ve already had our hands on the excellent teenage engineering POM-400 synth and POM-16 sequencer, and after being blown away by how excellent and full of surprises they were, we were raring for more. Thankfully, the amazing folks at teenage engineering provided us with a review unit of the OP-Z and the first bit of expansion kit designed for it – the oplab module.
Now, let’s get into what exactly the OP-Z is – since it’s quite the little package! At its core is a 16-track sequencer capable of sequencing a wide array of things. Around it are four drum track engines, capable of loading a 24-sample pack, four synth tracks, capable of loading one of the multiple available synth engines. These synth tracks each also feature a powerful PCM sampler. Next come the two effect racks, a “tape” track, the master track, and finally, we have the unique performance, module, DMX light, and motion tracks.
Looking at the physical form factor, the OP-Z is tiny. Compared to the already semi-pocketable POM-16, the OP-Z is the same width, but half the thickness and almost half the height. It also feels extremely solid in the hand, with an injection-moulded IXEF 1022 PARA polyarylamide-based resin, reinforced with 50% glass fibre by weight. This is a unique decision, but it gives the svelte device serious structural integrity. The material also gives each OP-Z a streaky marbled surface finish, which teenage engineering claims to be unique on every single device – which is certainly endearing!

In the first half of this review (well, we tried to make it a half), we were focused on covering the initial build experience of the Chatter kit by CircuitMess.
In this second half, we want to explore a bit deeper under the hood and get to know what makes the little Chatter devices tick – and how much we can get out of them.
These LoRa-based DIY texting machines come equipped with USB-C connectors for PC communication, and are built to be programmed with CircuitMess’ own CircuitBlocks IDE. It’s based around the Blockly language – meaning that it’s simple to use and quite intuitive for newcomers to the field.
Once downloaded, CircuitBlocks grabs a set of extensive and well-written libraries enabling high-level access to all the main hardware components of the Chatter – especially focusing on the buttons, piezo buzzer and display. When we say high-level here, we truly mean it. The team did a gorgeous job with the core library here – called CircuitOS. It unifies the experience across the company’s kits and provides simple calls for handling button presses, sprite graphics, interactive UI elements, sound and multitasking. It all makes programming the Chatter feel way less like programming an MCU and way more like a proper desktop experience akin to those students might have had in the past.

When Formlabs unleashed the Form 3 (and its dental counterpart – the Form 3B) upon the world back in June 2019, it changed the game for desktop 3D printing by bringing an array of features never seen before in this form factor. On top of that – the company tried to allow for finer details to be printed with less support material by introducing their LFS technology – which boils down to the bottom of the resin tank being flexible, thus allowing the layers to be peeled off gradually, instead of being torn right off the surface by the Z-axis motor.
This produced amazing results, with smooth surfaces and never-before seen versatility when printing free-standing walls and overhangs. Having had the pleasure of owning a Form 3 for over a year, we have to say that it was truly a great printer – delivering with most prints, no matter how challenging the geometries were.
In January of 2022, Formlabs dropped a new pair – the Form 3+ and the Form 3B+, which brought new software and hardware to the table. The software part of the announcement promises 20-to-40 percent faster printing – with the company also promising to bring it over to the older Form 3 and 3B machines. The hardware part promises better thermal control, due to a redesigned heating element, a more stable LPU (the part that houses the optics and laser – and that actually does the printing) and better early layer performance – making these first layers print 5-15 minutes faster.

14.6 inches is a lot for a tablet. It’s massive. It feels like it just shouldn’t be this big – but in all its fourteen-and-a-half-and-a-bit-more inch glory, the Samsung Galaxy Tab S8 Ultra stood in front of us on our review desk – and it was up to us to figure out how to approach it.
The S Pen, Samsung’s own digital stylus, which has appeared in various iterations and product series, also makes a return here, and comes bundled in with the tablet. An optional $349 keyboard accessory enables on-the-go access to DeX mode and turns the device into a pseudo-Chromebook type of deal.
See, Samsung positioned its flagship tablet in the ever-growing niche of laptop-replacement devices, and the relatively competitive pricing (starting at $1,099 for the base 8GB RAM model, with 12GB and 16GB models being available in $150 increments) is clearly taking a shot at the venerated iPad Pro lineup – but while this year Samsung opted for a gorgeous AMOLED screen and a sleek design and a lot of high-end features, the lacklustre performance and inherent flaws of Android as a tablet OS hold back the Galaxy Tab S8 from reaching the productivity potential of its competitors.

We all love our Rapsberry Pi 4s, but it’s not a secret that they tend to overheat. Painfully so. It’s been the main complaint of every owner of one of these SBCs – and in our initial review of it, we’ve discovered that these issues aren’t limited to cosmetics only – as they negatively impact performance due to thermal throttling.
There’s also quite a few strong reasons to decide to keep a Pi 4 in a case – keeping the dust away, and keeping any nasty ESD currents at bay. This all boils down to a case being almost a necessity – but most cases, including the official Pi 4 case only make the situation worse. During our testing, the Pi hit its 80 degree throttle point extremely easily, within a few minutes of its four cores hitting the full 1.5 GHz base clock. This makes performance take a huge dip, turning the class-leading A72 cores against themselves. We’ve seen benchmarks where systems with smaller, but more heat-efficient A52 cores win over the Pi in a textbook tortoise-and-hare example. The little cores just simply never slow down.
Cooling cases, thus, are a necessity for this SBC, and today we’ve got a Waveshare Pi 4 Cooling Case with us. It’s a simple contraption – two slabs of solid milled aluminium and two fans. The magic, though, is in how well it works.

