
")
CircuitMess Chatter
The Chatter is an amazing STEM kit designed for young tinkerers as their first foray into the world of electronics. It achieves this and so much more in a well-designed and beautiful package.
Pros
- Great instructions
- Easy to assemble
- Lots of hidden functionality to hack into
Cons
- None noteworthy
In the first half of this review (well, we tried to make it a half), we were focused on covering the initial build experience of the Chatter kit by CircuitMess. You can read that article here.
In this second half, we want to explore a bit deeper under the hood and get to know what makes the little Chatter devices tick – and how much we can get out of them.
These LoRa-based DIY texting machines come equipped with USB-C connectors for PC communication, and are built to be programmed with CircuitMess’ own CircuitBlocks IDE. It’s based around the Blockly language – meaning that it’s simple to use and quite intuitive for newcomers to the field.
Once downloaded, CircuitBlocks grabs a set of extensive and well-written libraries enabling high-level access to all the main hardware components of the Chatter – especially focusing on the buttons, piezo buzzer and display. When we say high-level here, we truly mean it. The team did a gorgeous job with the core library here – called CircuitOS. It unifies the experience across the company’s kits and provides simple calls for handling button presses, sprite graphics, interactive UI elements, sound and multitasking. It all makes programming the Chatter feel way less like programming an MCU and way more like a proper desktop experience akin to those students might have had in the past.
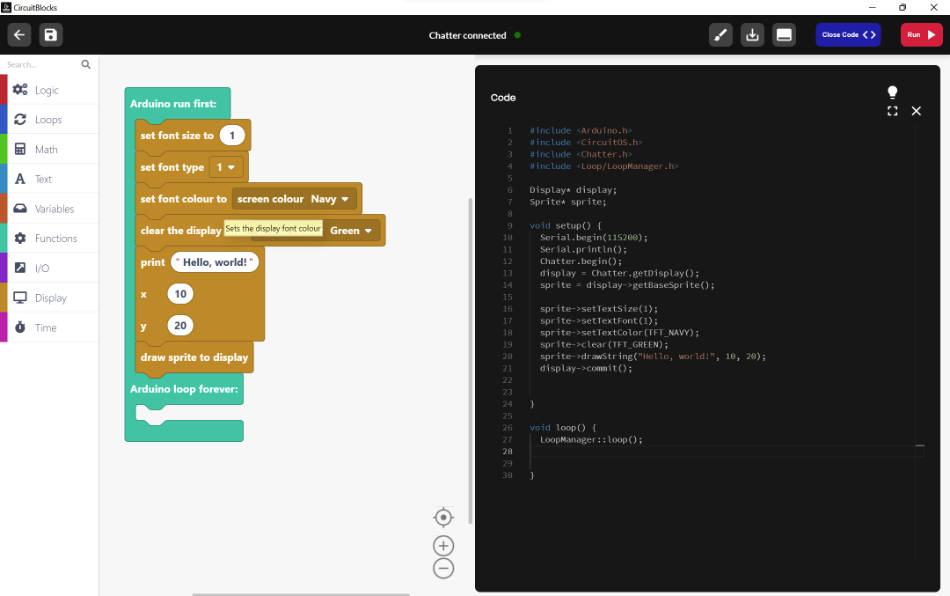
It’s important to note that these are Arduino libraries (more on this later) – and that CircuitBlocks offers both block-based programming as well as a code editor. In the block mode, the code editor sits in read-only mode and shows interpreted code in real-time – a neat touch! Playing around with the built-in demos, we really started appreciating how much depth these kits had to offer. It was incredible seeing how much great syntactic sugar was present – and especially the implementation of multitasking. We’re aware we keep mentioning it – but the way it’s done here looks a lot like Java or C#’s event handler approach – which is plain awesome!
Using the Blockly interface we put together several little demos, before creating some more in the code editor view. These all helped us figure out more and more about the software architecture behind these.
#include <Arduino.h>
#include <CircuitOS.h>
#include <Chatter.h>
#include <Loop/LoopManager.h>

int i;
int z;

Display* display;
Sprite* sprite;

void BTN_1_press(){
  sprite->clear(TFT_ORANGE);
  z = 1;
  Print_from_left(50, 1);

}

void BTN_2_press(){
  sprite->clear(TFT_NAVY);
  z = 2;
  From_right(1, 1);

}

int Print_from_left(int q, int w) {
  int i_inc = 1;
  if (-60 > q) {
    i_inc = -i_inc;
  }
  for (i = -60;
       i_inc >= 0 ? i <= q : i >= q;
       i += i_inc) {
    sprite->clear(TFT_ORANGE);
    Print(i, w);
    Piezo.tone((i * 10 + 1000), 0.0001);
    delayMicroseconds(100);
  }
  Piezo.noTone();
}

int Print(int a, int b) {
  sprite->setTextColor(TFT_BLACK);
  sprite->drawString((String(z)), (a + 3), (b + 3));
  sprite->setTextColor(TFT_DARKGREY);
  sprite->drawString((String(z)), (a + 2), (b + 2));
  sprite->setTextColor(TFT_LIGHTGREY);
  sprite->drawString((String(z)), (a + 1), (b + 1));
  sprite->setTextColor(TFT_WHITE);
  sprite->drawString((String(z)), (a), (b));
  display->commit();
}

int From_right(int q, int w) {
  for (i = 180; i >= 0; i--) {
    sprite->clear(TFT_DARKCYAN);
    Print(i, 1);
    Piezo.tone((i * 10 + 1000), 0.0001);
    delayMicroseconds(100);
  }
  Piezo.noTone();
}

void setup() {
 Serial.begin(115200);
  Serial.println();
  Chatter.begin();
  display = Chatter.getDisplay();
  sprite = display->getBaseSprite();
  Input::getInstance()->setBtnPressCallback(BTN_1, BTN_1_press);
  Input::getInstance()->setBtnPressCallback(BTN_2, BTN_2_press);

  z = 1;
  sprite->clear(TFT_ORANGE);
  sprite->setTextSize(9);
  sprite->setTextFont(2);

}

void loop() {
  LoopManager::loop();
  Input::getInstance()->loop(0);

}
Still, we wanted more! Some digging later, we figured that the Chatter is based on the popular ESP32 architecture – using the much loved ESP-WROOM module (with an ESP32-D0WDQ6 – a bit of an older chip, but still plenty powerful). The plentiful buttons were all interfaced thru a mux chip – with the rest of the GPIO being mostly devoted to the screen and the CP340 USB converter. It’s a shame the designers went with the CP340 instead of a CP2012 in here (which gave us some serious headaches with reliability on macOS Monterey – but worked fine with Windows 11). Firing up the Arduino IDE gave us some more clues into how the CircuitMess software ecosystem works – as all the library files were neatly arranged into Arduino IDE’s own library folder – and are a (seemingly) fork of Espressif’s arduino-esp32 library – which means that the programming is done by unmodified esptool under-the-hood.
But wait, you might say, an ESP32? That means…
Yep! Aside from the LoRa, which is the main radio used in this project, the Chatter has WiFi and Bluetooth onboard as well – thanks to that ESP32-WROOM SoC, but cheekily tries to pretend it doesn’t. Jokes aside though – it’s an awesome feature (but seriously though, Google “CircuitMess Chatter WiFi” and bask in the glory of zero mention of these). Which then means…
#include "WiFi.h"

#include <CircuitOS.h>
#include <Chatter.h>

Display* display;
Sprite* sprite;

void setup() {
  Serial.begin(115200);


  Chatter.begin();
  display = Chatter.getDisplay();
  sprite = display->getBaseSprite();

  sprite->setTextSize(1);
  sprite->setTextFont(1);
  sprite->setTextColor(TFT_WHITE);
  sprite->clear(TFT_BLACK);
  display->commit();

  WiFi.mode(WIFI_STA);
  WiFi.disconnect();
  delay(100);

  Serial.println("WiFi On");
}

void loop() {
  Serial.println("Pretraga...");

  // WiFi.scanNetworks will return the number of networks found
  int n = WiFi.scanNetworks();

  if (n == 0) {
    Serial.println("No networks");
  } else {
    Serial.print(n);
    Serial.println(" networks available");
  }
    int yaxis = 10;
    for (int i = 0; i < n; ++i) {


      sprite->drawString(WiFi.SSID(i), 10, yaxis);
      display->commit();
      yaxis = yaxis + 10;
      Serial.print(i + 1);
      Serial.print(": ");
      Serial.print(WiFi.SSID(i));
      Serial.print(" (");
      Serial.print(WiFi.RSSI(i));
      Serial.print(")");
      Serial.println((WiFi.encryptionType(i) == WIFI_AUTH_OPEN)?" ":"*");
      delay(10);
    }

  Serial.println("");
  delay(5000);
  sprite->clear(TFT_BLACK);
}
Yep! Standard ESP32 libraries work just fine with the Chatter – and thus, we decided to put together a little demo that uses the WiFi antenna to scout out available networks and print them out – and it worked wonderfully! This discovery was truly a little gem – and we’re extremely happy with the fact that the Chatter is more than it seems at first glance (internet texting is practically asking for itself to happen now).
Overall, the Chatter is more than it seems at first glance. A rich set of libraries offers a great entry-point for beginners, while the very nature of the ESP32 platform provides great potential with the device for those willing to dig a bit deeper. For the price – getting a set of two fully-programmable development kits, each with LoRa, WiFi and Bluetooth is also a serious deal. Honestly, we’re impressed. Bravo.
More informations: CircuitMess https://circuitmess.com/pages/chatter
A side-note about macOS Monterey
While on Windows, everything ran perfectly (and can’t stress this out enough – everything ran absolutely perfectly, on multiple machines we’ve tried), we encountered some issues with macOS. Firstly, we had issues with the chip libraries themselves – which refused to locate the python installation due to the removal in newer macOS versions. This was already fixed in the main esp32 repo, but a manual fix is quite easy:
sudo sed -i -e 's/=python /=python3 /g' ~/Library/Arduino15/packages/cm/hardware/esp32/*/ platform.txt
While this fixed compilation errors in the Arduino IDE – CircuitBlocks still wasn’t happy and kept failing to compile, even after launching directly from the terminal (sometimes, macOS apps can’t read path properly when started from the Launchpad).
Secondly, the upload issues. It’s odd that the BOOT button – standard on almost all ESP32 boards – wasn’t included here, given the temperamental nature of older Espressif silicon. See, in order to get the board to accept new program data, GPIO 0 has to be pulled low. This is usually supposed to be done by a transistor controlled by software, but sometimes the timings can go a bit awry and the thing just fails to go into boot mode (from which the infamous “invalid head of packet” issue arises). This is where the slightly unreliable nature of the CP340 paired itself with the silicon issues of an older revision of the ESP32 – with more than half of all programming attempts on our Mac failing spectacularly.
Now, to get to this point we also had to work a bit. The esptool verison shipped with the CircuitMess library is 3.0.0 – whereas 3.3.0 is the latest at the time of writing (another ESP32-based system we regularly use works just fine with the newer tool). The older version had some reports regarding the very timing issue we’ve faced. A fix that we had to implement was an added wait in the code while the chip sorts itself out.
Other possible solutions here include an electrolytic capacitor between GPIO 0 and GND or passing the “– -after esp32r0” argument to the esptool command if using Arduino CLI. Or just pressing that BOOT button – which is nowhere to be seen here.
Or maybe all of this was just macOS doing what it does best during major version updates – messing up some .kext deep down under the hood.
Hopefully, this is something that can get fixed soon. It doesn’t detract from the experience, or the joy that this kit brought to us – but to a small group of Mac users on certain OS versions, the coding experience might be less-than-ideal.