

Toocaa L2
The Toocaa L2 laser engraver and cutter is a safe, high-quality and clean solution for maker, educational and prosumer use. Suitable for workpieces smaller than 40 cm and packed with security features and a built-in ventilation system, it's designed for use in residential and shared areas, and not only dedicated workshops.
Pros
- Comprehensive multi-layered safety
- Built-in ventilation system
- Excellent precision
Cons
- First-party honeycomb bed should have been larger
- The security dongle is a potential point of failure
The new Toocaa L2 laser engraver and cutter appeared on the market in May 2024 and immediately drew attention with a campaign focused on safety and minimal impact on the working environment. Elecfreaks already had experience in producing laser engravers and cutters with their first Toocaa model, designed to complement their range of quality STEM kits.
Even this first Toocaa model was a well-designed machine that allowed students not only to easily create objects, primarily from wooden sheet materials, but also to engrave wooden, plastic, and metal objects. Using customized CAD software, it was easy to enter the creative world through direct and tangible creation.
Building on this experience, Elecfreaks developed its successor, the Toocaa L2 laser engraver and cutter, a model tries to improve on just about everything, while still aiming to be a primarily STEM-oriented tool. Let’s see how successful the team was at this — and to help us do so, we’ll be testing a Toocaa L2 with a 10 W laser module together with the optional Toocaa Air Assist Kit, and a 40 × 40 cm Toocaa-branded cutting and engraving honeycomb bed. Before we continue, we’d like to thank Elecfreaks for providing us with the equipment we’ll be taking a look at in this review — but as always, all thoughts and opinions are our own.
Unboxing and first impressions
Our first surprise was the weight of the package, which DHL informed us of even before the shipment arrived — we mostly deal with small electronics in our lab, so 15 kg of stuff is not something that gets shipped to us too often. There were several boxes in the package, the first of which contained the Toocaa L2 laser engraver and cutter itself. At that point, we didn’t know whether it had the 10 W or the 20 W laser module pre-installed — there’s no label on the box denoting this (at least that we could find: there’s likely a different SKU number somewhere for warehousing purposes, but that’s not exactly human-readable).
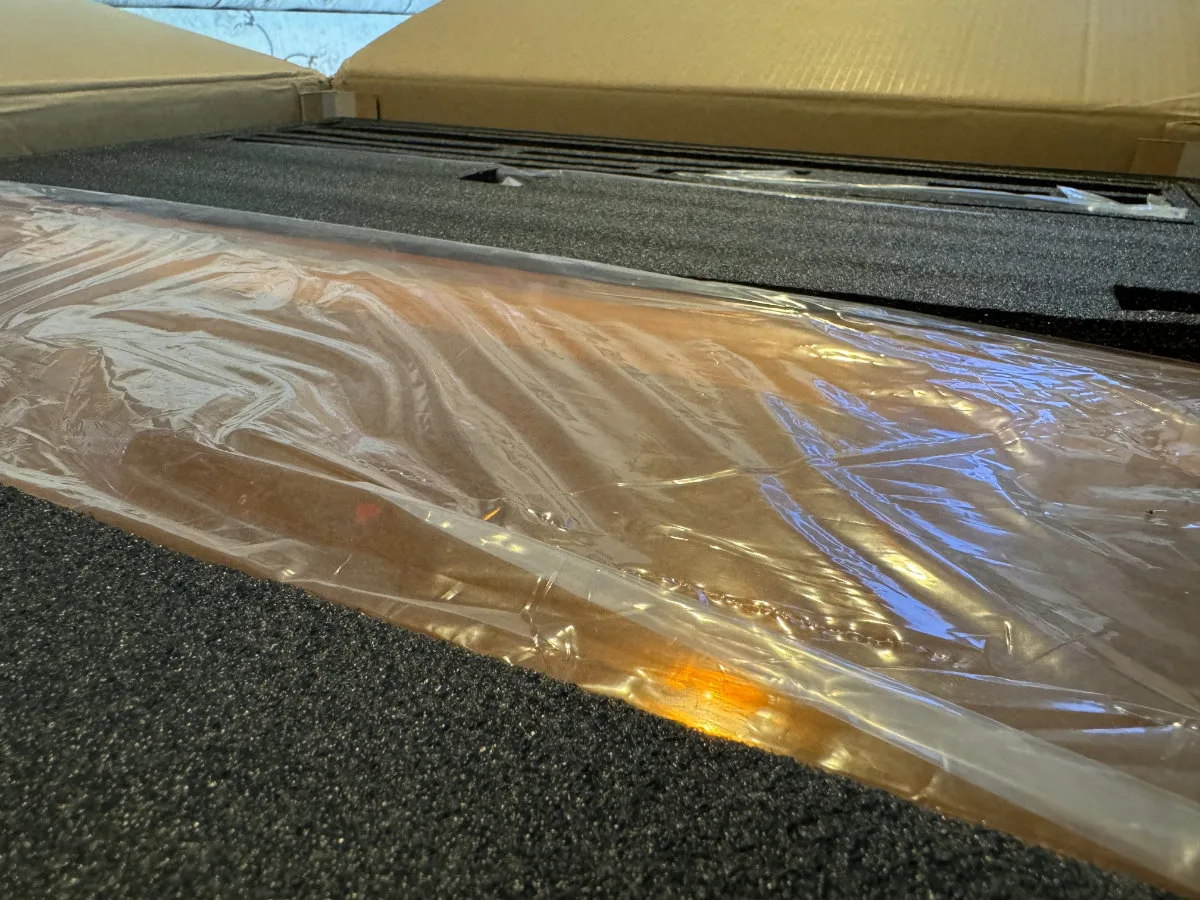
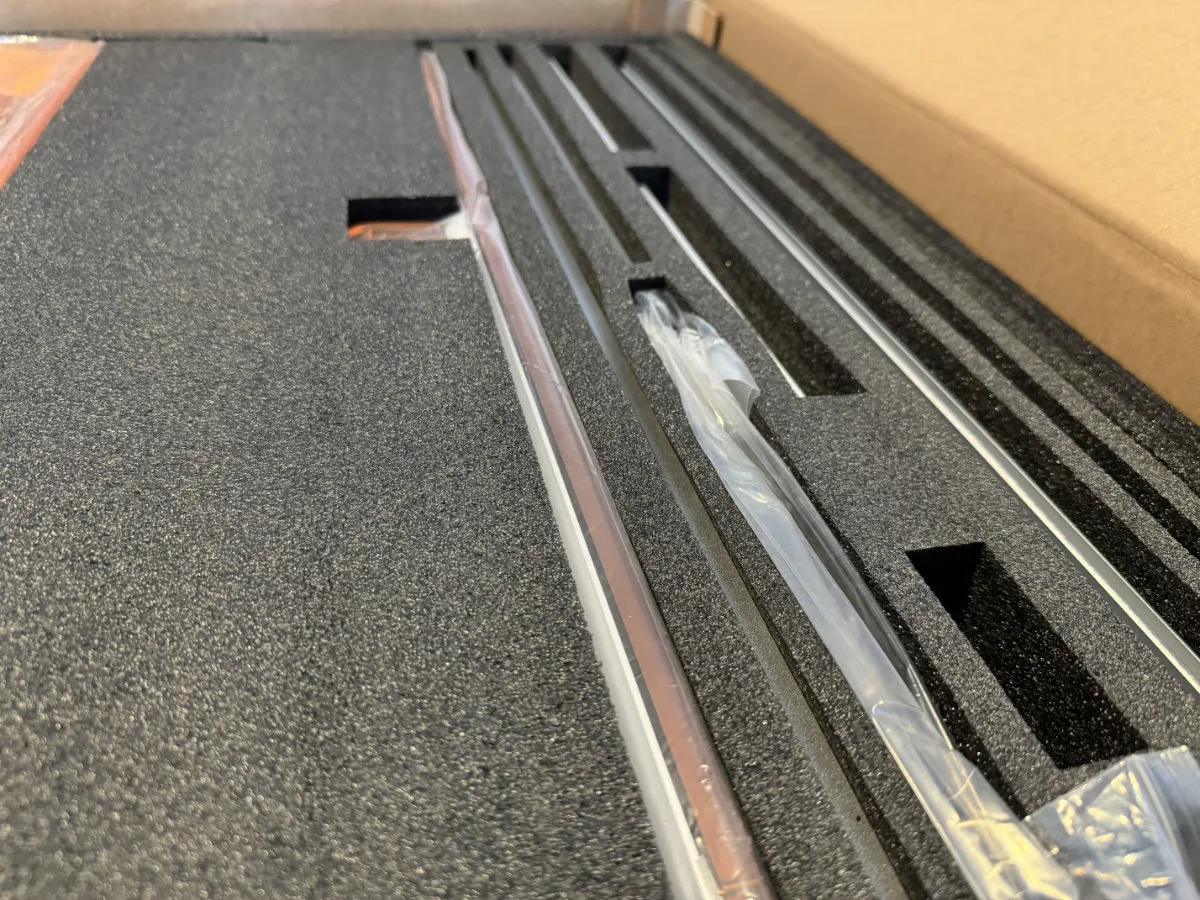
As soon as we flipped this box open, we realized that the Toocaa L2 ships unassembled (despite the huge box). All the parts are carefully arranged, protected with film, and secured in foam slots. Despite the likely tumble-torture during delivery, all of the contents were pristine upon closer inspection. Good!
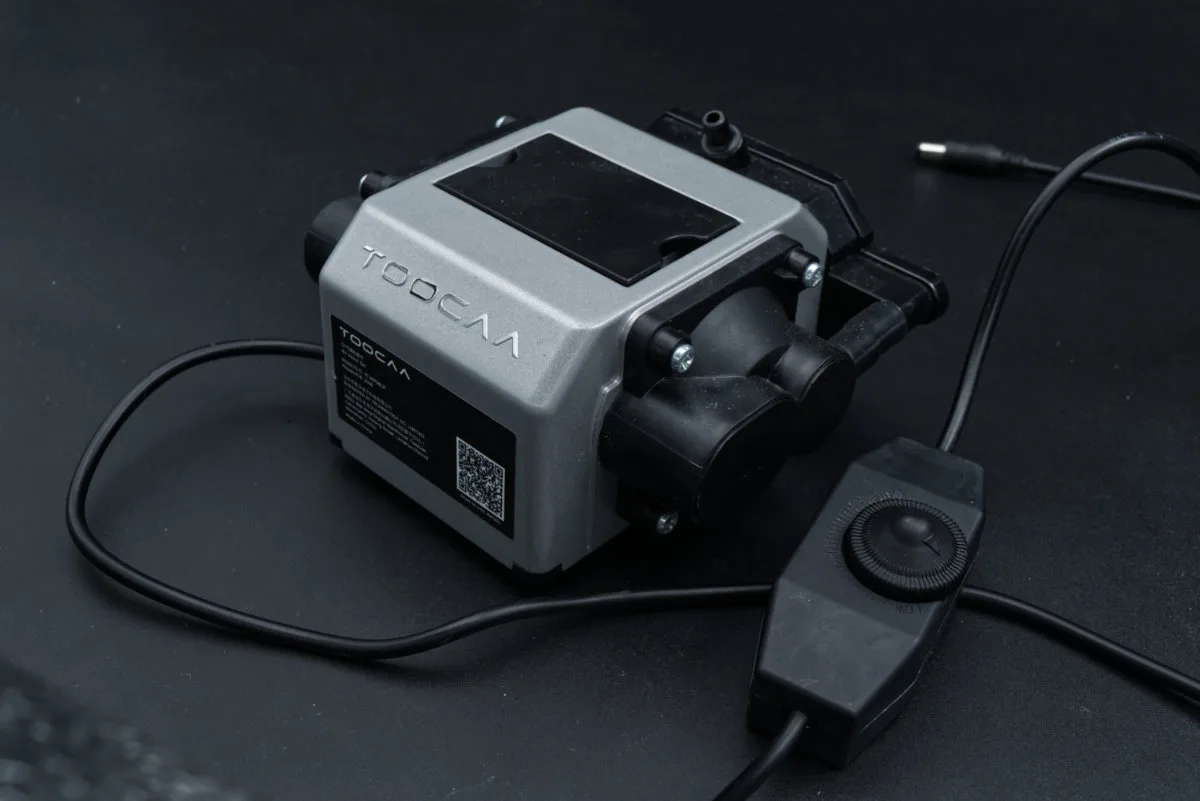
The package contained two additional boxes. The smaller, yet heavier one contained the Toocaa L2 Air Assist Kit. This is essentially an air pump whose output connects to the laser head, blowing away the hot, charred particles released during engraving or cutting. It’s powered by a separate 24 VDC/1 A power supply and has a simple potentiometer to adjust the airflow. It’s got four springy rubber feet that prevent the thing from transferring vibrations to the surface, making it relatively quiet in operation, though still noticeable.
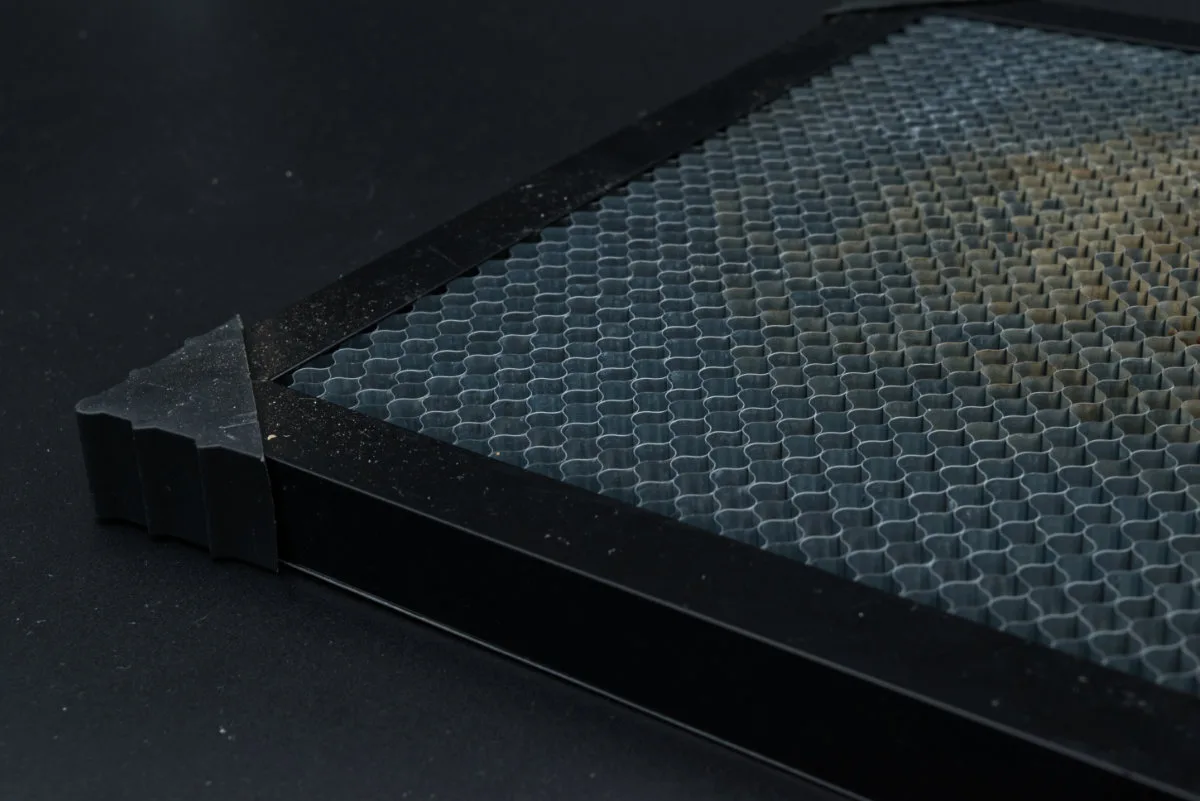
The final box contained a 40 × 40 cm steel honeycomb bed used for providing support to the workpiece. Honeycomb beds are especially useful during cutting, when the laser beam passes through the cut and is not reflected by the honeycomb structure which prevents charring of the underside. It also allows smoke to easily dissipate more easily, avoiding surface discoloration. A 40×40 cm sheet of aluminum is provided for mounting underneath the honeycomb and is meant to provide extra protection to your working surface. Assembly is very simple, using four plastic corner brackets. Unfortunately, this is where we ran into a shipping-related issue: these brackets are extremely thin, and the entire bed was packed without any extra padding to protect against impacts during transport. You guessed it – this meant that three out of the four corner brackets arrived broken.
In general, a laser cutter can be used without the honeycomb, with only the metal sheet serving as a protective base, since the laser cannot burn through it. The downside is that the metal sheet can heat up in certain spots and cause the laser beam to reflect off its surface, damaging the working piece. The drawback of the honeycomb is that resin and burnt wood residue quickly builds up inside its structure, producing quite a strong burnt wood odor. It’s pretty tough to eliminate, with the only solution being a deep clean in an organic solvent — though you should be careful with beds that feature integrated plastic parts.
Setting up
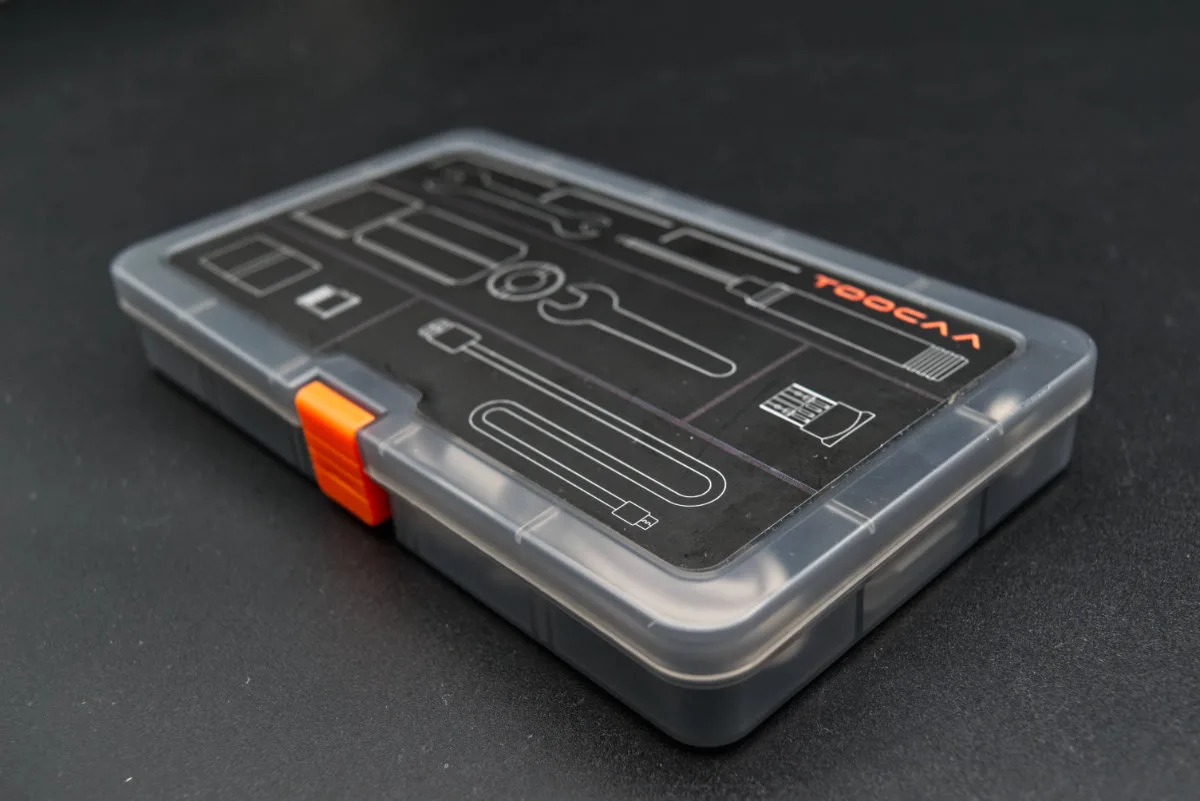
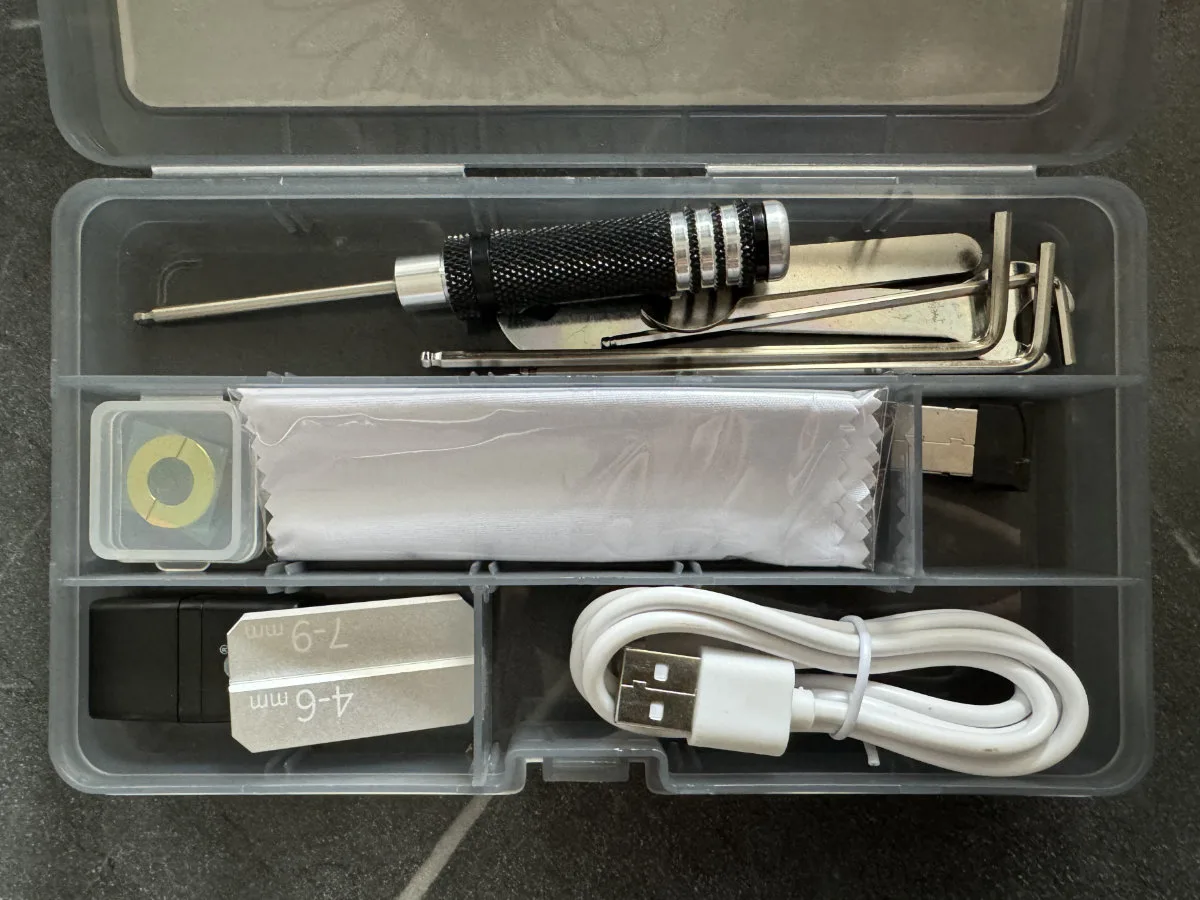
The Toocaa L2 comes with a small box containing basic tools and some spare parts. Its contents are sufficient for the complete assembly of the engraver, which was quite a pleasant surprise. Some assembly, but no extra tools, required!
Perhaps most importantly, the set includes a screwdriver with a hex bit — one that you likely won’t already have among your tools — and that’s required for reaching into tight spaces where an Allen wrench just won’t fit. There’s also an extra lens for the laser module, which will need to be replaced after a certain period of use, as charred particles accumulate on it during engraving and cutting. As it becomes clouded, the beam’s intensity decreases. Also included is a handy USB microSD card reader and a USB-A security dongle that must be inserted into the Toocaa L2 in order for it to run. It’s a simple security measure, but enough to keep little hands from getting hurt playing with a laser. Make sure you don’t lose this dongle — without it, the Toocaa becomes little more than an expensive paperweight.
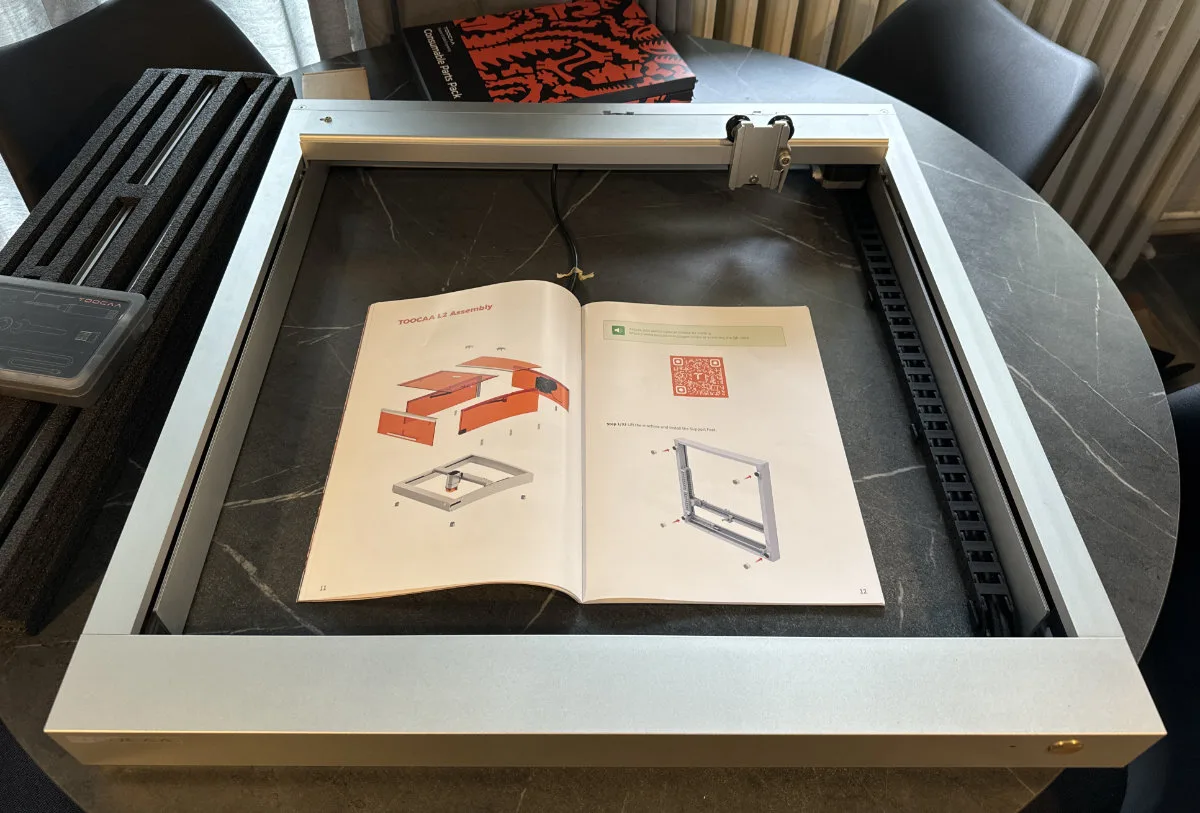
Assembly is thoroughly explained in a well-made, high-quality instruction manual that ships in a colorful, pretty high-quality cardboard box. This extra bit of packaging for the manual was unexpected, but we have to admit — it’s appealing. Each step is illustrated with a dedicated little diagram, often accompanied by a link to additional online explanations.
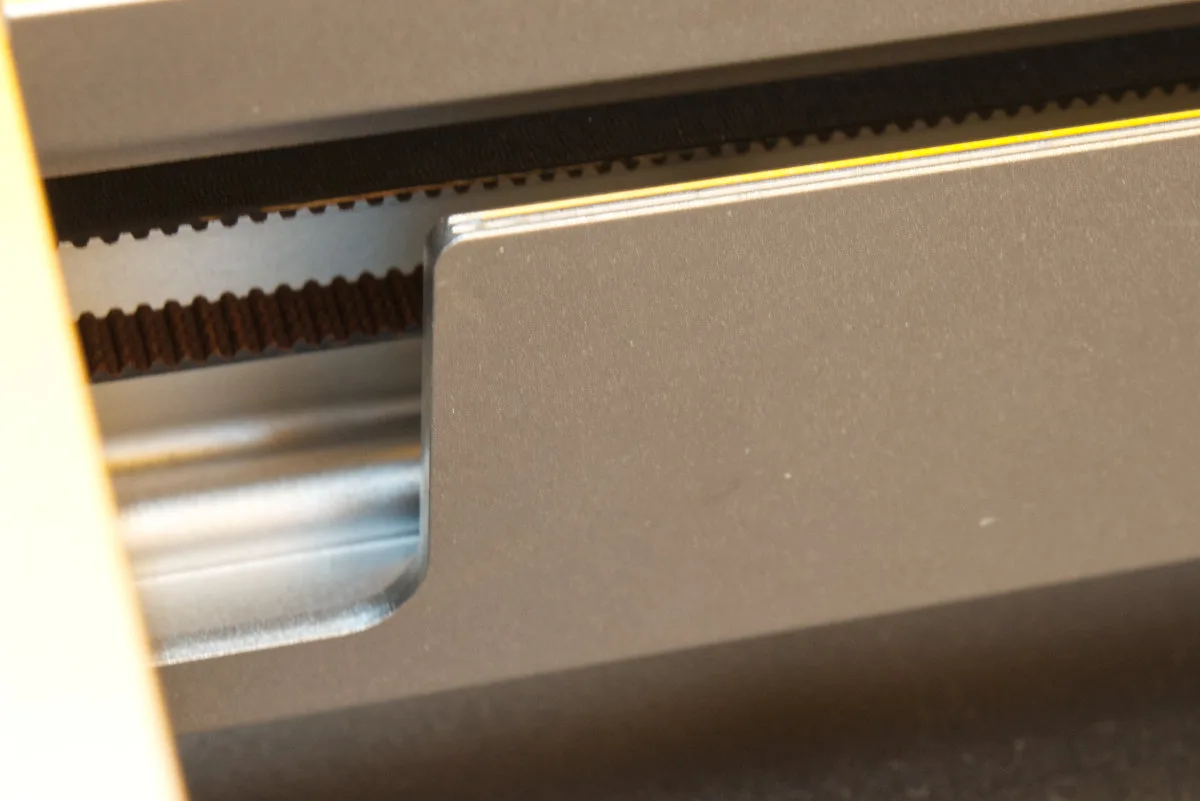
The main frame of the unit is made of anodized aluminum, with all the moving components (motors, belts and such) pre-installed and factory-calibrated to work immediately upon startup. The positioning of the laser head carrier along the Y-axis is handled by a toothed belt cleverly hidden inside the outer chassis, completely encased as to prevent accidental contact.
On one corner, there’s an attractive glossy metal logo, in line with the overall clean industrial design. Don’t be confused by the absence of the L2 part here — this is not a model designation, but rather the name of Elecfreaks’ new brand. Huh?
Weeeell, the company has decided to spin off the Toocaa name into a separate entity that only deals with engravers, cutters and the related paraphernalia. While the exact reasoning and logistics behind this move are a bit blurry, Toocaa now has a completely new, dedicated website promoting the brand.
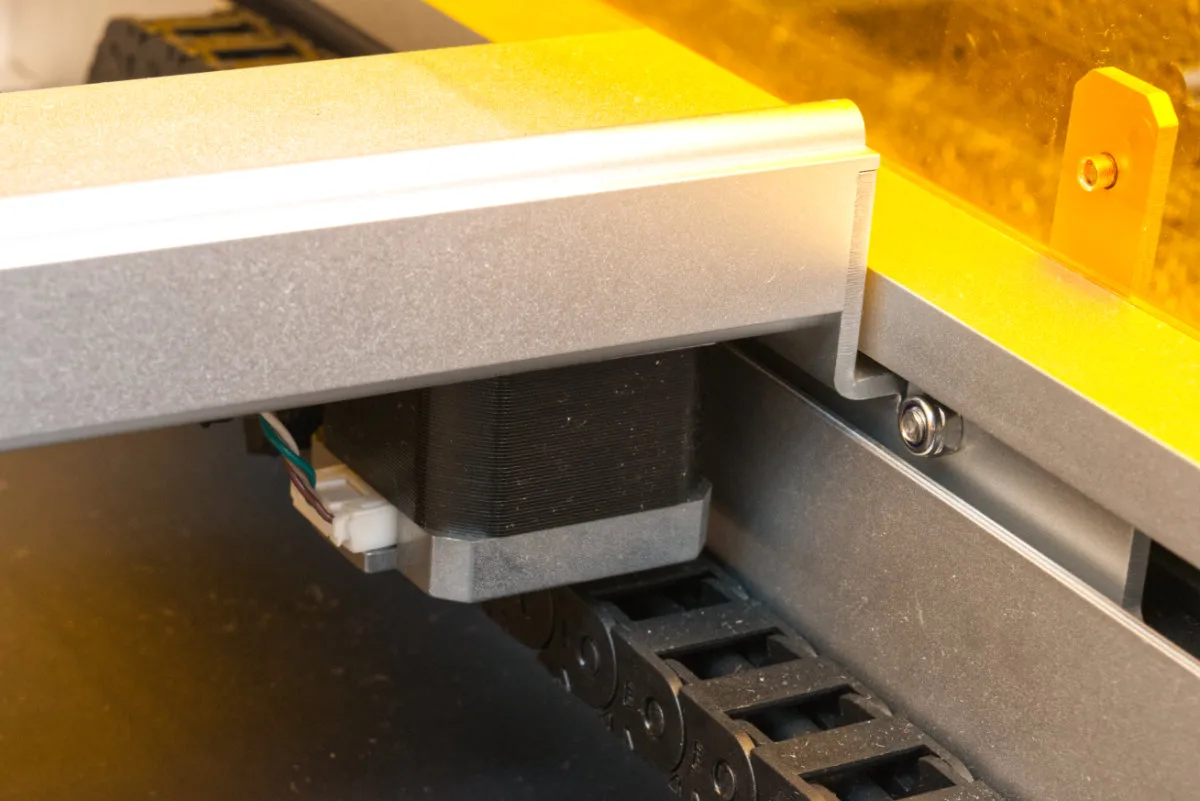
Side tangent over. The servo motor that drives the laser module carrier is mounted on the underside of the frame profile, enabling precise positioning. The cables are neatly routed through high-quality drag chains, protecting them as the Toocaa L2’s mechanical parts move.
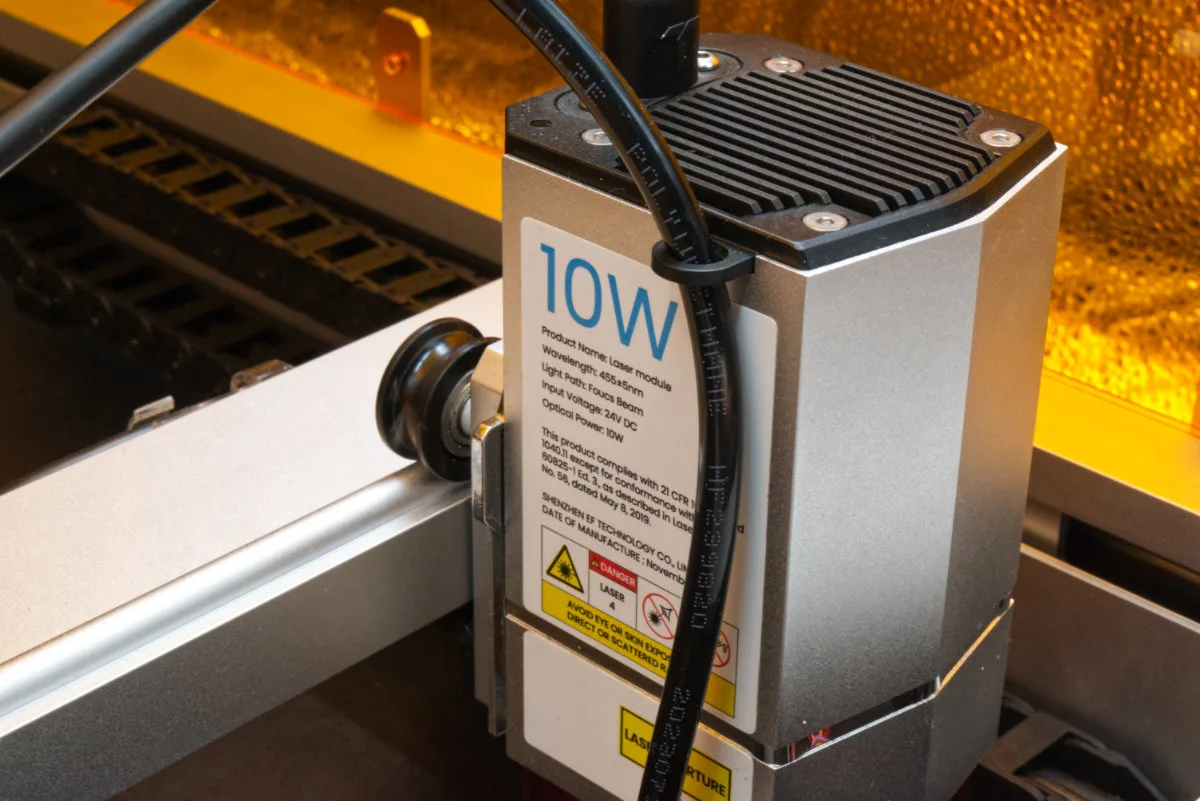
The 10 W Toocaa laser module
The Toocaa L2 comes in two variants: one with a 10 W laser module and another with a more powerful 20 W module. A 2 W infrared module is also available online, sold separately. All modules have the exact same physical dimensions and mount onto the locking carrier on the frame. All of these feature diode lasers, which is pretty expected for this class of machine. These have both benefits and drawbacks compared to other laser types, and for some, diode lasers could be a dealbreaker. But for small, education- and maker-oriented jobs, we feel that they offer the best balance of size, cost and performance.
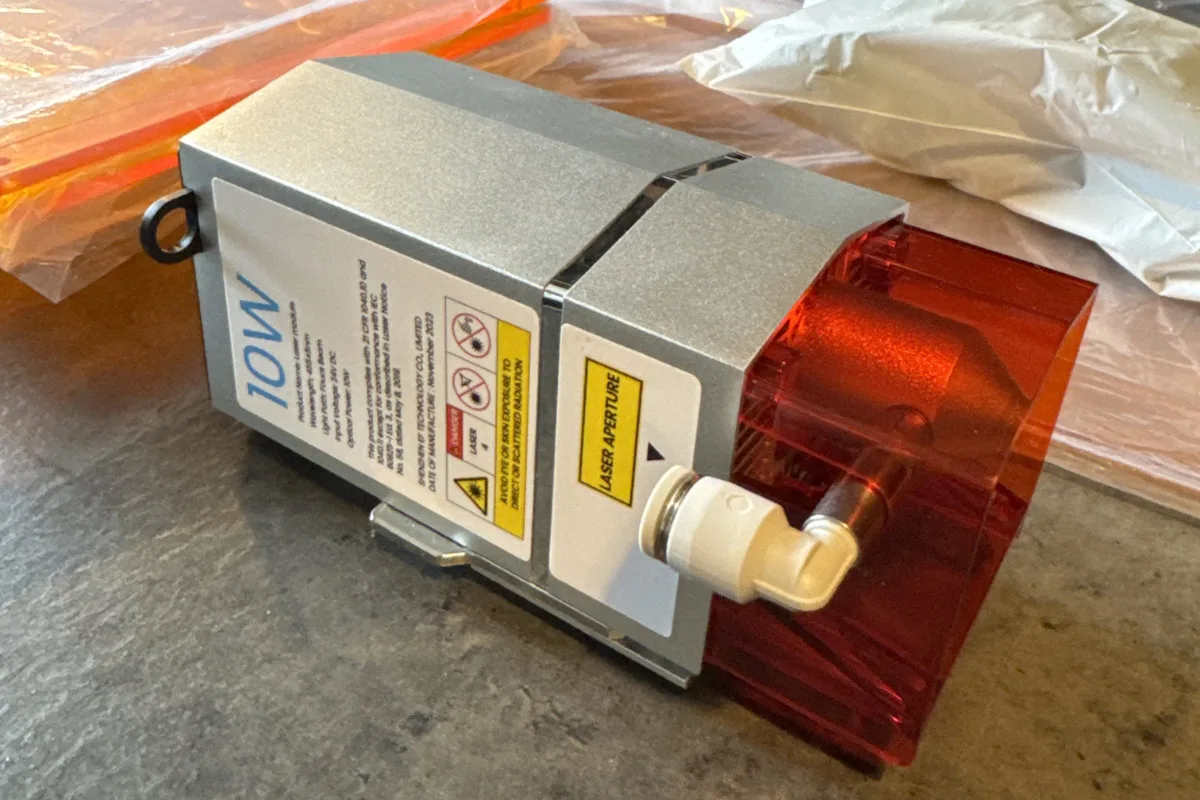
A closer inspection of the laser module reveals a great deal of attention paid to safety. In addition to the metal beam guide, the laser aperture is further enclosed by a translucent orange plastic shield, preventing you from staring directly into an unprotected beam from the sides.
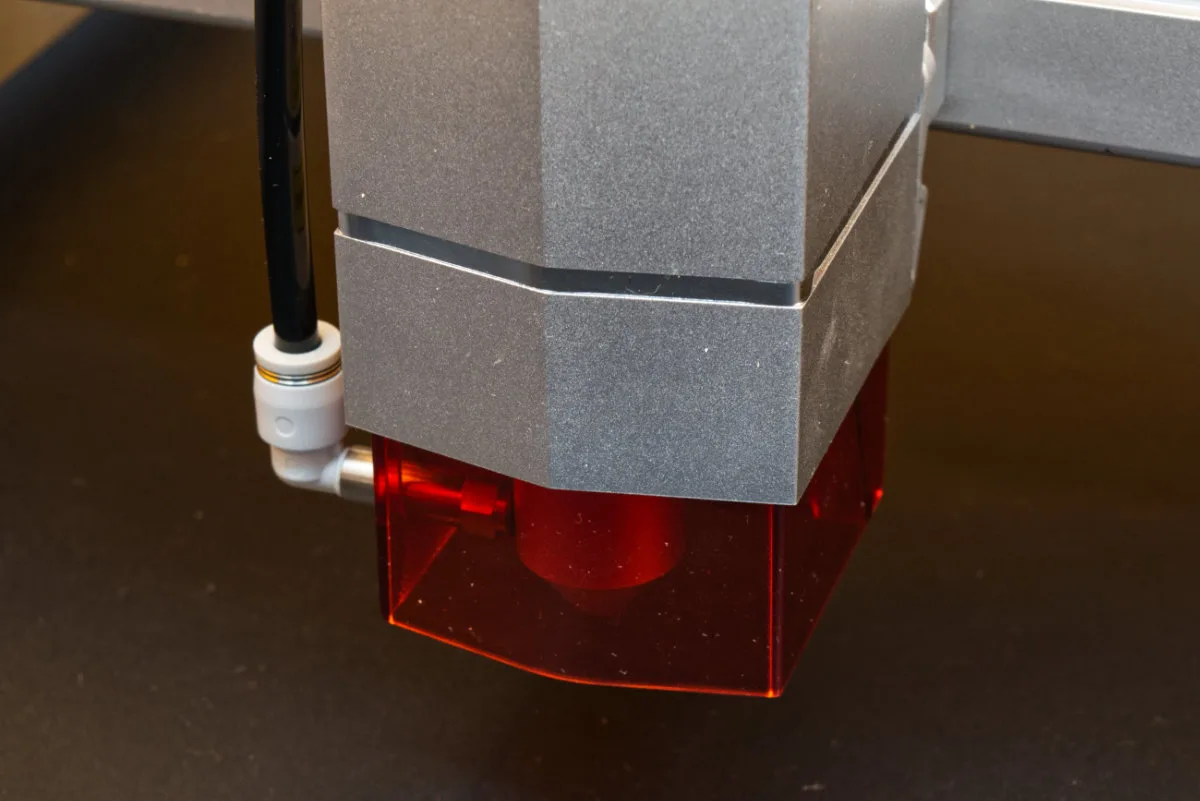
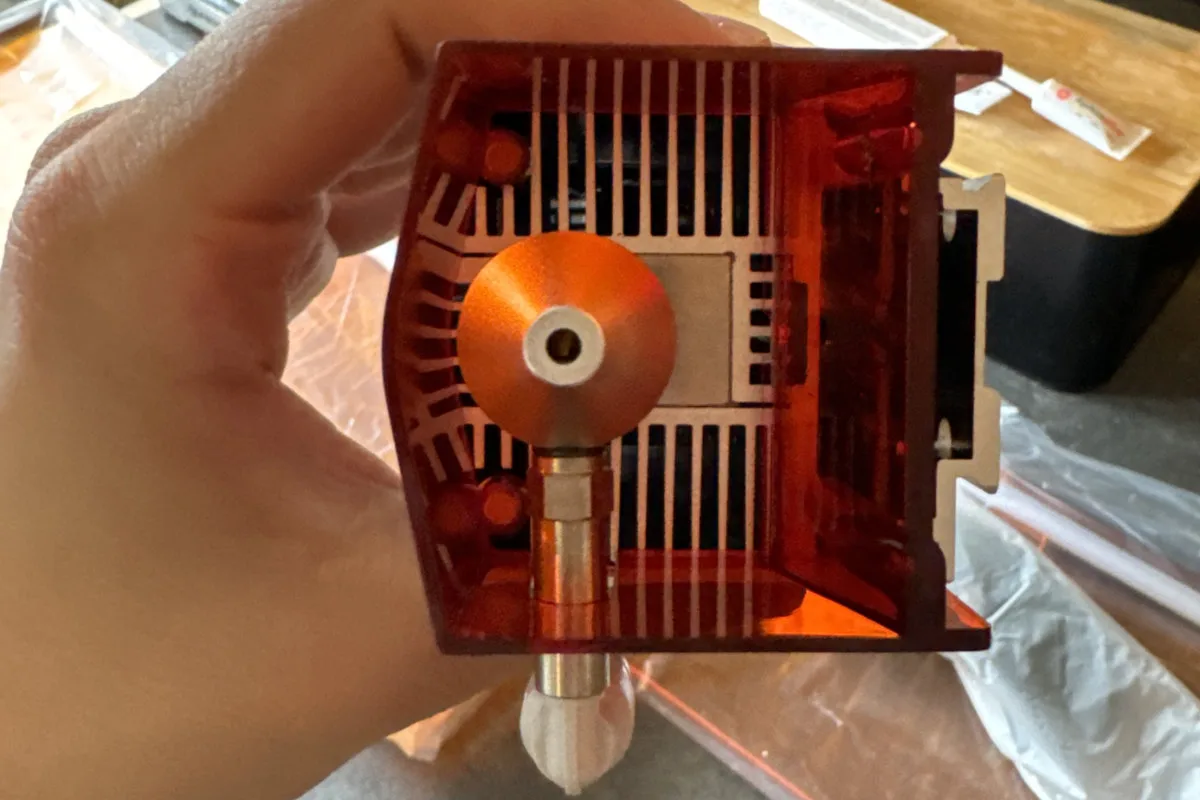
From underneath, we can see that the laser module’s body is made entirely of metal, with numerous cooling fins designed to efficiently dissipate heat from the laser diode during operation. There’s also a fan located on top of the module that helps aid in cooling.
The image below also shows the module’s side-mounted air nozzle meant for connecting the Toocaa Air Assist Kit using a flexible hose. The air is routed through the metal beam guide and exits vertically directly onto the workpiece. This blows charred debris away during cutting and engraving, resulting in cleaner edges and a reduction in the amount of particles that reach the laser lens.
Mounting the laser head is very simple — it’s just a matter of sliding it down the pre-installed rails and engaging the little latch lever.
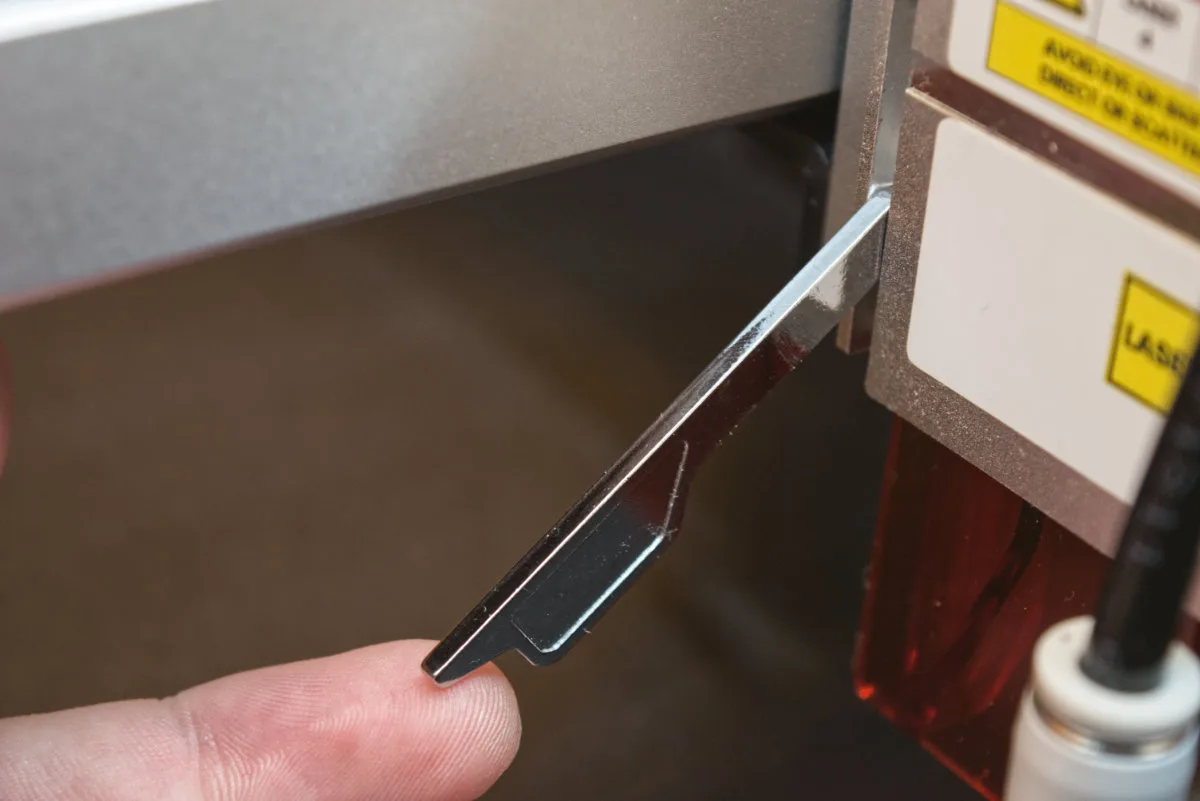
The laser module does not have any autofocus capability, so every time you change the material thickness you have to manually adjust the focus. There’s a spacer located on the side of the module that you can flip down to aid this process: with it extended, focus is achieved by simply lowering the module’s mounted height until the tip of the the spacer touches your working surface. This ensures that the beam is correctly focused, ensuring a very small laser dot and precise cuts. Sometimes you may want a thicker cut—in that case, you can raise the head slightly, usually by about the thickness of a coin. Similar adjustments can be made for engraving if you want a slight blurring effect on certain materials. Such decisions fall into the realm of craftsmanship and are learned through experience.
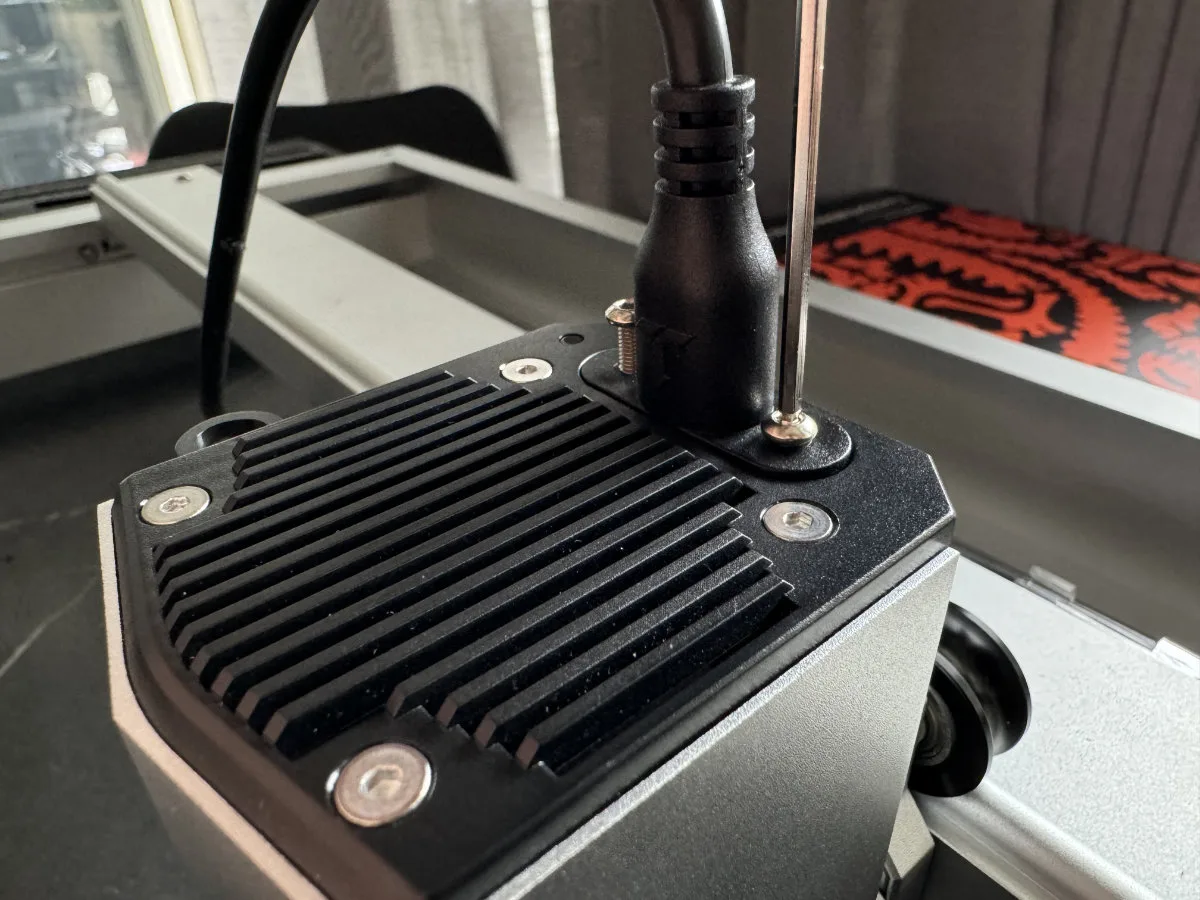
Finally, the control and power cable for the laser source has to be connected and secured with two screws so it doesn’t come loose during operation. It’s an intriguing USB-meets-VGA-style-screws hybrid, but hey, if it works… You’ll need to use the included hex bit screwdriver to secure the connector due to the rest of the module getting in the way, so don’t lose the one provided!
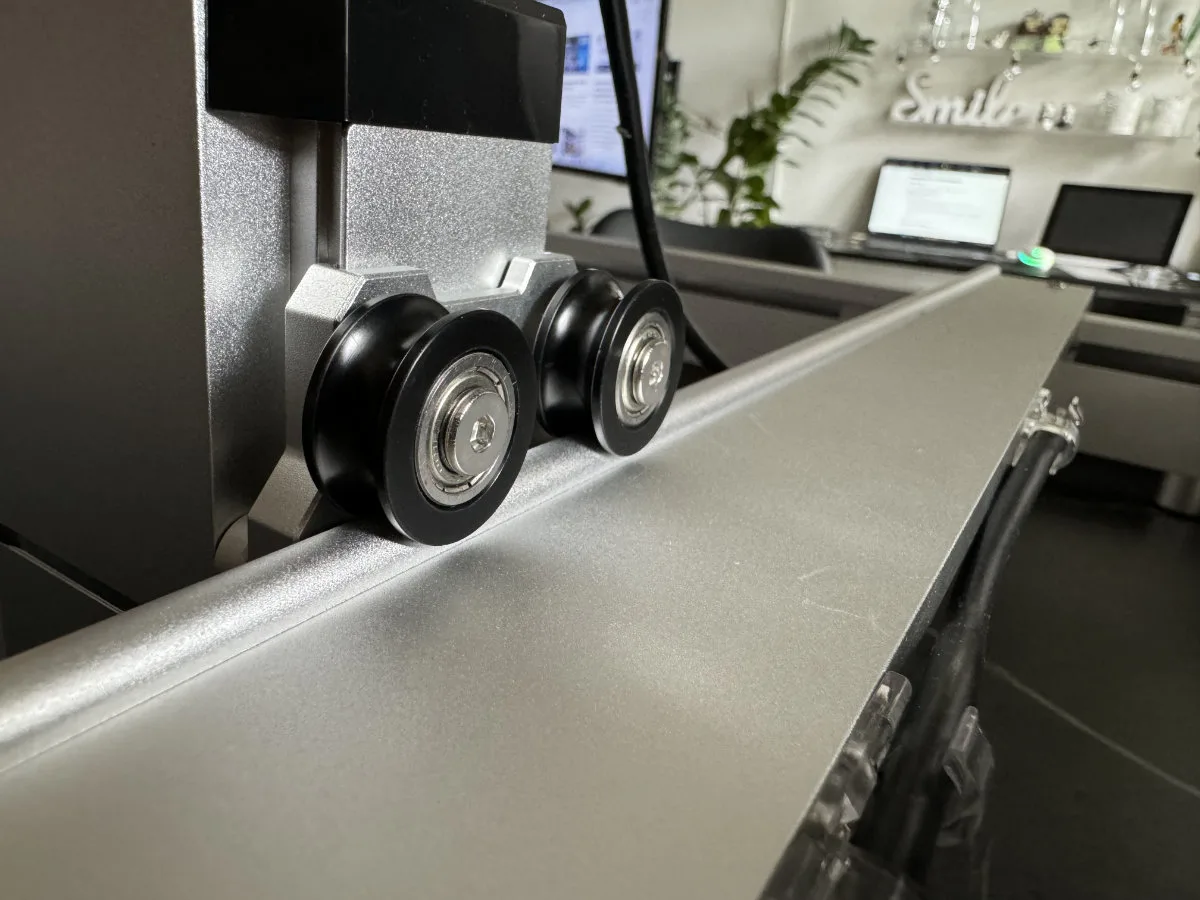
Movement of the laser along the X-axis is handled by two wheels that glide smoothly over the unit’s frame. We don’t see any lubrication applied here (nor on any exposed parts of the Toocaa L2 — though there’s some on the internal belts and gears). This is good, as it means there’s no sticky or greasy bits that’ll get jammed up with sawdust particles produced during operation.
Protective Cover
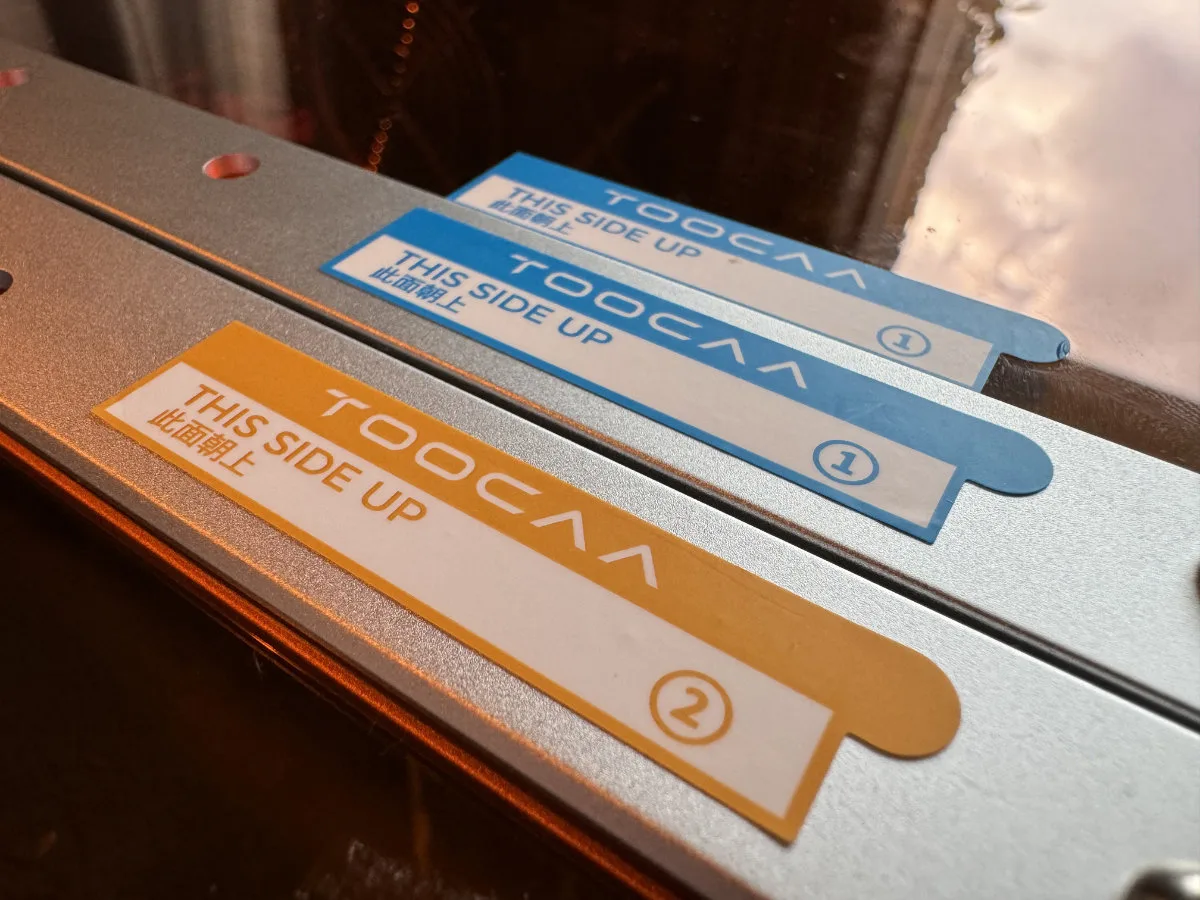
With the laser module installed, it was time to attach the protective cover that sits atop the entire working area. It’s not a complex procedure — it all comes down to screwing a couple of bolts into pre-drilled holes, joining the orange plastic protective panels with metal strips that provide the cover shape and rigidity. The panels and strips are similar enough that they could be confused, but are clearly (and cleverly!) marked with little matching labels showing what connects with what, making assembly straightforward and very practical.
There’s a pair of hinges curiously mounted on the outer side of the cover. These are positioned halfway down the depth of the unit, meaning that the cover, when opened, requires some 40 cm of free space above the device. For comfortable operation, we recommend clearing out at least a meter on every side around the Toocaa L2 so you can work without feeling too cramped. Keep this in mind if you plan to place it inside a shelf or cabinet. It’s a chunky unit! The ideal spot for the L2 is on a large workbench, preferably near a ventilation outlet.
The full work area inside the cover measures 60 × 60 cm, although the honeycomb bed is slightly smaller at 40 × 40 cm — the maximum cutting size with this bed. We’re not exactly convinced by this choice as there’s always the risk of running the laser right into your workbench, but oh well — larger third-party cutting beds are available and are reasonably inexpensive.
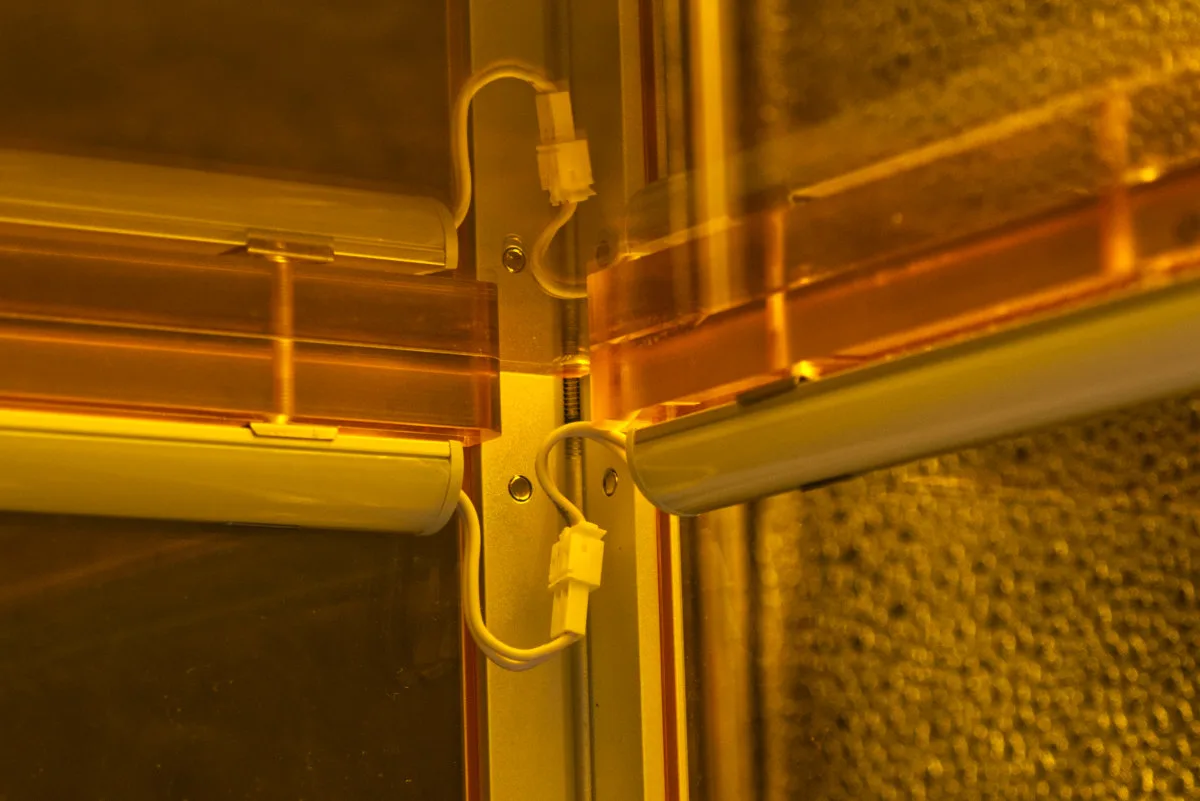
The work area is illuminated by several LED strips that turn automatically when the device is on, mounted along the inside edges of the top cover. They are cleverly angled inward so their light does not spill everywhere and blind everyone within a five-meter radius.
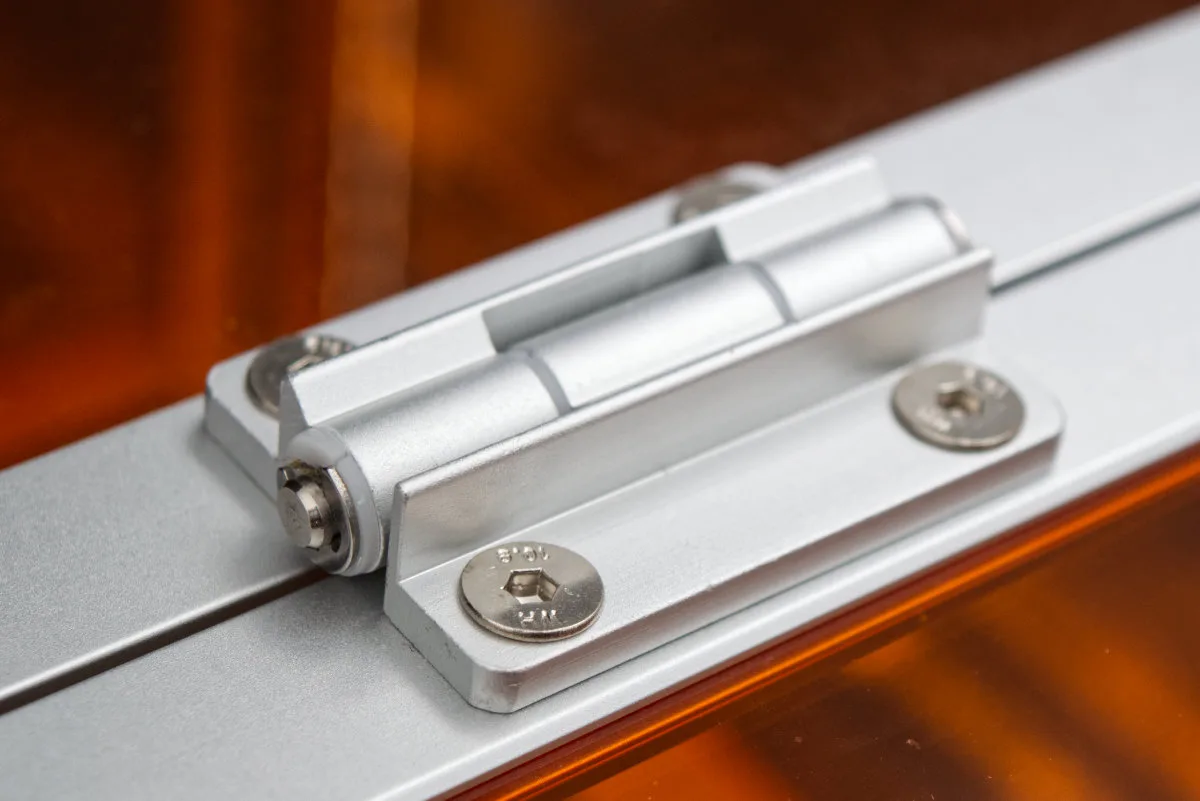
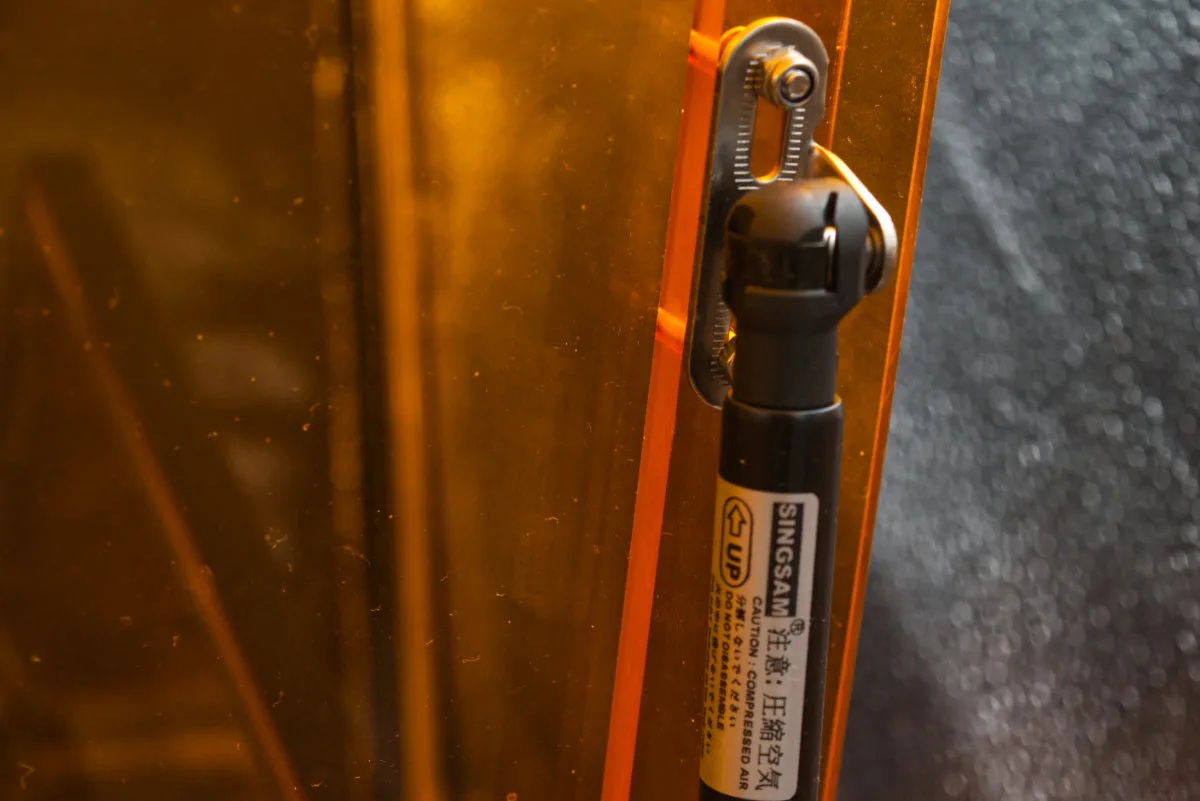
The part of the cover that opens is self-supporting thanks to two pneumatic hinges attached to its inner edges. These not only hold the cover in its open position but also ensure soft, controlled and thunk-free closing.
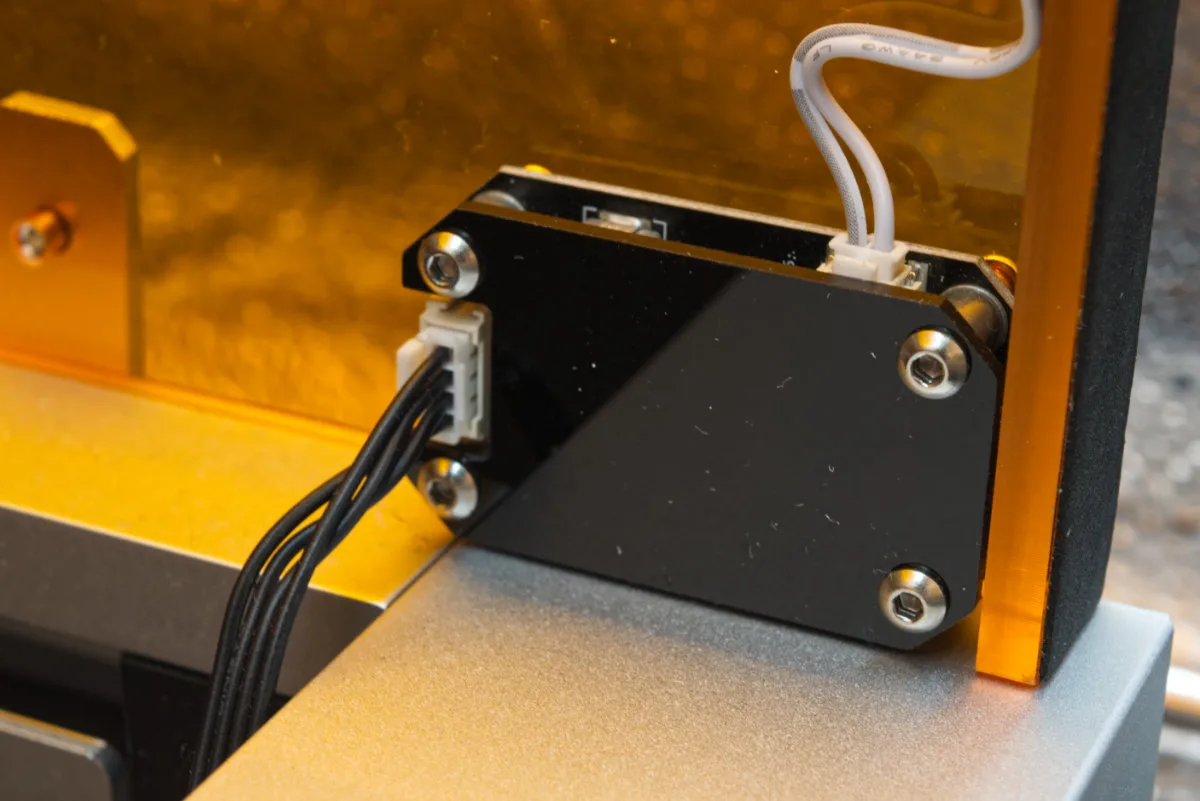
For extra safety, there’s a cover position detection system. A Hall effect switch mounted along the edge prevents the laser beam from turning on if the cover is open, and immediately cuts it if it detects the cover being lifted during operation.
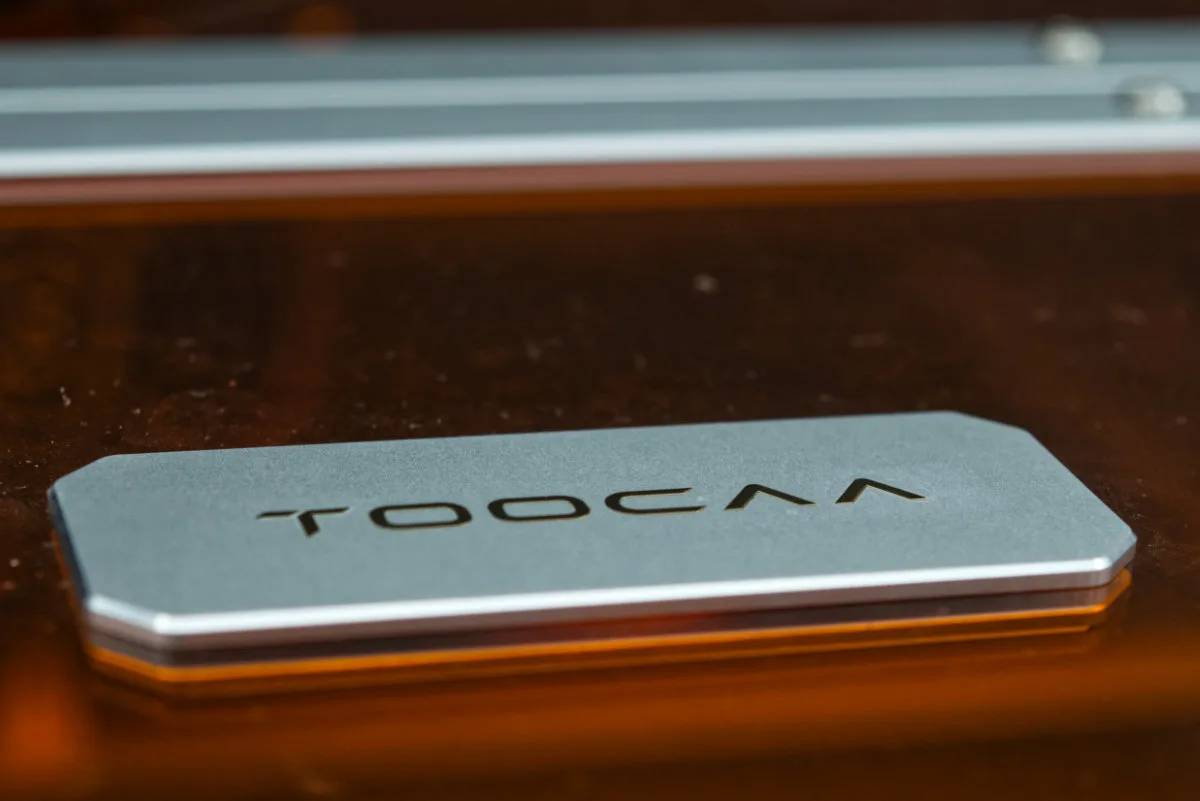
Here’s a cute detail: there’s a bit of branding on the top of the device that’s executed quite charmingly. Two metal nameplates snap together from both sides of the orange cover, held firmly in place by built-in neodymium magnets — no glue, screws, peeling, or falling off (…at least until the magnets demagnetize). This is just a plain good solution for this sort of thing.
Workplace pollution
Since a certain amount of sawdust and organic vapors is released during operation (natural wood burns and chars due to natural oils and resins — synthetic materials, leather, or even wood composites contain even nastier things that, you guessed it, also burn and char). This inevitably leads to air pollution in the workspace. These contaminants aren’t acutely dangerous, even if quite strong-smelling (though you definitely shouldn’t be breathing any sort of fume for any notable amount of time), if you’re dealing with pure wood, but can get toxic fast if you’re cutting plastics or certain wood composites.
Unless you’re directly venting all this stuff out, you’re going to run into problems regardless of how well your room itself might be ventilated. The Toocaa L2 addresses this by featuring a powerful fan on the rear of its protective cover, designed to exhaust all the airborne particles air through a (provided) flexible ribbed hose meant to be attached directly to a ventilation outlet. For rooms without the required facilities, Toocaa offers a separate standalone air purifier. We don’t have one of these to try out, so we can’t say too much about how well it performs; and considering its cost — almost exceeding that of the Toocaa L2 itself — it’s clearly only an option to be considered when no other solutions are available. Even then, long-term filtration efficiency and cost-effectiveness are questionable.
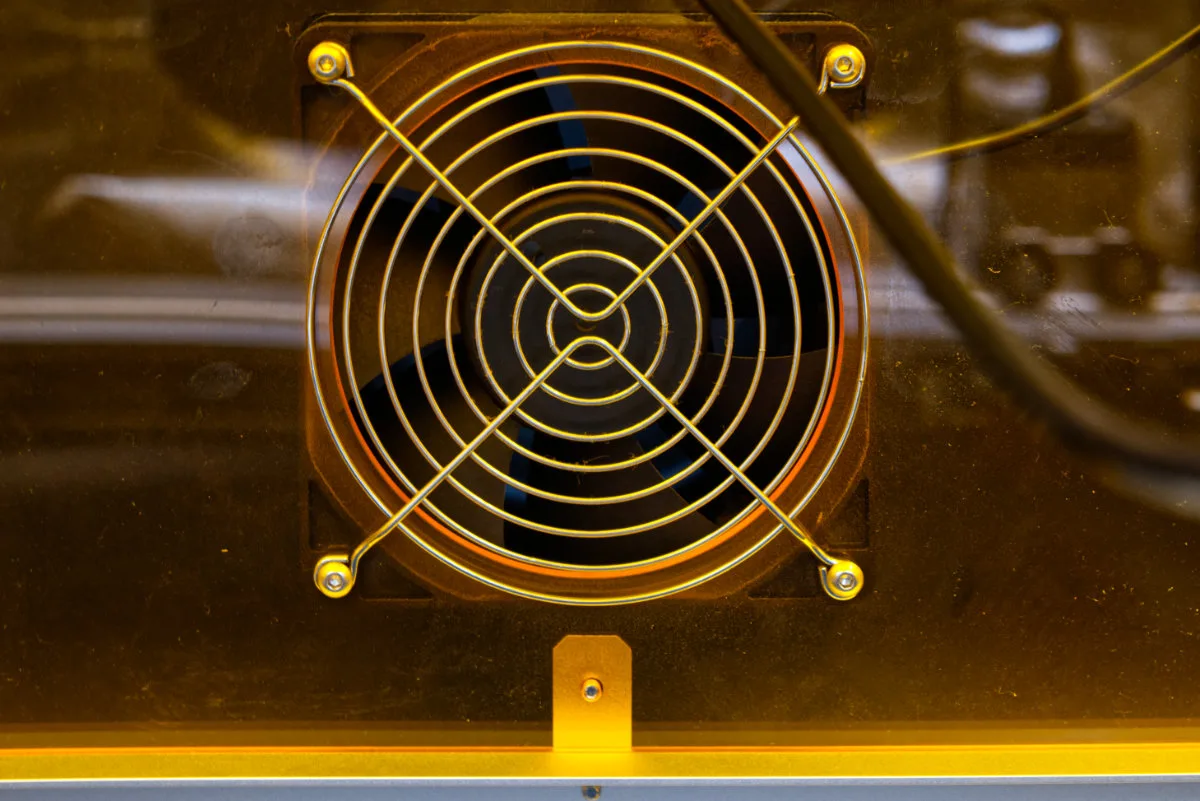
As we just mentioned, the exhaust fan mounts using four screws and a metal bracket on the rear panel. It’s relatively simple to install, proper fan orientation/airflow direction being the only thing you have to pay attention to. It has to blow air out rather than draw it in. We found the fan to be reasonably effective, except in the upper left and right corners of the work area, where some smoke particles — especially those released form your workpiece’s underside during cutting — may escape through the gap between the Toocaa L2’s frame and the surface it’s sitting on. No matter how strong the fan, this will happen due to the Toocaa’s inherent non-airtight design. While it can’t be fully mitigated, we recommend keeping the honeycomb bed centered on the work surface as it does help.
Here’s a little space consideration: the Toccaa L2 is around 80 cm deep, and the hose attaches to the fan bracket with quite a chunky plastic flange that requires some extra space, you’ll need to provision at least a meter of space behind the unit. And if you position the unit so that you have to bend the hose to reach your ventilation system, you’ll need even more space to account for, well, bending the hose.
Working with the Toocaa L2 Laser Engraver and Cutter
Before powering the Toocaa L2 up, let’s check the small black control panel on the right side of the device, where all the ports and controls are located. The first of the bunch is a simple power switch. Pretty self-explanatory.
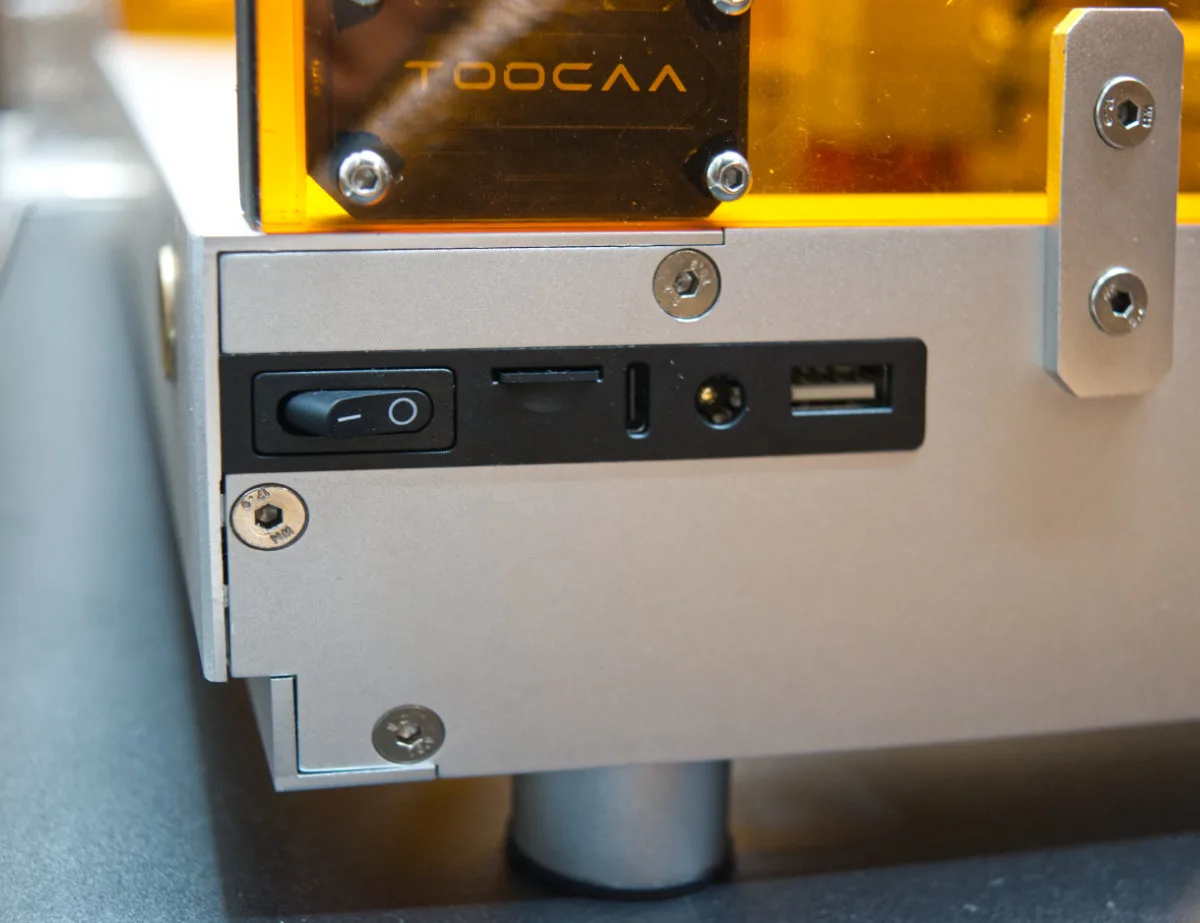
Next is a microSD card slot, where you can insert a card containing the file to be engraved or cut, saved as a GCode (.gc) file exported from LightBurn or LaserGRBL. We used LightBurn, a commercial program with a very reasonably priced $60 perpetual license (and a full-featured, though time-limited trial). LaserGRBL is the free, though objectively less powerful (and to us, less intuitive) alternative.
The second way to start engraving or cutting is via a direct USB-C connection, which allows full control of the Toocaa L2 from your computer. This requires keeping a PC nearby but gives much greater flexibility and more direct control of every cut.
The next port is the DC power jack. The included power supply is rated 24 V/3 A one (at least with our 10 W laser model). Separate 24 V/1 A supplies are provided for the fan and Air Assist Kit. Finally, the USB-A port on the panel is for the security dongle, which must be inserted for the laser to operate. This is an important safety feature, preventing unauthorized or accidental use. In a STEM environment, which the Toocaa is designed for, this is especially important to prevent children from getting hurt. Lasers like these, while nowhere near as powerful as lasers can get, are still plenty powerful and are capable of causing some serious injuries.
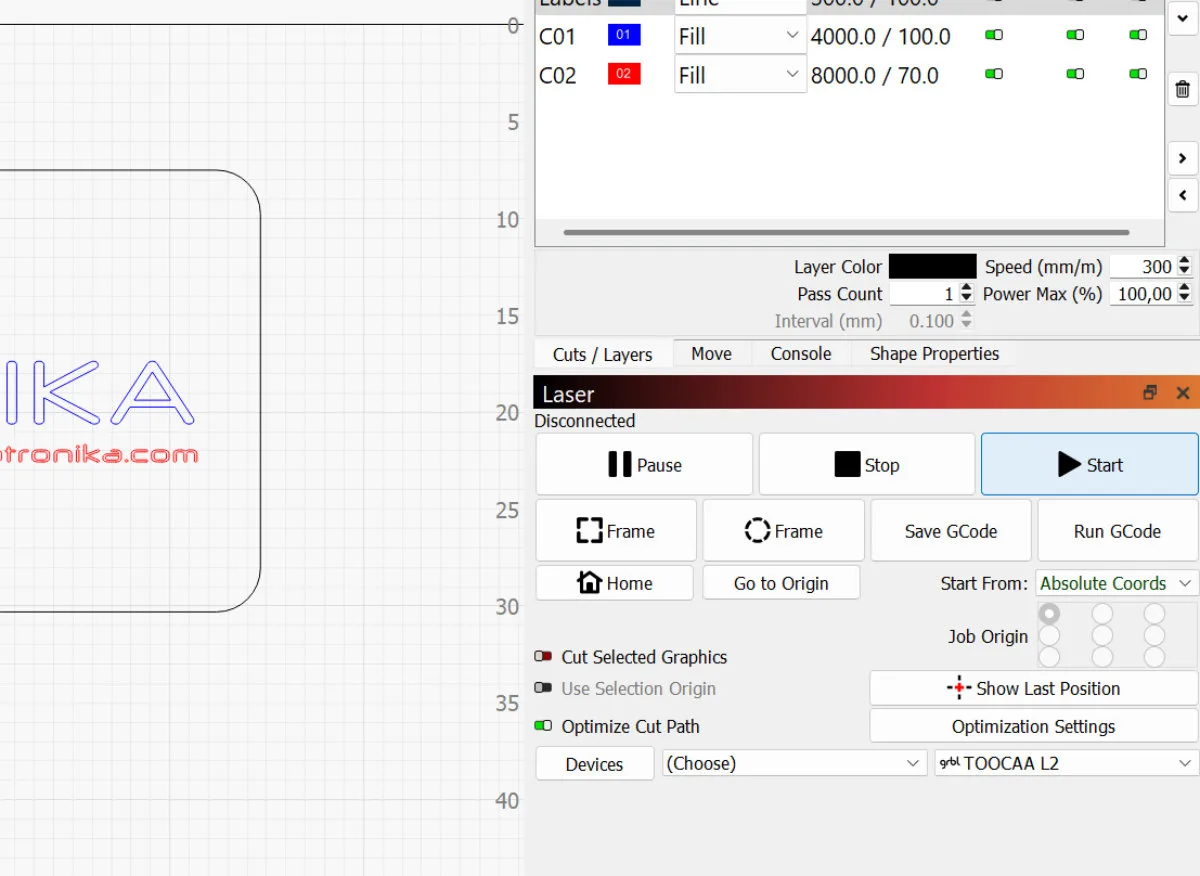
With the power turned on, the Toocaa L2 looks quite professional, modern, and sleek. In addition to the white LED strips that illuminate the work area, there is another LED strip that runs along the front of the unit that changes color depending on the machine’s state: a solid blue when running and a blinking red if an error occurs.
For the laser to power up and start cutting or engraving, several safety conditions must be met:
- The protective cover must be closed, as detected by a magnetic hall sensor.
- The safety dongle must be in the USB-A port.
- The Toocaa L2 must be stationary and level: a built-in accelerometer and gyroscope will stop the laser if the machine is tilted or otherwise moved.
On top of this, the Toccaa has a fire sensor mounted on its laser module which continuously monitors for any signs of ignition or excessive smoke and stops operation if these are detected.
Overall, if we’re to count the supplied laser goggles, the Toocaa L2 puts three separate layers of optical protection between you and the laser: a small acrylic shield mounted right on the module, enveloping the laser’s aperture, the protective cover surrounding the entire work area and a pair of goggles that, despite all the built-in safety features, are always a good idea to wear when operating any equipment which features strong lasers.
Testing the Toocaa L2 Laser Engraver and Cutter
Alright, enough talking about the features. Let’s get to the most important bit: testing the real-world performance. For this, we tried cutting a variety of little items and engraving some benchmark designs. We didn’t really try anything on metal surfaces: we received the Toocaa L2 with the less powerful 10 W laser, which is not marketed for engraving metal surfaces (this is generally a job better suited for other types of lasers, not diode ones), though it can mark anodized aluminum and painted metal surfaces. A 20 W module would be ever-so-slightly better for this, though the real deal here is the 2 W infrared laser module meant for engraving metal surfaces.
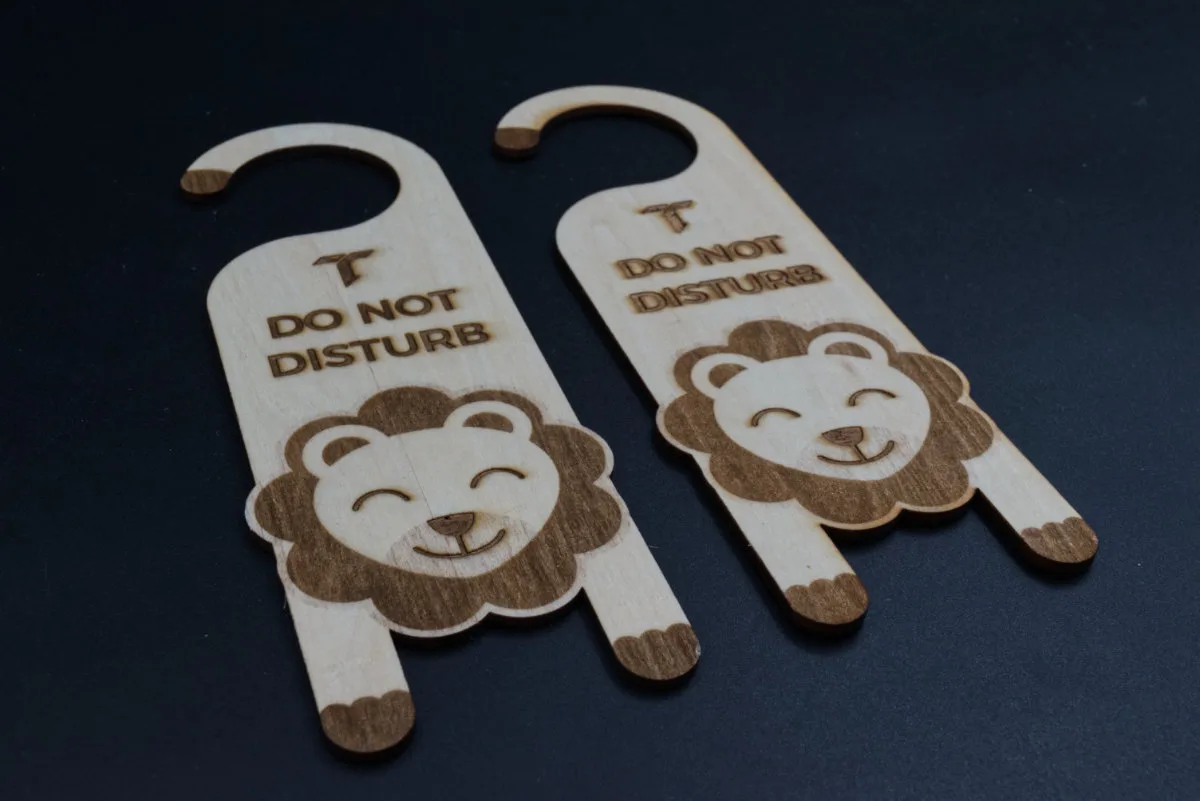
Our first project, which comes pre-loaded on the included microSD card, was a do not disturb door hanger design cut from the 3 mm particleboard that comes provided with the machine to get you started. We tried this design twice: once without the Air Assist Kit and once with it set at ~20% airflow. The airflow removed burnt particles before they could stick to the surface, leaving a cleaner surface finish. Airflow intensity must be monitored carefully, especially when dealing with paper or cardboard. Either way, in most cases, burnt-on marks can be removed from surfaces using lighter fluid or rubbing alcohol.
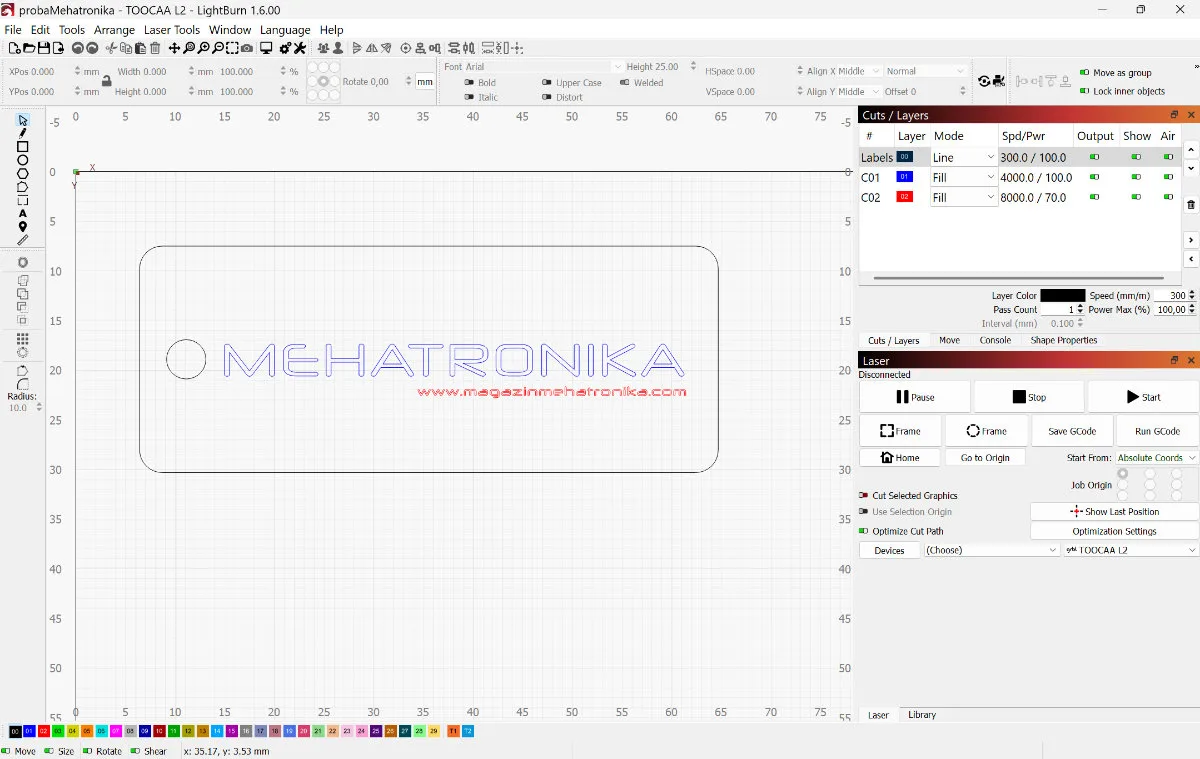
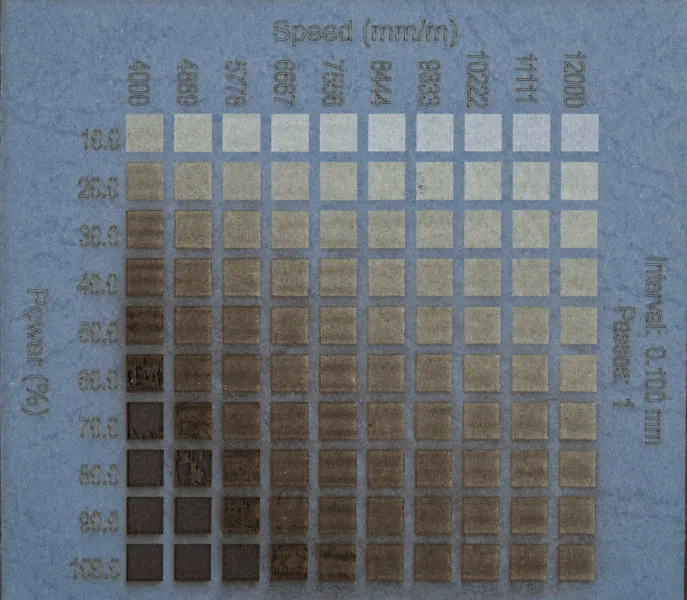
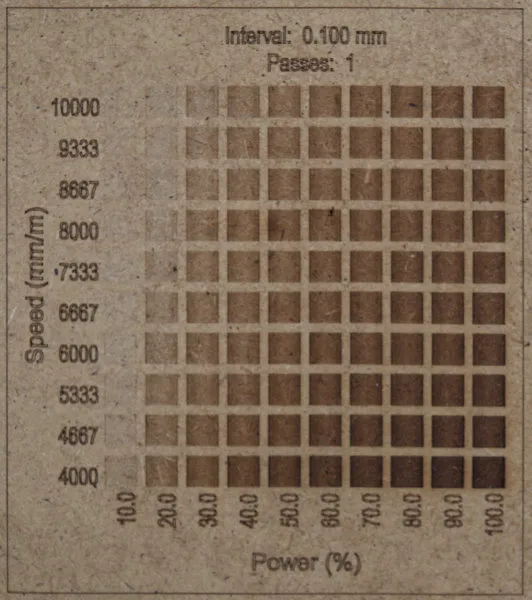
When creating your own designs in LightBurn or LaserGRBL, there are two main parameters that you can set for any given laser path: laser power (0–100%) and movement speed. Material characteristics such as type, moisture, density, and age, as well as the specifications of your laser all affect optimal settings.
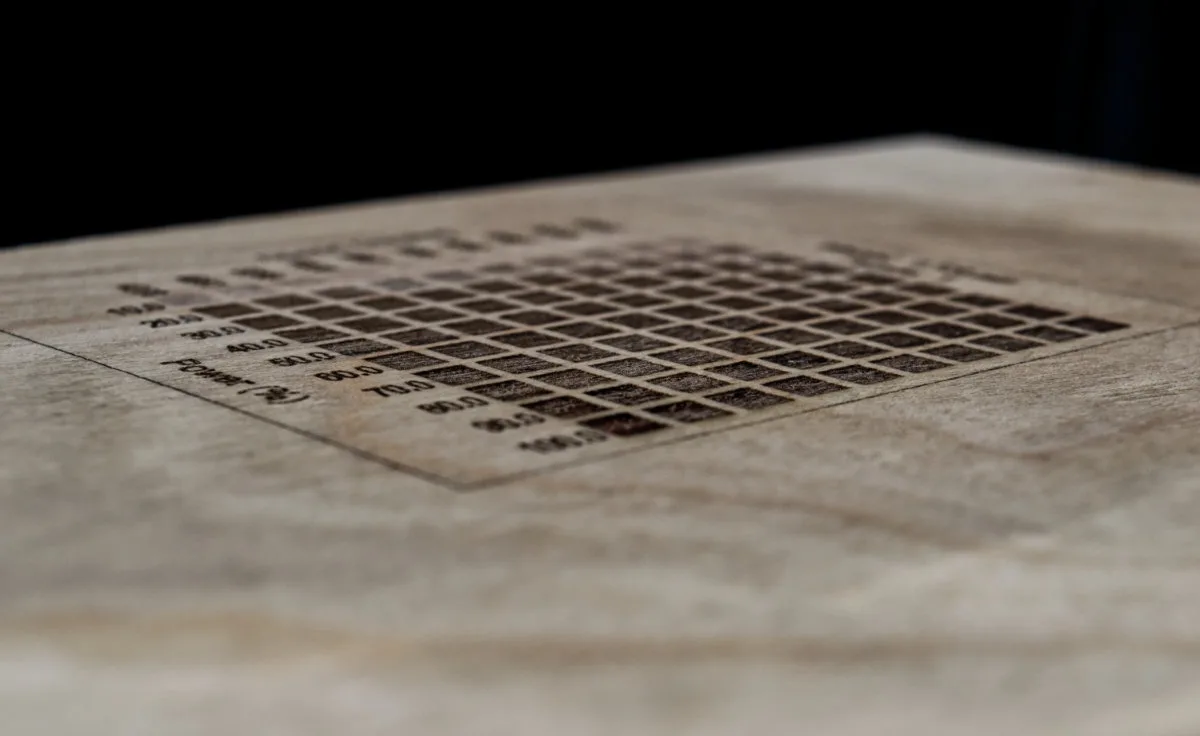
We ran some laser tests on birch plywood, MDF (3 mm), and blue corrugated cardboard (0.5 mm) and got the following results:
Cardboard — cutting cardboard is unsurprisingly quick, with just 30% laser power at a speed of 1000 mm/min sufficing.

Engraving cardboard requires speeds above 8000 mm/min and sufficiently low laser power to avoid burning the material. Keep in mind that many colored carboards use pigments that aren’t too thermostable, meaning that at faster speeds (and lower laser power) you’ll often see the initial color fade before being replaced by a browner tone due to high temperatures at higher laser power and slower engraving speeds.
Birch plywood — at a speed of 6000 mm/min it was possible to get a full range of shades of brown by varying laser power without denting the surface.
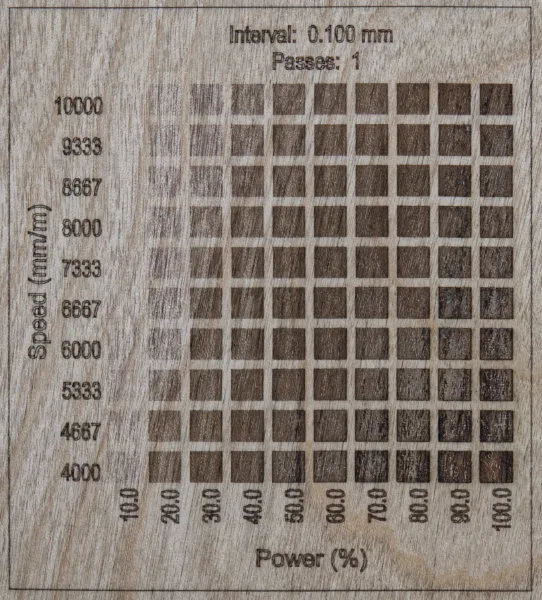
If a deeper engraving is desirable, a slower speed of around 4000 mm/min can be used. At this speed, the laser set to 100% power will produce a 0.5 mm deep engraving. For even deeper relief cuts, slower speeds may be used.
MDF — To us, MDF proved to be one of the best materials, with 3 mm being an ideal board thickness for the 10 W laser. Cutting MDF was no issue, and the resulting edges are clean and very precise. For cutting, a speed of around 200 mm/min at 70% laser power seems optimal.
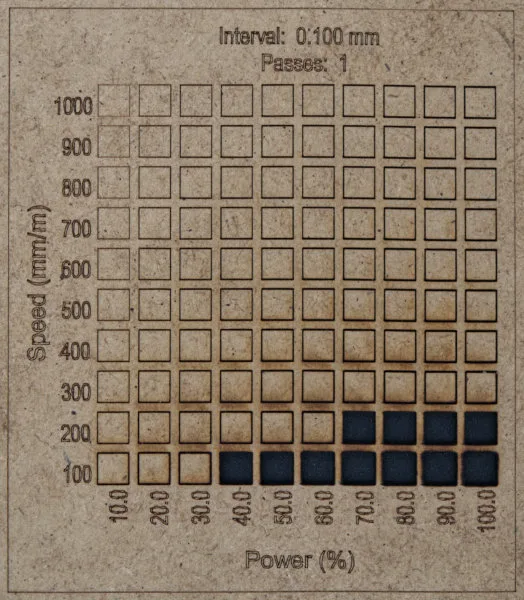
For marking MDF, a speed of 8000 mm/min is ideal, as it prevents the laser from digging into the material too much but still allows for a wide range of shades to be achieved.
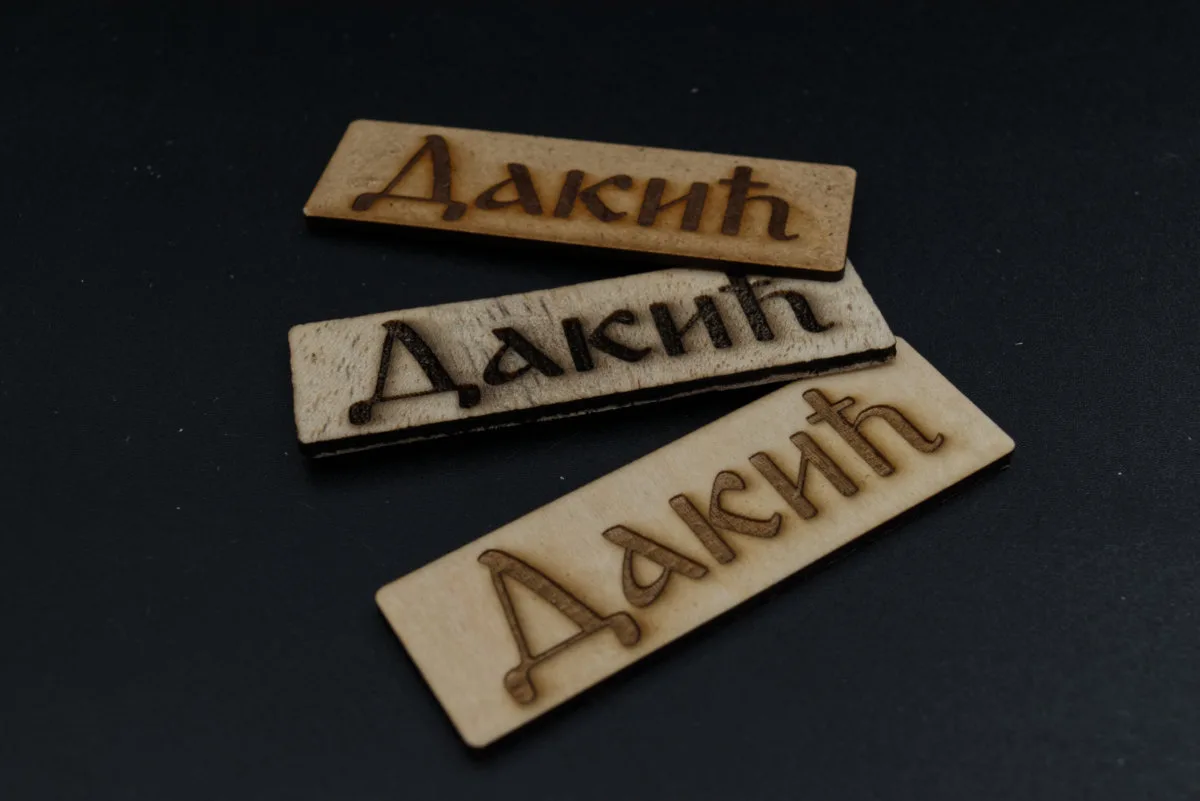
Guided by our test results, we set our cutting parameters to 300 mm/min at full laser power for cutting and to 6000 mm/min at full power for engraving, and then cut three identical name plates on MDF, balsa, and birch veneer. This time we intentionally left the Air Assist Kit turned off. Our results are shown in the photo below (in this order, top-to-bottom).
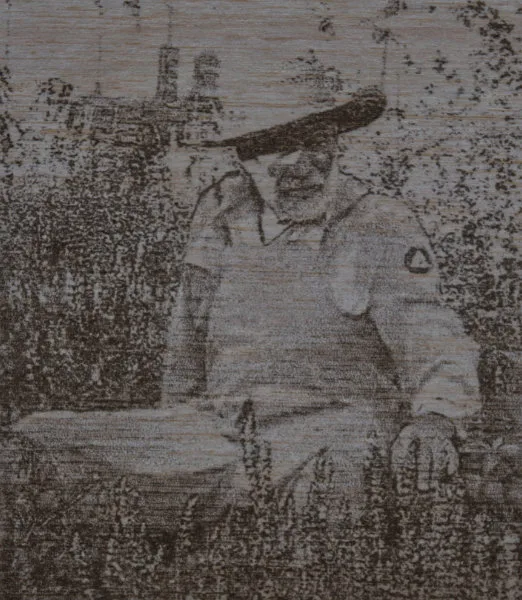
We also experimented with engraving a photo from our archives. First on MDF:
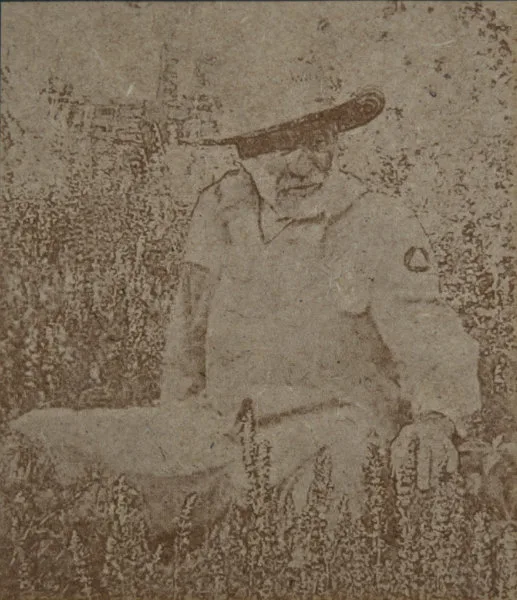
Then on balsa:
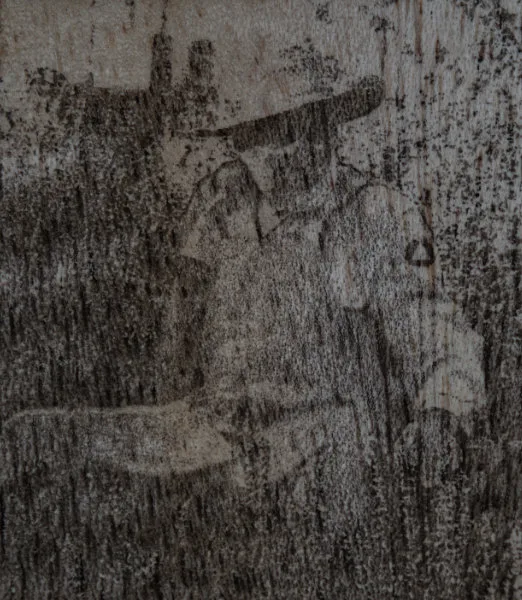
And finally on birch plywood.
Further testing had us cut some more items out. We chose to continue on MDF, as the Toocaa had the easiest time producing the best results with this material.
The Toocaa L2 cut this design out in about 10 minutes, and with such precision that even after separating the cutout we could fit it back perfectly into the remaining wood. Impressive! The edges were exceptionally clean, requiring no post-processing beyond removing a few excess pieces — most of which simply fell out on their own.
We also tried cutting out a bit of colored MDF. During cutting, there’s some paint charring that gives pre-painted pieces a special sort of charm. If this is a look you want to achieve, definitely look into colored materials. On the other hand, for a more uniform finish, painting pieces after cutting might be what you’re after.
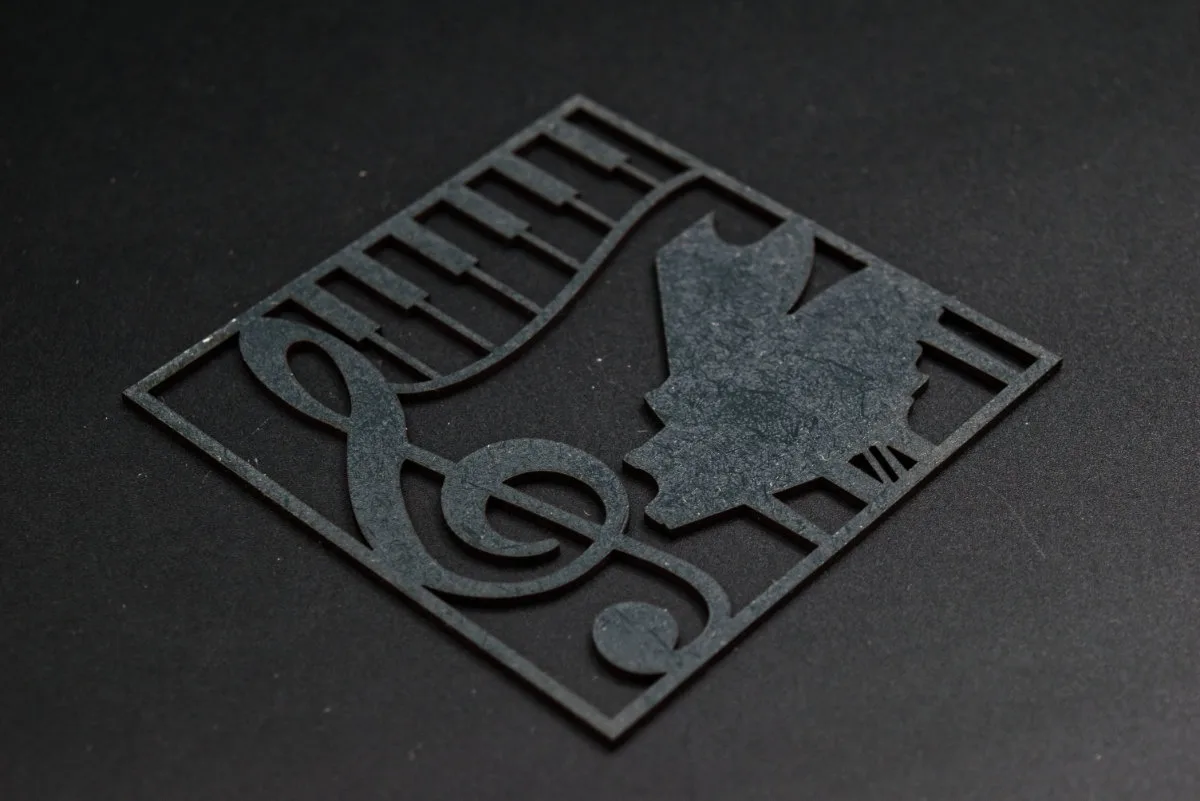
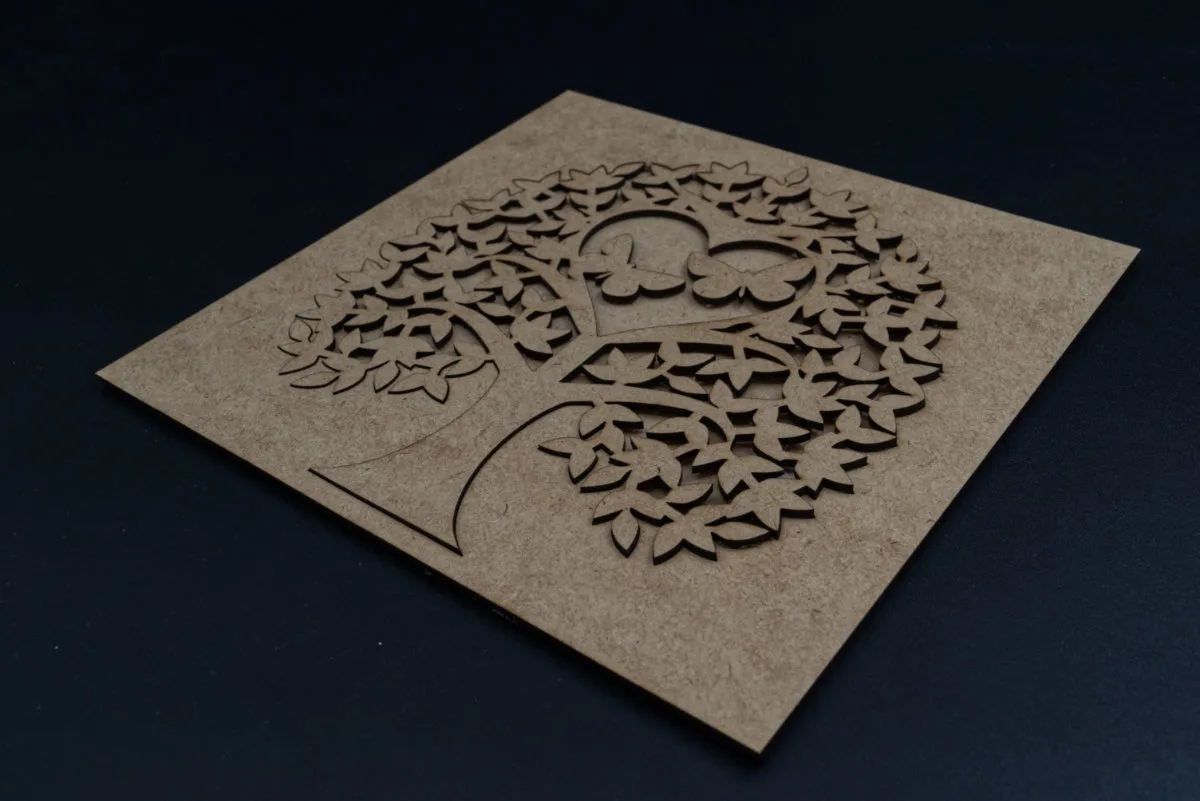
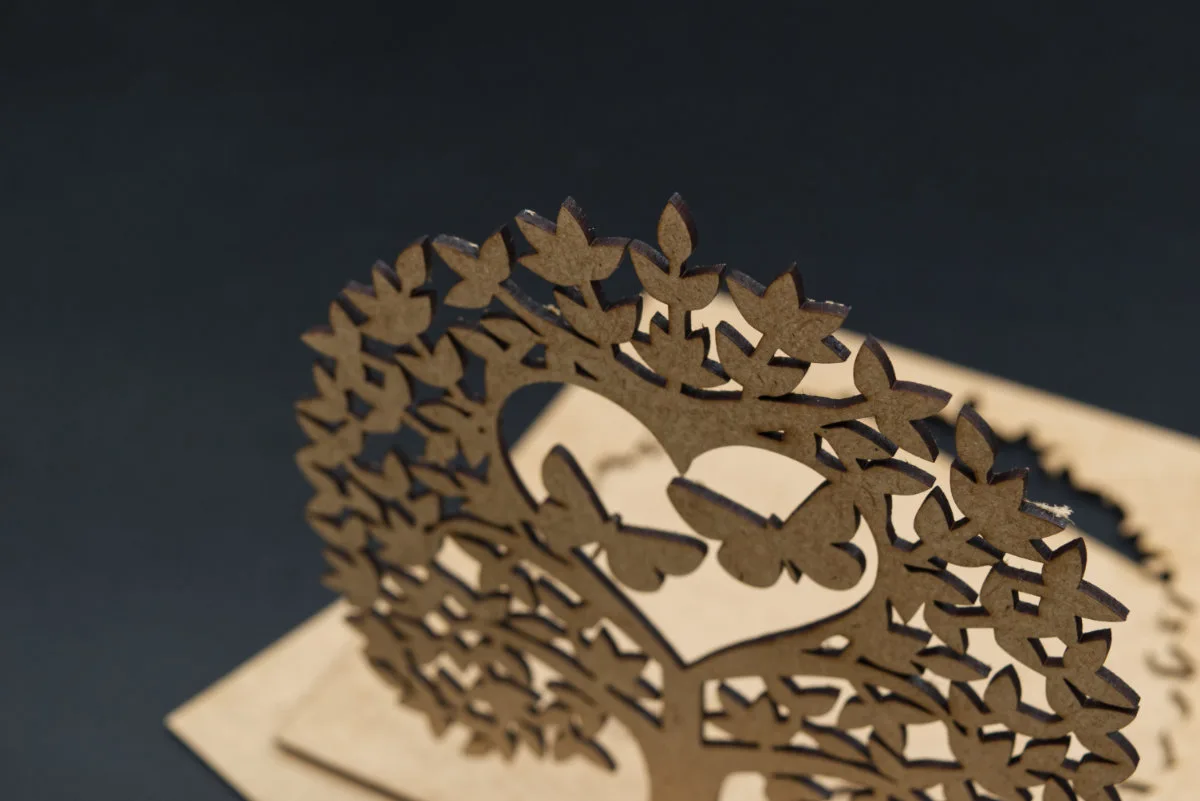
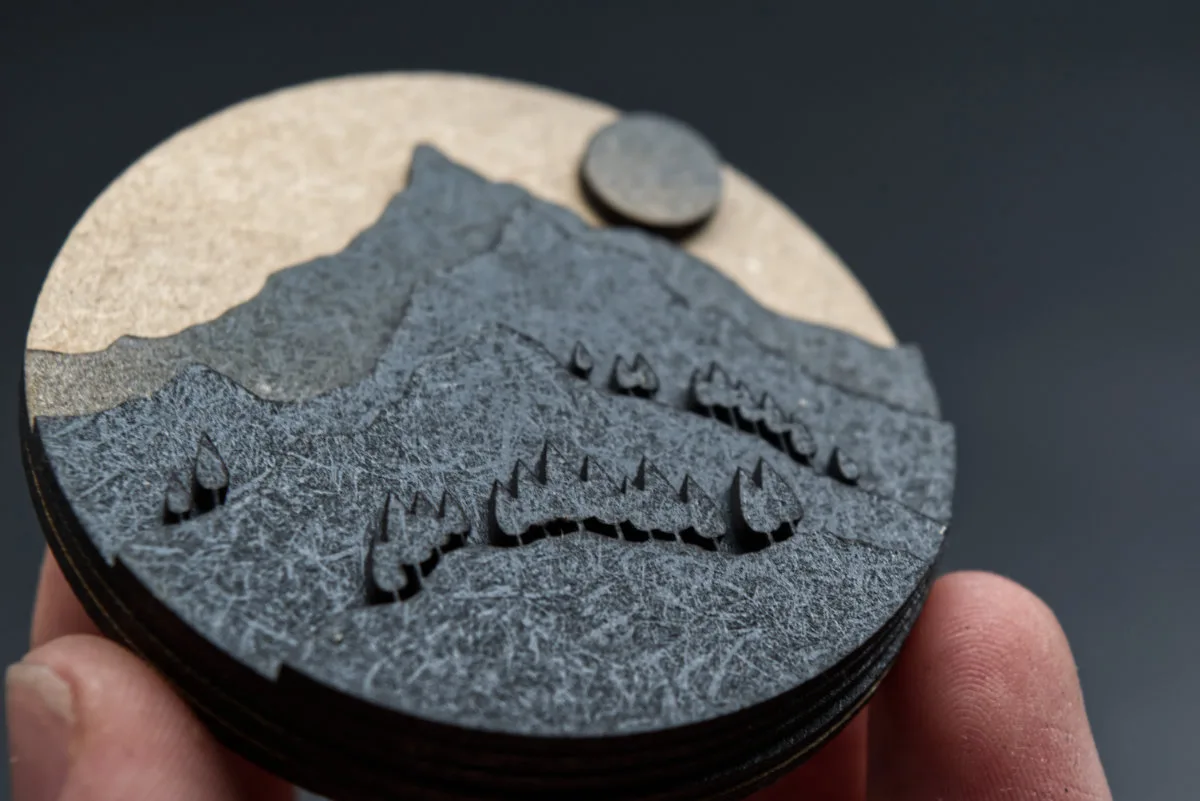
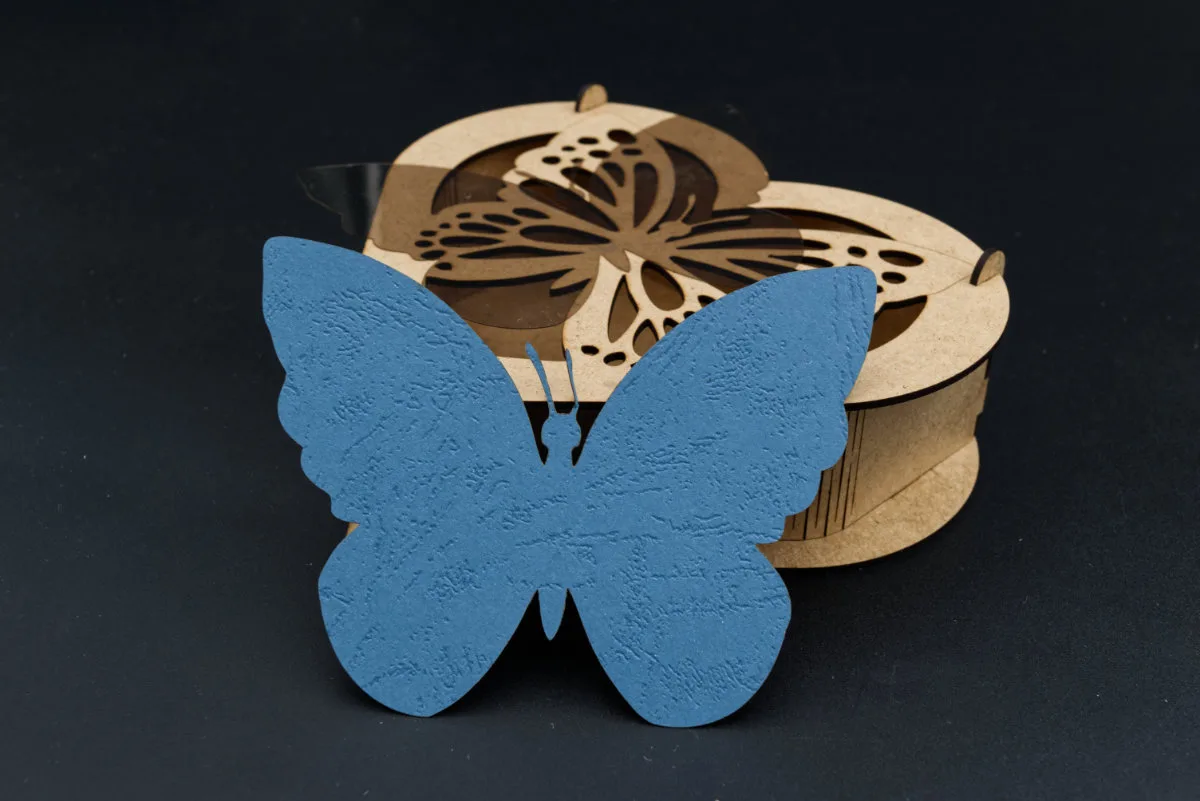
We also made an interesting little “3D collage” out of several small pieces that get layered over each other after cutting. The base circle is only 5 cm in this design, which should give you an idea of how thin the tree trunks here are. All of the tiny details came out perfectly, and there was no struggling with incomplete or fuzzy cuts, nor damage during separation of the cutouts.
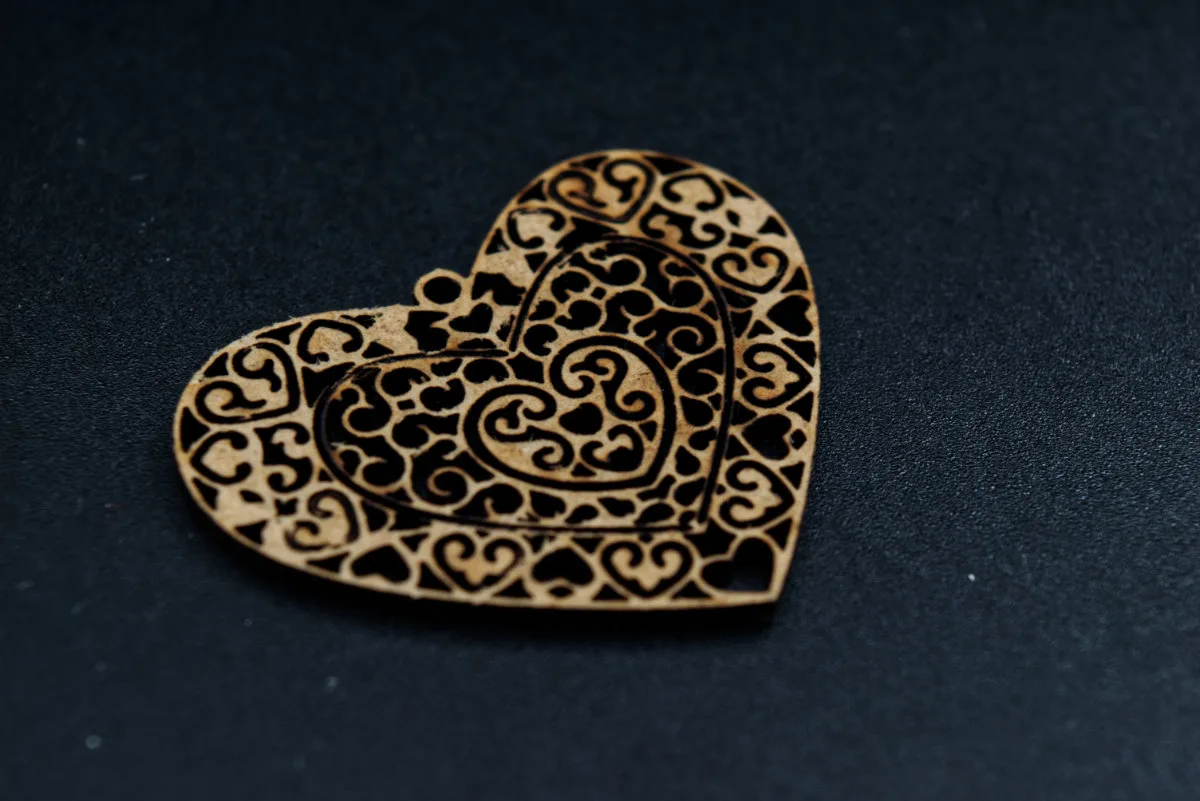
This level of precision pushed us to try out something truly delicate: a little heard pendant that’s just 3 cm wide. For this example, we intentionally photographed the backside to highlight the fine hair-like fibers left behind after removing the excess pieces. With some more laser setting tweaking, this flaw could easily be eliminated. Still, we consider the result nothing short of remarkable — there’s no excessive charring and not a single damaged detail. From the front, this little locket looks flawless. Pay close attention to the middle zone of the design and its incredibly thin contours.
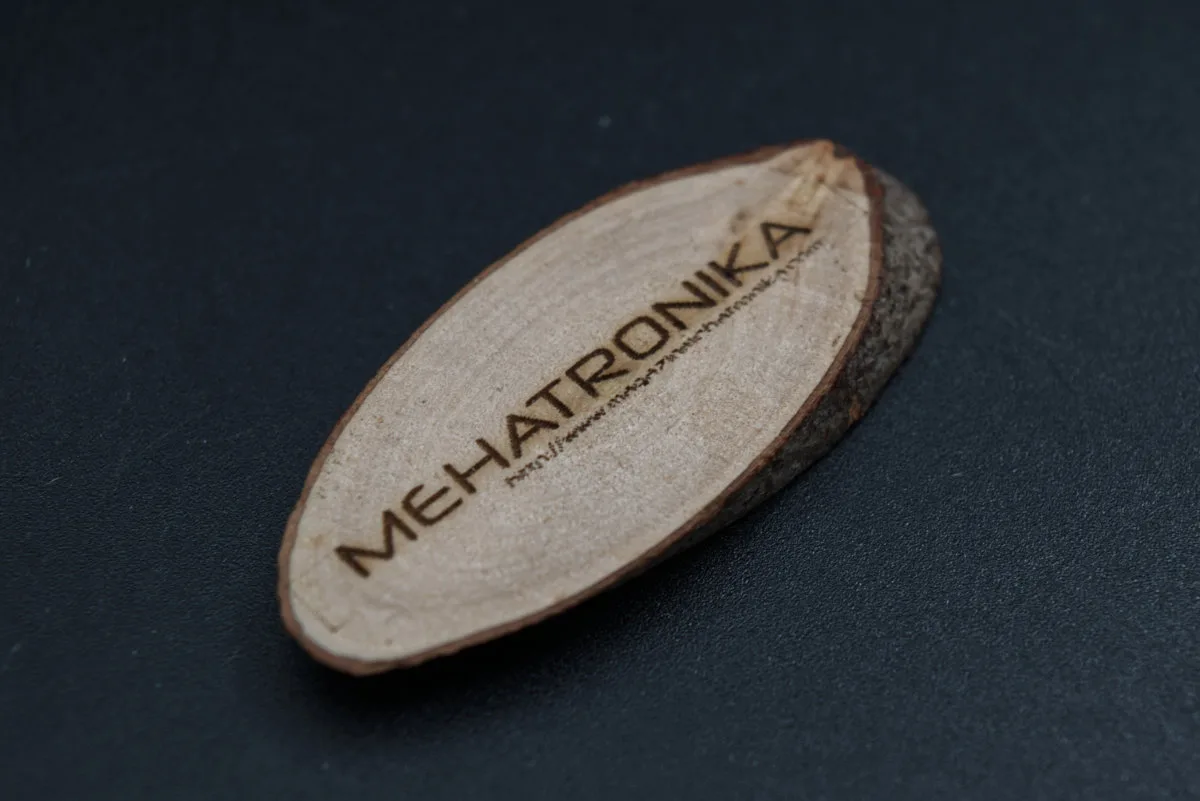
Finally, we found a few small tree branch slices in out lab and decided to sign them with our logo. Positioning such a tiny object turned out to be surprisingly simple thanks to the way this process works. With a single press of the front button, the Toocaa L2 activates its laser at a barely visible power level (think laser pointer: that’s essentially what it’s doing), and then moves the module around to trace a faint outline of the total working area. Nifty!
Conclusion
After a month with the Toocaa L2 and its associated accessories, we can say that we’re pretty happy with it. The 10 W laser is ideal for wood sheets, cardboard, and thin plastic. For maker projects, we’d recommend 3 mm MDF as the ideal material. It’s very uniform, easy to work with, and doesn’t release too much gunk — unlike plywood, where adhesives in the middle layer often cause burnt residue to build up along the laser path. It’s also perfectly flat. Natural wood can warp during cutting, due to the way its fibers are arranged, which then causes the laser to go out of focus, reducing the quality of the cut. MDF also takes paint well and can be bent cleanly after scoring, which is handy for more advanced builds.
Safety comes first. The Toocaa L2 employs multiple layers of protection: preventing the laser beam from ever escaping the work area, shutting down the laser automatically in case of irregular operation, and ensuring safe use both in STEM education and at home, where strict safety rules may not always be followed. This makes it easy to recommend to beginners too, especially when compared to many other inexpensive models which have little in the way of shielding users from the exposed laser beam.
Another thoughtful detail is the integrated exhaust system, which helps remove particles, gases, and odors. This is especially valuable in residential settings. We enjoy the smell of freshly burned wood as much as the next guy, but after a few hours you get tired of your entire room smelling like a fireplace. Not exactly pleasant. The Toocaa L2 tackles this issue at its source, keeping the workspace clean and mostly odor-free.
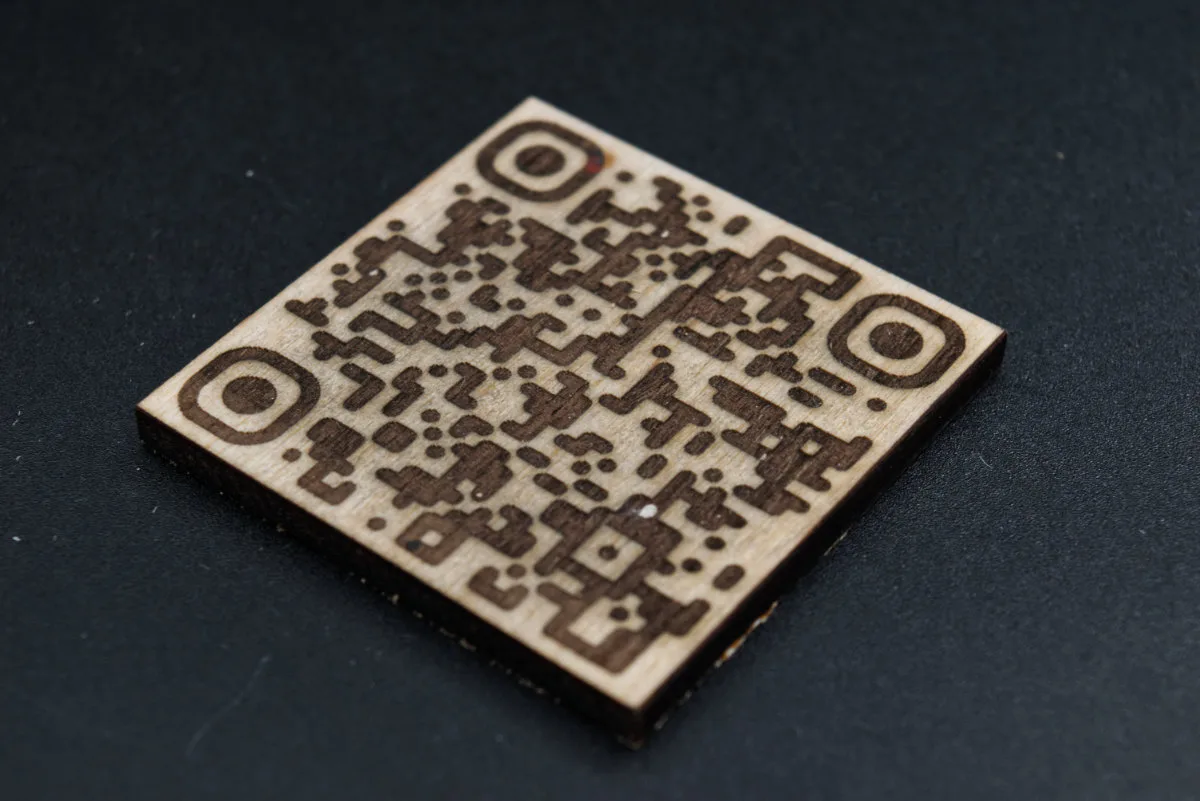
As our little signature, and a way to wrap this review up, we’ve engraved a QR code with a link to our website — and a final thought to impart you with: at $866, the base model’s MSRP, you’ll be hard-pressed to find a safer, cleaner, and higher-quality laser engraver and cutter on the market.