
")
CircuitMess Chatter
The Chatter is an amazing STEM kit designed for young tinkerers as their first foray into the world of electronics. It achieves this and so much more in a well-designed and beautiful package.
Pros
- Great instructions
- Easy to assemble
- Lots of hidden functionality to hack into
Cons
- None noteworthy
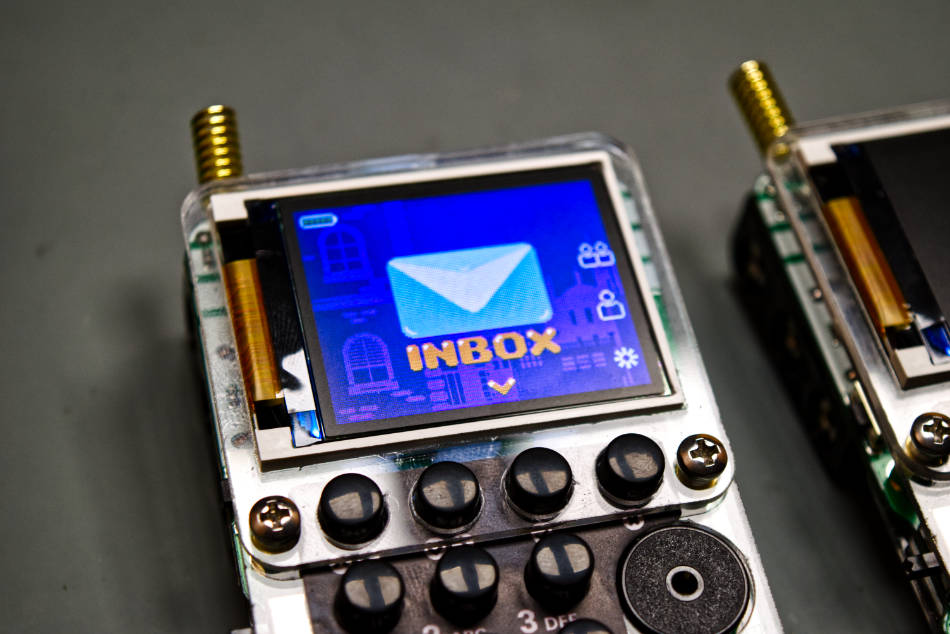
Circuitmess’ Chatter is the newest kit in their STEM Box series of unique DIY projects. Released in February 2022, it features quite a few technologies and concepts that it aims to introduce to students and tinkerers alike. The Chatter itself is a tiny LoRa-enabled texting machine with quite the range. The kit lets you build two of them, both of which are also programmable thanks to the USB-C interface they offer.

The kit series began in 2020, via an extremely successful Kickstarter campaign, offering a subscription-like model of ordering these – with a box arriving at your doorstep every three months. There’s also a tool-kit available that’s sent free with some longer plans – containing the essentials needed for assembling all of these.
We’ve been sent the Chatter box, as well as the tool kit (and a very nice t-shirt, too – thanks guys!) free of charge by Circuitmess for review purposes. We’ll also split this review into two parts, with the first part focusing on the build process and stock software, and a second part focused on the coding aspect that allows for extending the finished devices’ capabilities.
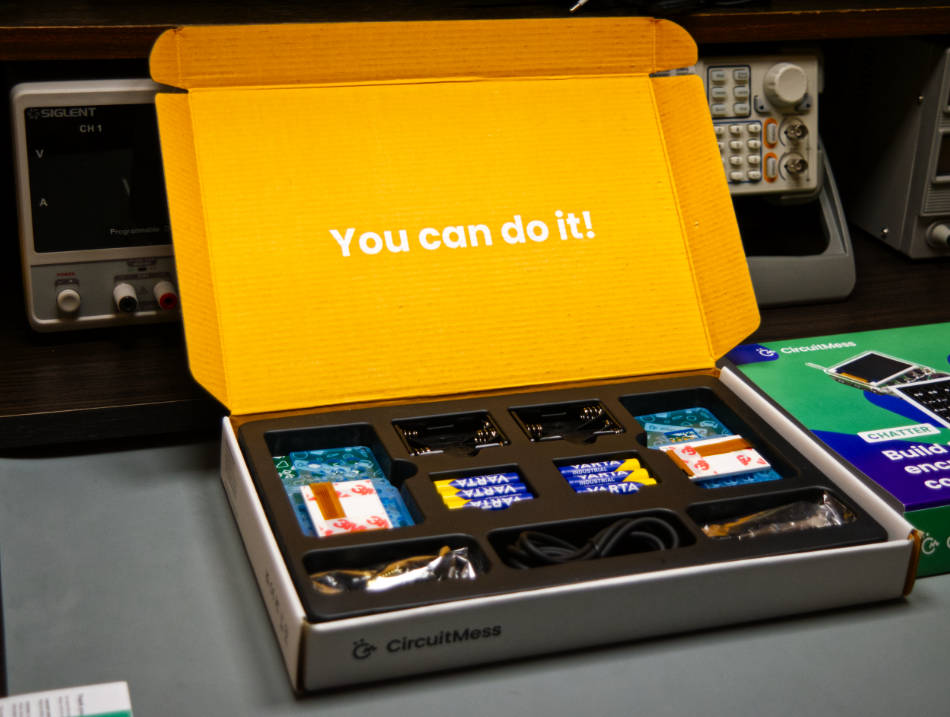
After opening the boxes, there’s quite an array of components jumping right at you – DIP switches, PCBs, screens, ribbon cables, screws and laser-cut acrylic pieces. Tiny details are sprinkled throughout the packaging, with an extremely modern quick start guide, as well as some words of encouragement on the top lid. Rest assured, box, I think we’ll manage!

Changing our focus to the other box, there’s an array of beginner-friendly tools in it. A pair of needle-nose pliers and wire-cutters, a screwdriver, a solder pump and a basic soldering iron with exchangeable tips and temperature control. There’s also some solder, a little iron stand and the most adorable tiny solder sponge imaginable. None of these tools are show-stoppers, but they get the job done at an incredibly low price, and are a perfect starting kit for anyone interested in electronics.
Back to the Chatter box – and taking a closer look at its two PCBs, we see that the more challenging SMT components have been pre-soldered. Thus, our first main goal was dealing with a manual switch, a piezoelectric buzzer and an absolute army of push-buttons. For both units combined, this part didn’t take much more than half an hour, and was rather enjoyable thanks to the good quality components used. The PCB mask was also durable and stood up to flux cleanup perfectly.
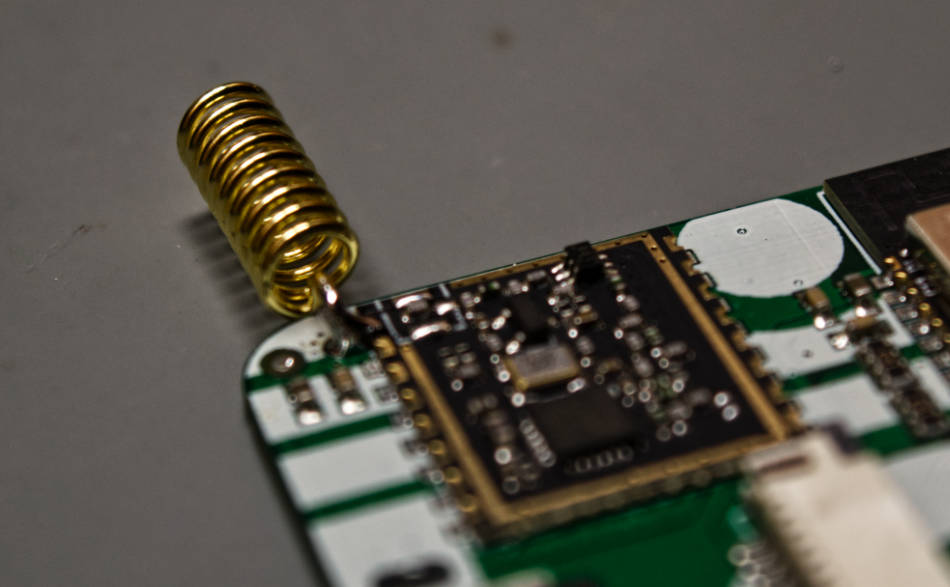
And then came the antenna. And it was one hell of a tricky connection – requiring some solder to first be flowed into the PCB hole, and then a solder bridge to be quickly made between it and a raised castellation on the modulator board. The keyword here is quickly, since being just a tad slow is going to re-heat the original solder and get the antenna falling out. But alas, some two tries later, we managed.

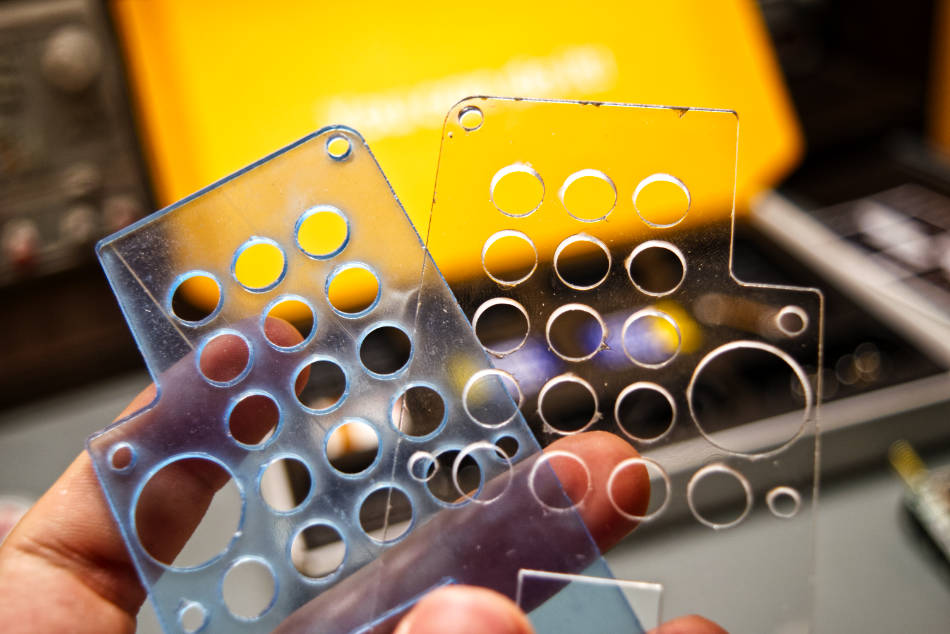
Assembling the acrylic case around the PCB was a breeze (do note that the acrylic is covered in blue protective foils). Screws and standoffs hold the entire thing together, and do so quite sturdily. There was something extremely satisfying about the way the back case fit perfectly around the solder pins. Before mounting the front plate, the screen had to be mounted, which was a breeze thanks to the ZIF connector on the board (thankfully it’s not a LIF connector).

Final touches were adding button-caps and a sticker with button labels. After three AAA batteries, both of the units were ready to be turned on – and it was glorious. A little animation lit up the little screens (which are really, really nice, by the way) and we were ready to text!
The software is well optimised, with a few basic apps, featuring profiles and friend lists, as well as the main chat area. It’s extremely simple here – with text and emojis being at the centre of the experience. The range on these is also extremely nice – and through our testing we got some 550 m in an urban environment.

Overall, our first impressions here are very positive – with easy-to-follow instructions. The kit is targeted at a middle-school-and-up audience, for which we feel it truly is a perfect match. Mostly simple steps are combined with a few that are quite tricky, offering a challenge that’s not overbearing. At around 150 solder joints, and quite a few screws on top, this project is great for developing fine motor skills and hand-eye coordination, while teaching about electronics and offering a great gateway into embedded programming – and most of all, leaving you with a pretty useful device at the end of it all!
More informations: CircuitMess https://circuitmess.com/pages/chatter