

Hubor Raspberry Pi Cases
Hubor is a series or Raspberry Pi accessories by Xinguard with a unique snap connector system. They are a bit hard to come by, but are some of the most gorgeous cases we've seen so far.
Pros
- Unique snap connector system
- Great build quality
Cons
- Assembly can be a bit tricky
Hubor is a series or Raspberry Pi accessories by Xinguard, a relative newcomer to the SBC world, debuting their first products in 2019. They launched this line of products as an Indiegogo campaign, raising enough money by early backers to develop the line of cases and other add-ons for the SBC.
When Xinguard reached out to us and asked us to send some samples for review, we were very intrigued. While we’ve never heard of the company before, some research later, we’ve acquired quite an interest for the unique case system in offer here.

We’d also like to take this chance to note that our opinions in this review are fully unbiased and are not influenced by any third party, including the company providing us with the units.
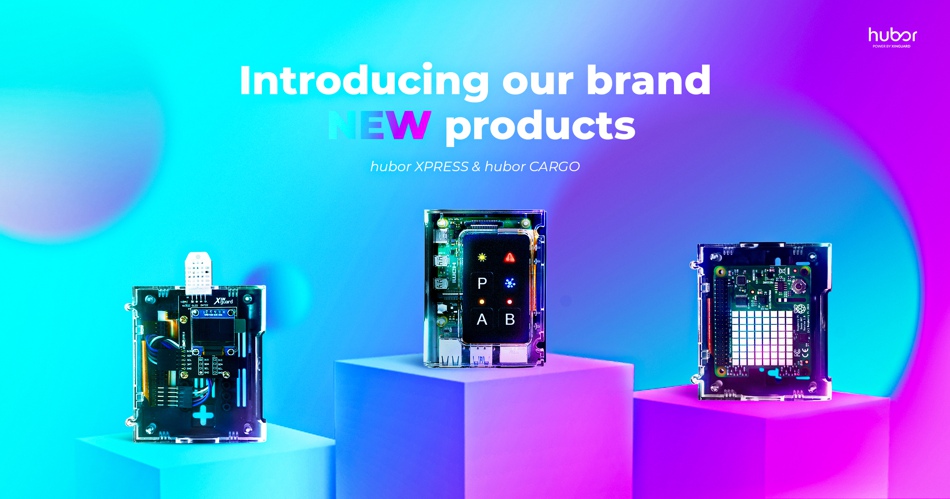
When the packages arrived at our office, we were immediately blown away by the retail packaging of the units. Sleek, almost Apple-esque, with some clever graphic design tricks running along the front of the box. The three main parts of the system – the 4Bx case for the Pi itself, and the Hx and Cx cargo modules – expansion cases that magnetically connect to the 4Bx, providing power and data to Pi HATs and custom PCBs, respectively.

We’ve also received the USB Console kit, which allows you to access the UART console on your Pi straight from your computer, without the need for a separate monitor or even a network connection. The trick up its sleeve is a clever magnetic connector and a plate that attaches to the 4Bx case, allowing for easy access to the needed pins, without twiddling with loose cables that can potentially be a safety risk.
By this point, we’re already realising that the theme of this entire review is going to be about connectors. Clever magnetic ports are the lifeblood of these cases, promising mobility and expandability that’s superior compared to a regular Raspberry Pi setup.
And we’d have to agree with that, keyword: once, once you get over the initial setup phase.
The initial assembly is… how do we put it – a mixed bag. Some things are clear enough, but some are just completely arbitrary. Where do the small screws go? When do you use the little plastic nuts and bolts provided with the Hx case? What exact pins are you supposed to plug the keypad and the LEDs into? These are just some of the issues out team ran into while trying the cases out for the first time. Why, you might ask? Because the assembly instructions are nowhere to be found! And since the boxes are modular and can be configured in a few different ways, you’re always left with a few spare parts, and a feeling of “I am almost sure I did something wrong, somewhere, somehow.” After the super-clean design of the boxes, we expected a simple, beginner-friendly installation procedure, but in the end, it took us more than an hour to painstakingly research the sparse documentation on the internet and piece the puzzle together. A little leaflet with all the parts labelled, and with step-by-step instructions would have done wonders, and we don’t see why this isn’t a feature already. There’s enough space in the box, and even if it raises the production costs up, we think it’d be a significant usability improvement for first time users.
After that, it was smooth sailing though. And it turned out we got it right the first try! Credit where credit is due, Xinguard built these to a pretty high standard, and all the prodding and poking while assembling didn’t leave a mark. Even the slightly flimsy looking FFC cables (and these always look a bit dainty, don’t get the wrong impression here) have held up while being plugged in and out of the 40-pin connector on the Pi, which is quite an impressive feat, given how hard it is to get the cable off of the header once it’s snugly fit on there. The acrylic is also pretty high quality, with no blemishes or stress lines in the transparent finish, something rarely seen on SBC cases. This gives us confidence that Xinguard is using high quality moulds, and it shows in the end result – the case feels heavy and robust and there’s little to no creaking and flexibility once assembled. We can confidently say that these are some of the best-looking and best-feeling cases we’ve had our hands on.

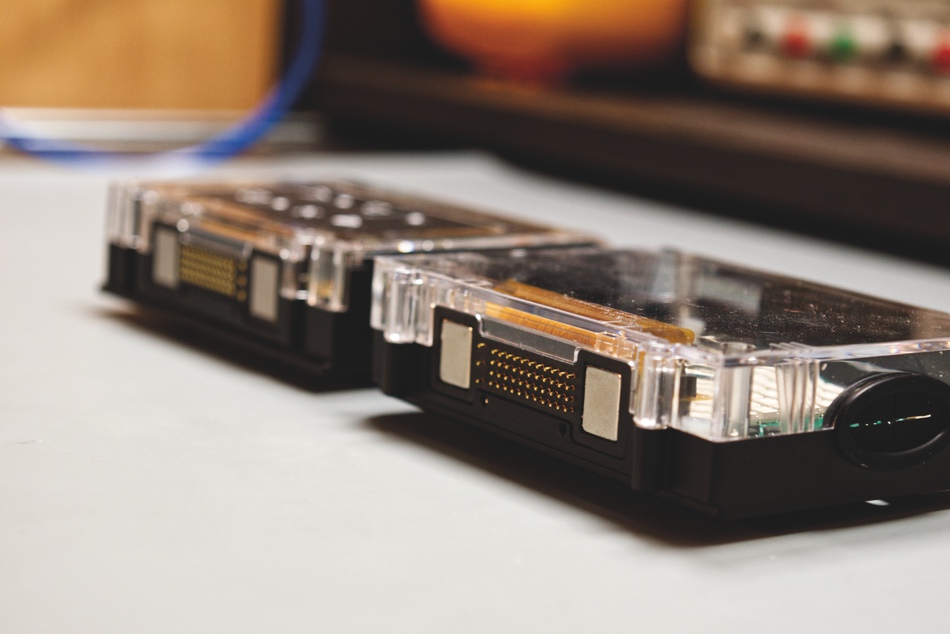
The signature magnetic connector is on the side of the case, with a neat 4-by-11 grid of spring-loaded pins (or pads, depending on whether you’re looking at the cargo add-ons or the main case itself), bringing out the entire GPIO header to the side. This is one of the most elegant solutions to having an accessible GPIO in a case, since most Pi enclosures limit or completely prevent access to these. There are also two powerful neodymium magnets per module, which snap the two halves of the connector in place and align them just right, ensuring a good electric contact. The entire process of connecting and disconnecting feels effortless and is rather smooth, instilling confidence in the durability of this part of the system, as well.

With that brief run-down of the physical specifications, we can move on to the world of modularity that the system opens up, and which Xinguard proudly touts as one of the main marketing features. Since the modules stack side-to-side, it’s now possible to attach a HAT to a Pi sideways, a concept we’ve never considered before.
The HAT (in our case, a Sense HAT) can sit in its own enclosure (the Cargo Hx) and be connected and disconnected easily, at will. This saves so much time by limiting the amount of wiring needed, as well as removing the need for any tools at all – your HAT literally snaps onto your Pi like a LEGO brick. Even better, the Cargo Cx module is optimised for custom PCBs, and as such, can be a great prototyping solution. You do all the wiring in the case, and not on your Pi, and when you’re done, you can simply snap the modules together.

For someone who plays with Pi hardware quite a bit, this is an amazing way to be able to interface pretty much anything you can think of with your Pi, while all of your parts are protected from dust and electrostatic discharge, safely in a case.
And on top of that, the cases look really, really good. They look keep-them-on-your-desk good. Instead of a mess of wires you get a clean, pretty set of boxes that snugly fit together. And look really good. Together. On your desk. In your office. Or school. Or wherever you have a desk.

…or on your wall. As long as it’s metal. Because you can mount the case vertically on a magnetic surface thanks to the four provided neodymium magnets included with the each module, which we find is a really nice addition.
The keypad-and-LED module is also quite a nice addition. The installation is a little tough because the lack of proper pinouts, but the value of this peripheral is undeniable. Together with selection of symbols and letters on the faceplate, this module can be easily used as a control system for many projects, without having to utilise extra hardware. Again, quite a rare feature for a Pi case.
Since we haven’t found a proper connection pinout diagram for this module, we’ve made our own chart to help out in utilising this hardware in code.
“Network” LED —> GPIO #5
“Warning” LED —> GPIO #13
“Sun” LED —> GPIO #19
A button LED —> GPIO #26
B button LED —> GPIO #6
A button (pull-up) —> GPIO #17
B button (pull-up) —> GPIO #27
P button (pull-up) —> GPIO #22
* all GPIO pins are the GPIO port numbers, not the physical pin numbers (ex. GPIO #17 is on the 11th physical pin. Pin diagrams can be found on the official Raspberry Pi website).
As a small side note, we’d like to see a tweak with the bottom portion of the 4Bx case, with a cut-out for easier access to the SD card. Once you get the card in there, you have to use a pair of needle-nosed tweezers to get it out. A small cut-out would allow to remove the card using a fingernail, without any extra tools required.

Overall, we find these to be amazing, especially in an educational setting, where pre-made Cargo modules with hardware can be provided to students, eliminating the need to assemble and fiddle around with electronics in a software-oriented classroom, while also preventing damage to the components. This is a great step up in usability of the Raspberry Pi line, which brings many new exciting uses for the platform.
We’ve pretty much said most of the things to be said here. We find these cases to be extremely durable, high quality and functional. Above all, they are stylish and sleek. There are a few minor drawbacks and suggestions we’d like to offer, but they don’t detract from the value of these little enclosures, for which we can only say that they are some of the most unique cases on the market right now. We’d note that during the review, Xinguard reached out to us and notified of the upcoming inclusion of the user manual in future revisions. We thoroughly recommend these, and can’t wait to see what Xinguard brings out next.
The following code is for the demonstration we have shown above. Pressing the A button, the Sense HAT displays the mehatronika.png file, found in the project folder. By pressing the P and B buttons, different coloured letters appear, them being P and B, respectively.
# Dependencies
import RPi.GPIO as GPIO
import time
from sense_hat import SenseHat
sense = SenseHat()
sense.set_rotation(90)
# Pin Definitons
butPinA = 27 # These are all pull-up
butPinB = 17
butPinP = 22
# Pin Setup
GPIO.setmode(GPIO.BCM) # Broadcom pin-numbering scheme
GPIO.setup(butPinA, GPIO.IN) # Button pin set as input w/ pull-up
GPIO.setup(butPinB, GPIO.IN)
GPIO.setup(butPinP, GPIO.IN)
print(“Press CTRL+C to exit”)
try:
while 1:
if GPIO.input(butPinA) == 0: # button is released
sense.load_image(“mehatronika.png”)
if GPIO.input(butPinB) == 0:
sense.show_letter(“B”,[0, 255, 0],[255, 255, 255])
if GPIO.input(butPinP) == 0: # button is released
sense.show_letter(“P”,[0, 0, 255],[255, 255, 255])
except KeyboardInterrupt: # If CTRL+C is pressed, exit cleanly:
GPIO.cleanup() # cleanup all GPIO
More informations: http://www.xinguard.com
GitHub link: https://github.com/magazinMehatronika/Hubor-Raspberry-Pi-Cases-Review