

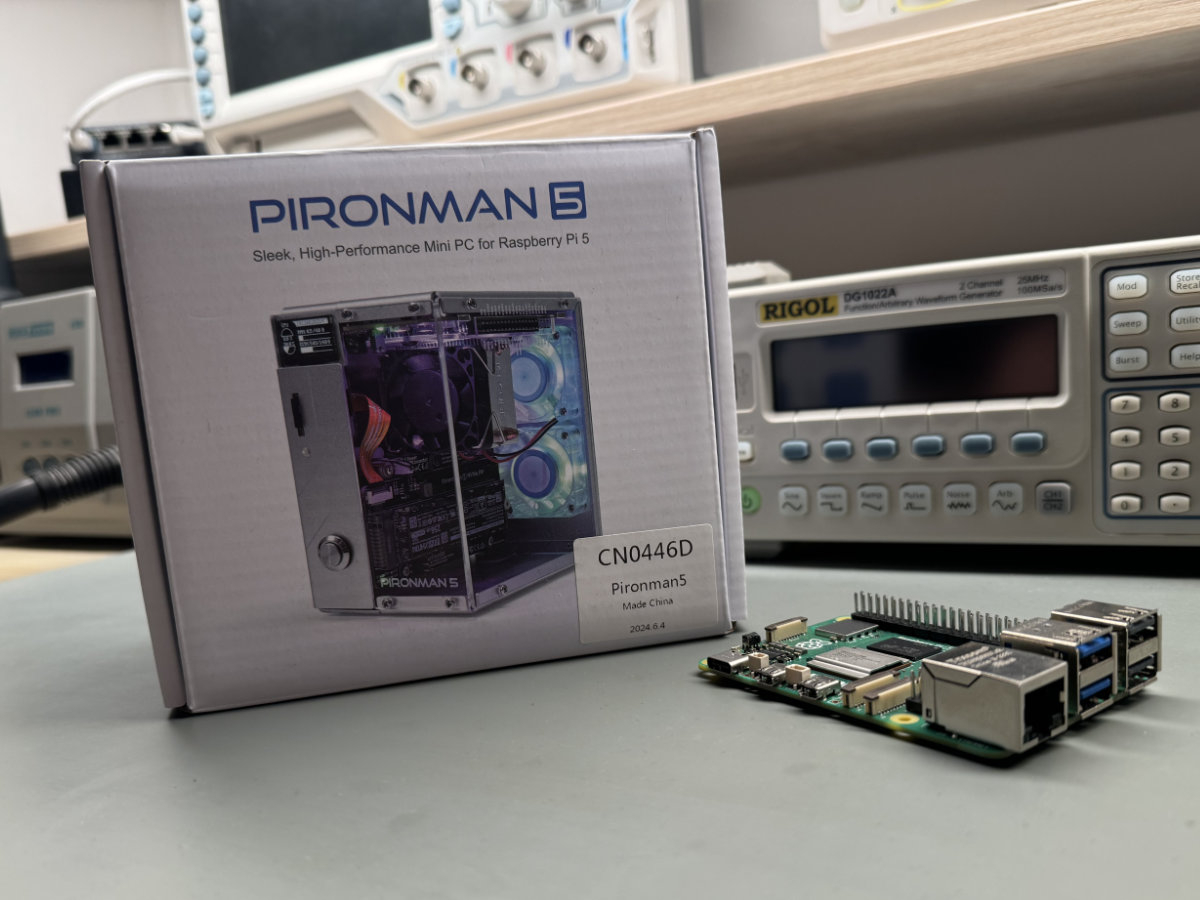
SunFounder Pironman 5
For $79, the Pironman 5 case brings a surprisingly solid desktop-like experience to the Raspberry Pi 5, tying in excellent cooling with NVMe support and several other nice-to-haves.
Pros
- Top-tier cooling
- NVMe drive slot
- Simply looks good
Cons
- Bad Wi-Fi performance
- Some ports are wobbly
- Might be big for some
SunFounder’s newest Raspberry Pi-based gizmo is the do-it-yourself Pironman 5 “Mini PC” case, drawing inspiration from flashy high-end PCs — and taking your regular old Raspberry Pi 5 and turning it into a package which wouldn’t look too out of place in a gaming setup built for babies.
This isn’t the company’s first go at the whole “shrunken-down gaming PC” concept, as the Pironman 5 is actually an updated (and heavily redesigned) version of an earlier Pironman V2.0 model (which is, in turn, just a minor hardware revision of the Pironman V1.0, so for the sake of simplicity we’ll group them together). The attractive design and top-notch thermal performance provided by the embedded IceCube cooler made the original model one of our favorite cases for the Raspberry Pi 4 (review here).
And trust us, we were genuinely sad when we realized that all the physical changes on the Raspberry Pi 5 meant it wouldn’t be compatible anymore.
As bummed as we were about this, seeing new products pop up left and right was quite exciting — the first few months after a new mainline Raspberry Pi hits the market are always packed! Raspberry Pi themselves designed their first ever actively cooled cases for this new board. The newly added PCIe interface opened up a world of possibilities for accessory designers. Third-party manufacturers did not disappoint, and within weeks there were already hundreds of new and updated HAT and case designs, and whatever other tacky add-ons people came up with.
All things considered, a redesigned Pironman compatible with the newest member of the Raspberry Pi family was a no-brainer for SunFounder — but just how good is this new model and how well does it leverage all the new hardware available on the Raspberry Pi 5?
Build process: long-ish, but enjoyable
The Pironman 5 ships as a DIY kit — and there’s some, or rather, a lot of assembly required. While the sheer amount of parts can look daunting, the build process is quite enjoyable, if a bit long. The provided instruction sheet was great and explained every step in detail. Most of the more fragile (ribbon cables, foam pads, etc.) and easy-to-lose (small screws and similar) parts had spares included, just in case.

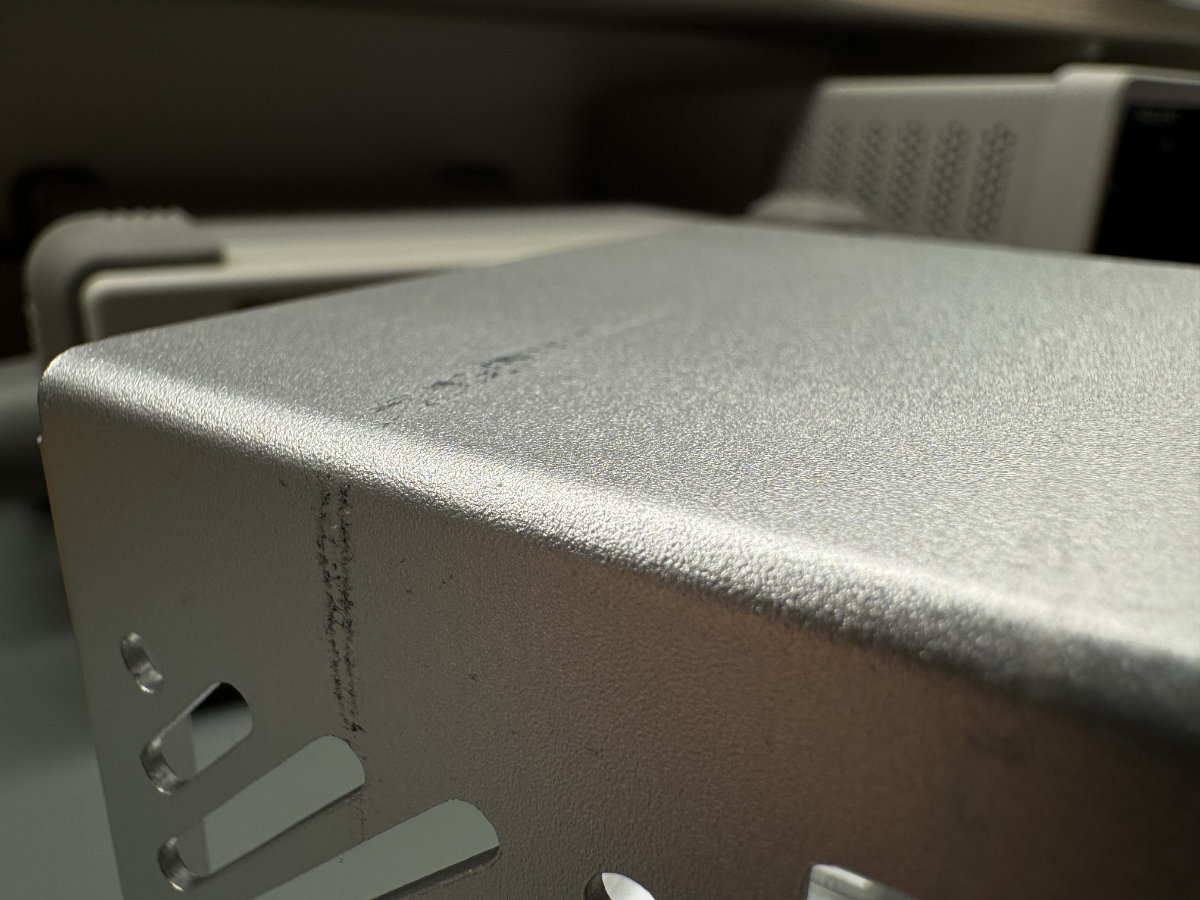
Immediately after taking out the two main aluminum plates, we noticed black lines running along the top and sides. We were initially worried about these being scuff marks on the anodized coating, and were ready to blame the postal service (and perhaps also call for more padding in the box). Luckily, a quick wipe down with isopropyl alcohol managed to remove the marks, which ended up being some sort of organic rubbery residue, probably left over from manufacture — likely due to a worn-down conveyor belt or something similar. Not a big issue, but perhaps something QC should have caught and fixed.
After this minor initial setback, the build process was mostly smooth. The first thing the manual has you do (after separating the two aforementioned aluminum plates, which are, for shipping reasons, fixed together) is install six standoffs which will serve as supports for the Raspberry Pi itself, as well as two of the Pironman’s custom breakout boards: the USB HDMI adapter and the MicroSD extender (we’ll be using official names as per the instruction sheet, for those who want to play along at home). Pay close attention to standoff lengths, as this step uses 5 mm, 6 mm and 8 mm ones. Telling them apart is easy, thankfully, as the little zip-lock bags they come in all have labels.
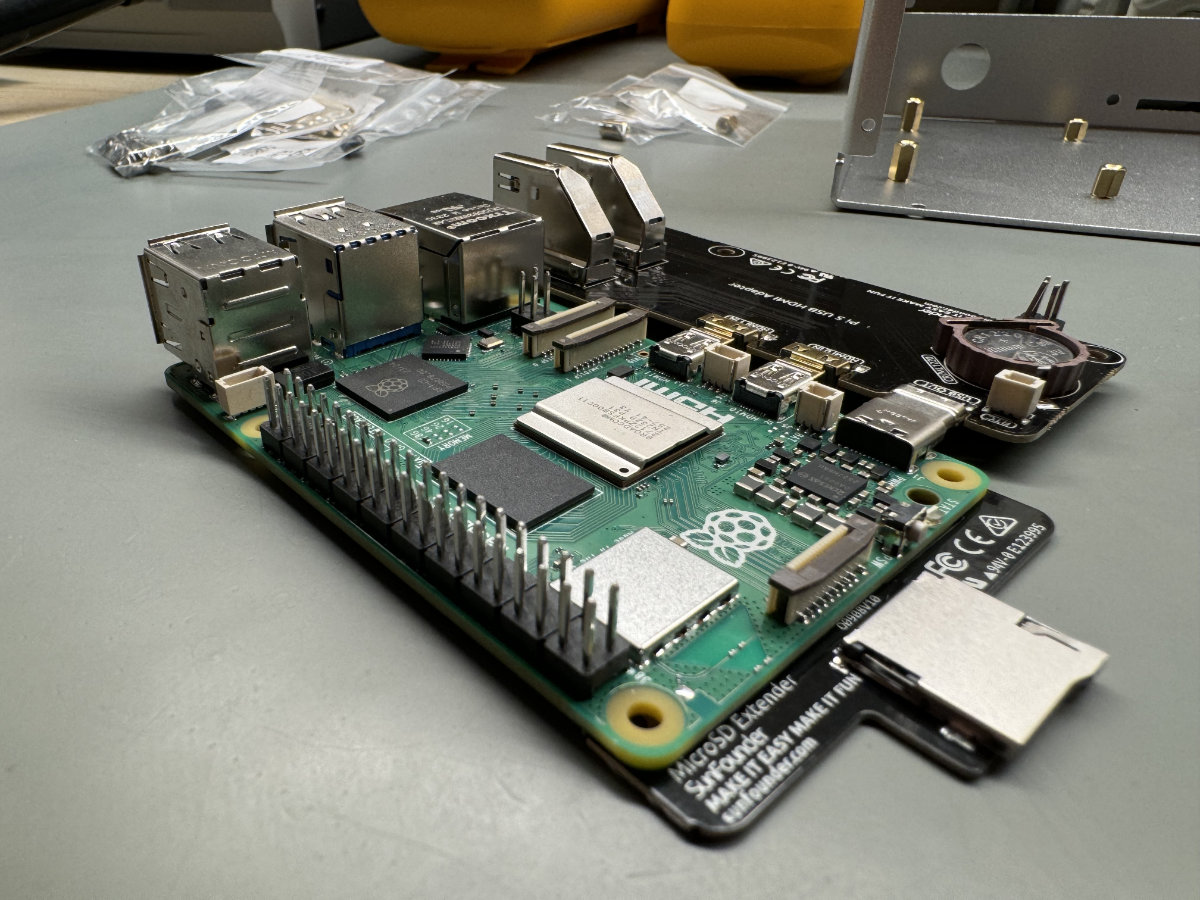
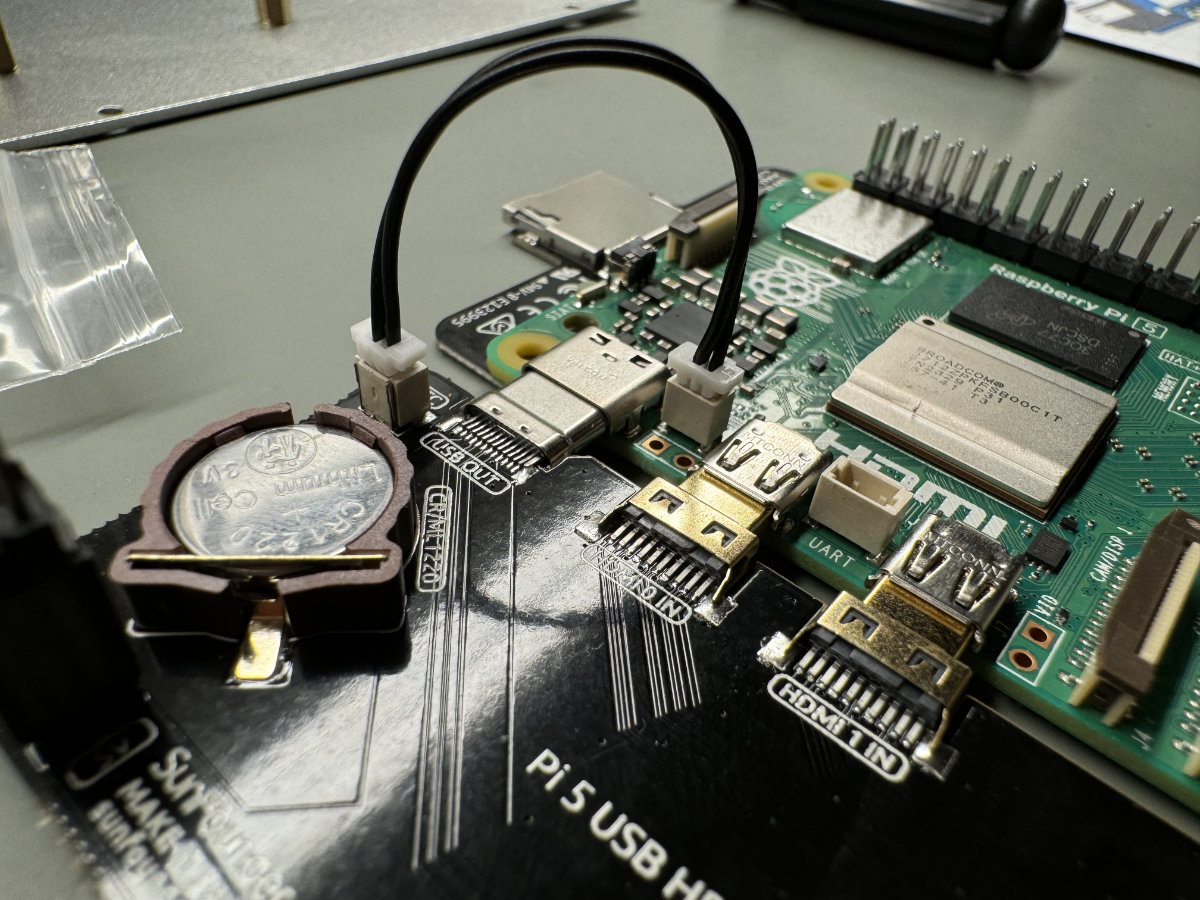
Both the USB HDMI adapter and the MicroSD extender attach directly to the Raspberry Pi’s ports — and yes, it does feel a bit weird shoving an extension board right into the SD card slot or interfacing two boards by directly connecting a USB and two Micro HDMI ports together. The latter required a little bit of force, and given how flimsy these small HDMI connectors can be, we definitely didn’t feel the most comfortable doing this (to make matters worse, this was our fancy pre-release review unit Raspberry Pi 5 — who’d want to break that). After a little bit of persuasion, everything did come together — and we were just glad nothing got snapped off. Our Raspberry Pi lived!
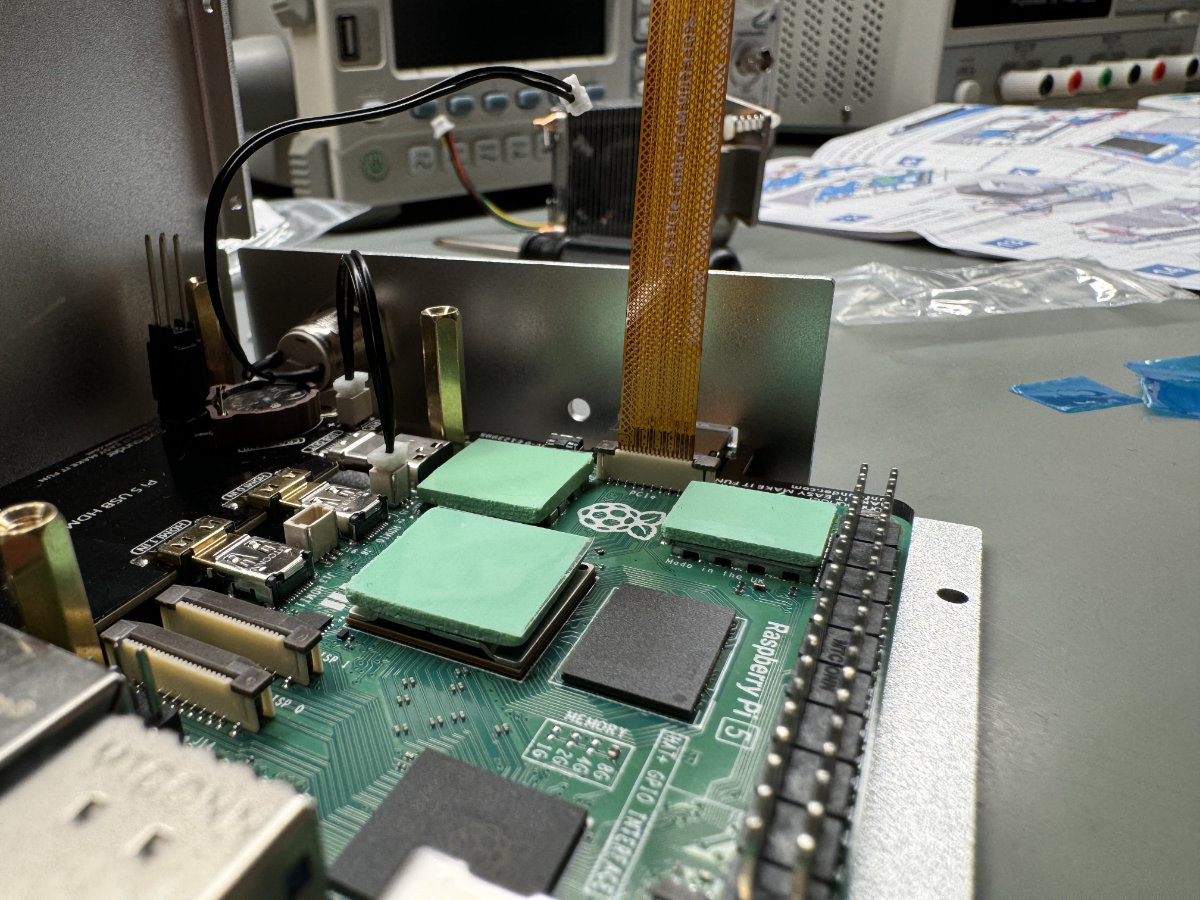
The next set of steps has you connecting cables, headers, buttons and batteries and attaching all the boards you’ve connected together previously to the standoffs. A set of thermal pads later (don’t forget to take off both the tough blue protective tape and the smooth clear one) and we were ready to snap on the IceCube cooler. Aside from the slightly different shape to accommodate for new chip arrangement, it also differs from older revisions in the way it’s mounted — finally using proper mounting push-pins (thanks to the Raspberry Pi 5 finally having dedicated heatsink mounting holes) instead of nuts and bolts, which both makes installation much easier and provides proper tensioning, ensuring good contact between the thermal pad and surfaces it touches.
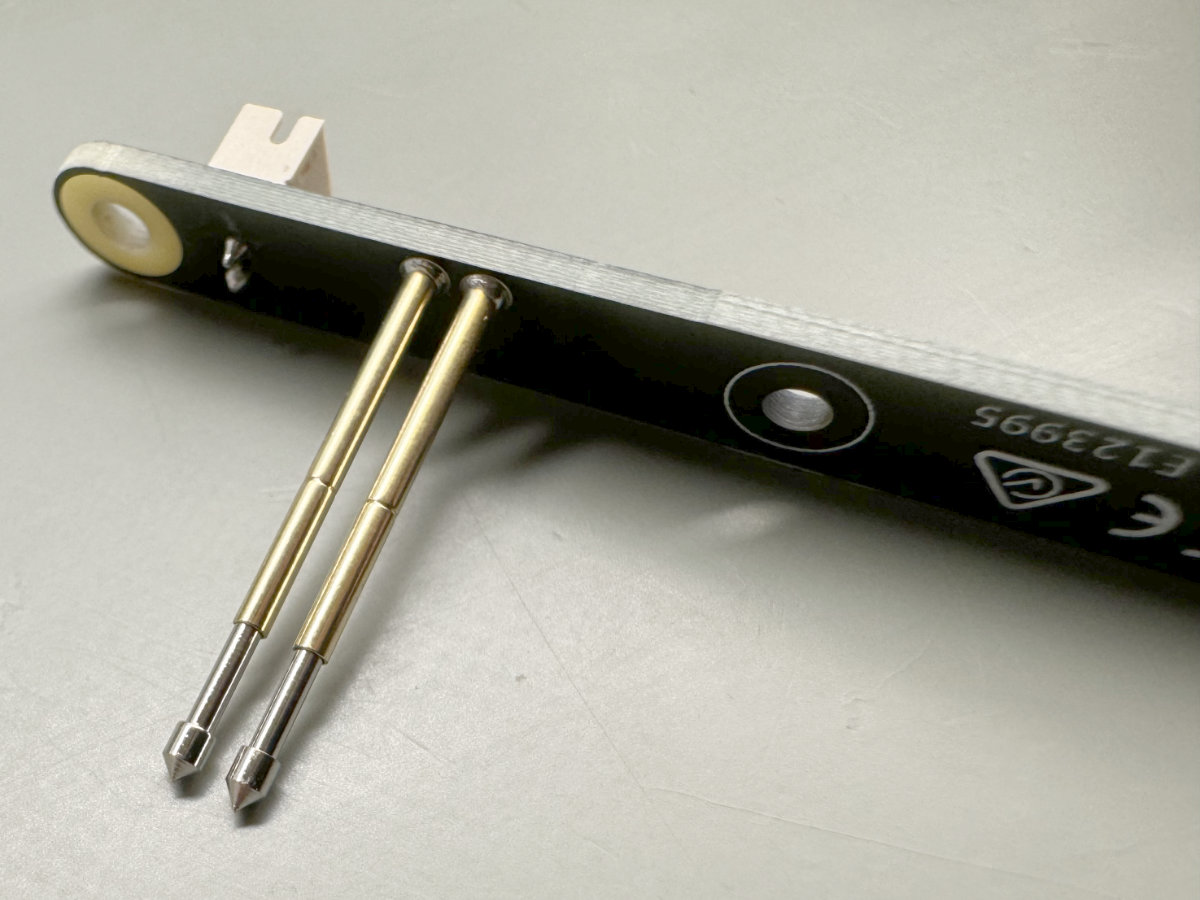
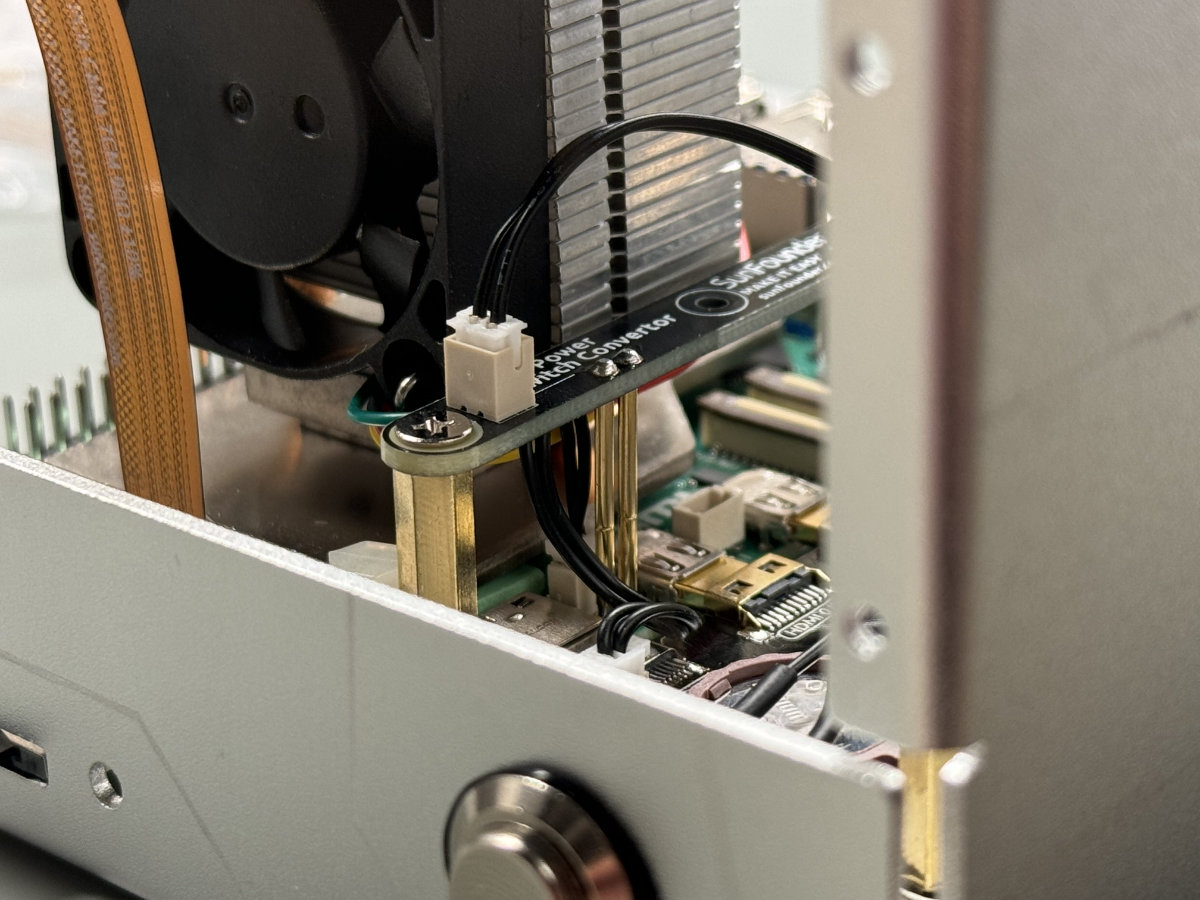
The Raspberry Pi 5 also has a dedicated power button, as well as a set of pads meant for attaching an external one, if required. You’d usually solder the required wires to these pads, but since SunFounder wanted to simplify assembly (and, understandably, not everyone would be too happy soldering stuff to their Raspberry Pi anyways), so a little riser board (somewhat verbosely called the Power Switch Converter) pokes at these pads with a set of the longest pogo pins we’ve ever seen and exposing the button interface through a little 2-pin connector. We found this a really cute solution and thought we should mention it.
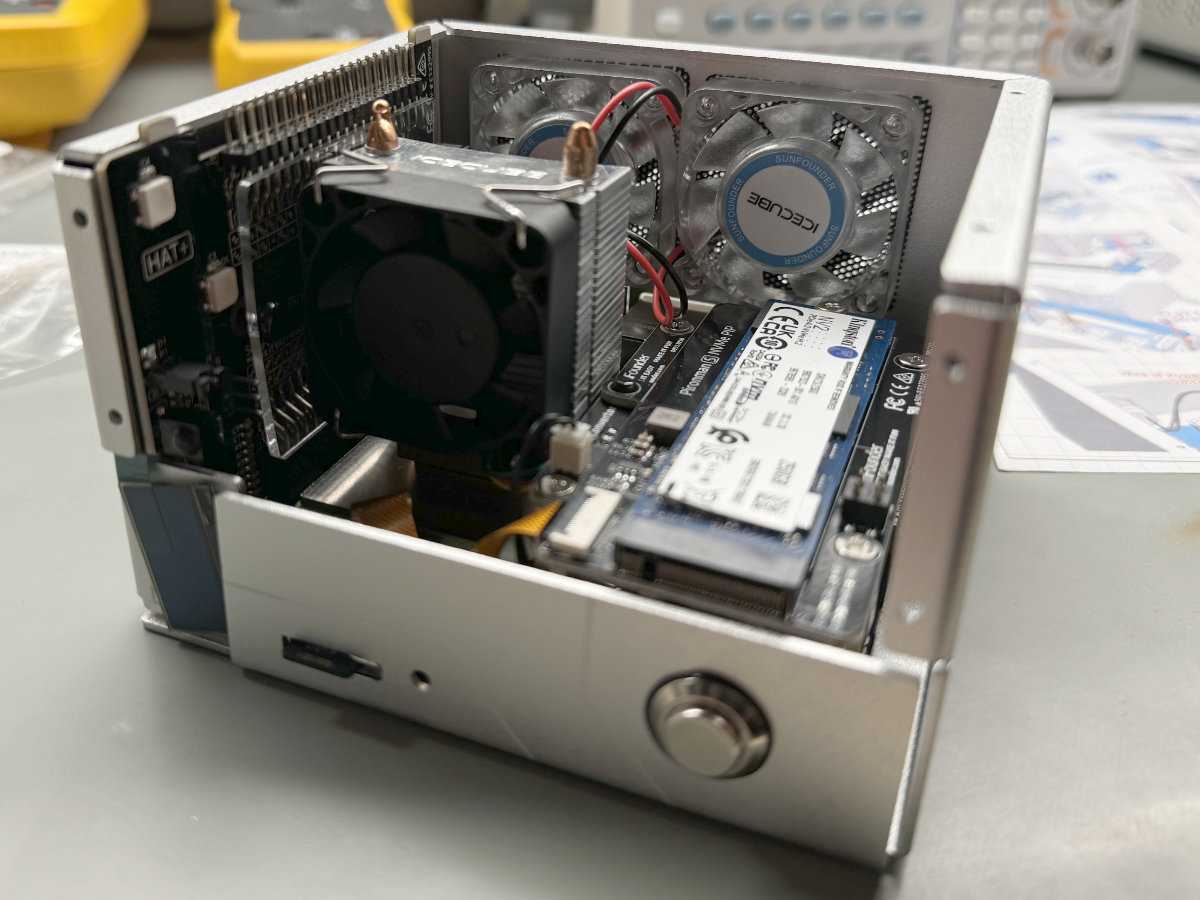
The Pironman 5’s NVMe PIP board sits above the USB HDMI adapter and attaches to the brass standoffs using a pair of screws and to the Power Switch Converter itself using a plastic rivet. Leaning this board onto the riser was a pretty clever move to ensure more stability, although the holes on the two boards which should align for the rivet to pass through didn’t do so initially, which required a bit of fiddling around and loosening a few screws before everything (more or less) fell into place.
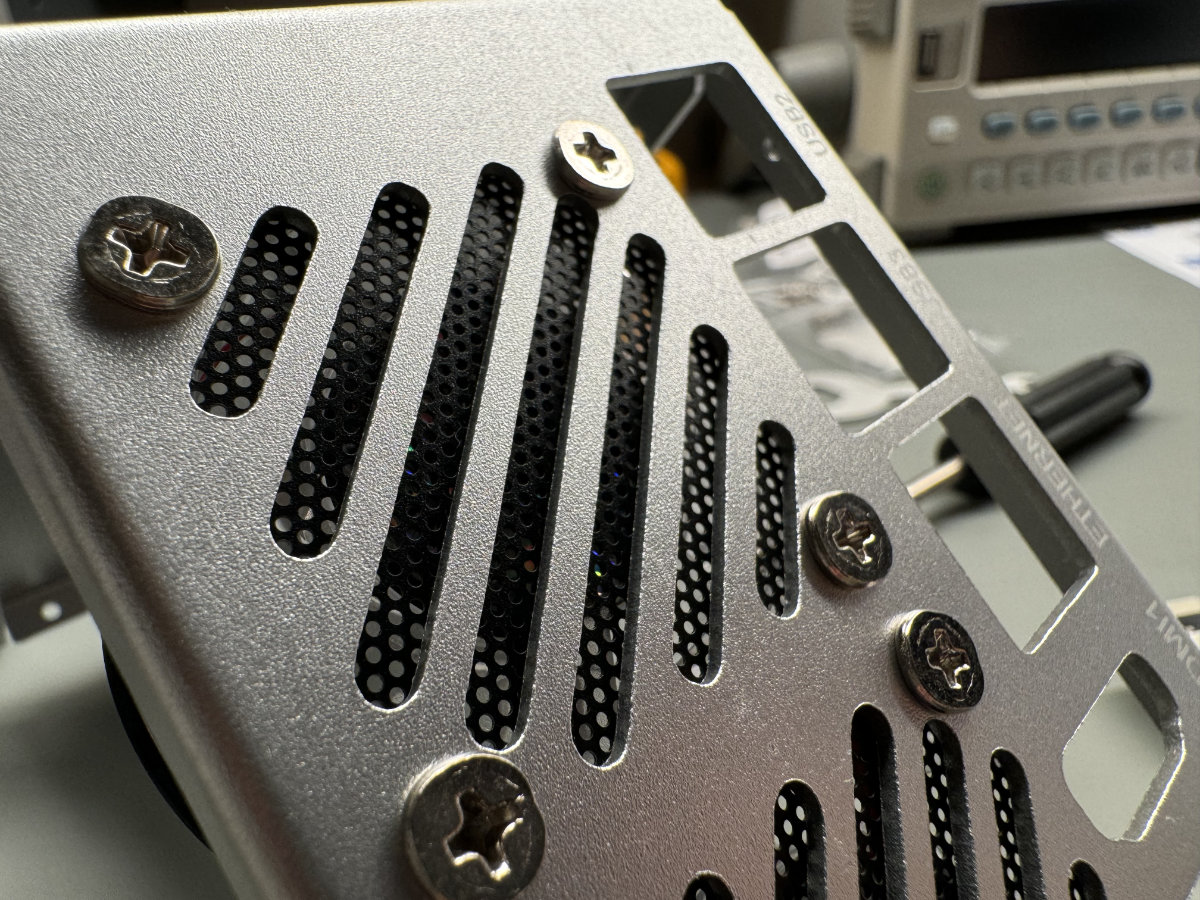
After this, it was time to install the two RGB intake fans. The procedure is pretty simple: you sandwich a little dust filter between the backplate and the fan and screw four self-tapping screws into the fan chassis. Easy, right? What we didn’t like, however, was that self-tapping part. The mounting holes on the fans should’ve been pre-threaded, like every single other screw hole in the kit. We were constantly afraid we’d somehow wreck the soft plastic while fastening these — and we ended up with two screws, one per fan, not really biting into the plastic and just spinning endlessly when fastened (which is interesting since other reviewers have also had this exact issue with one screw per fan failing to tap properly).
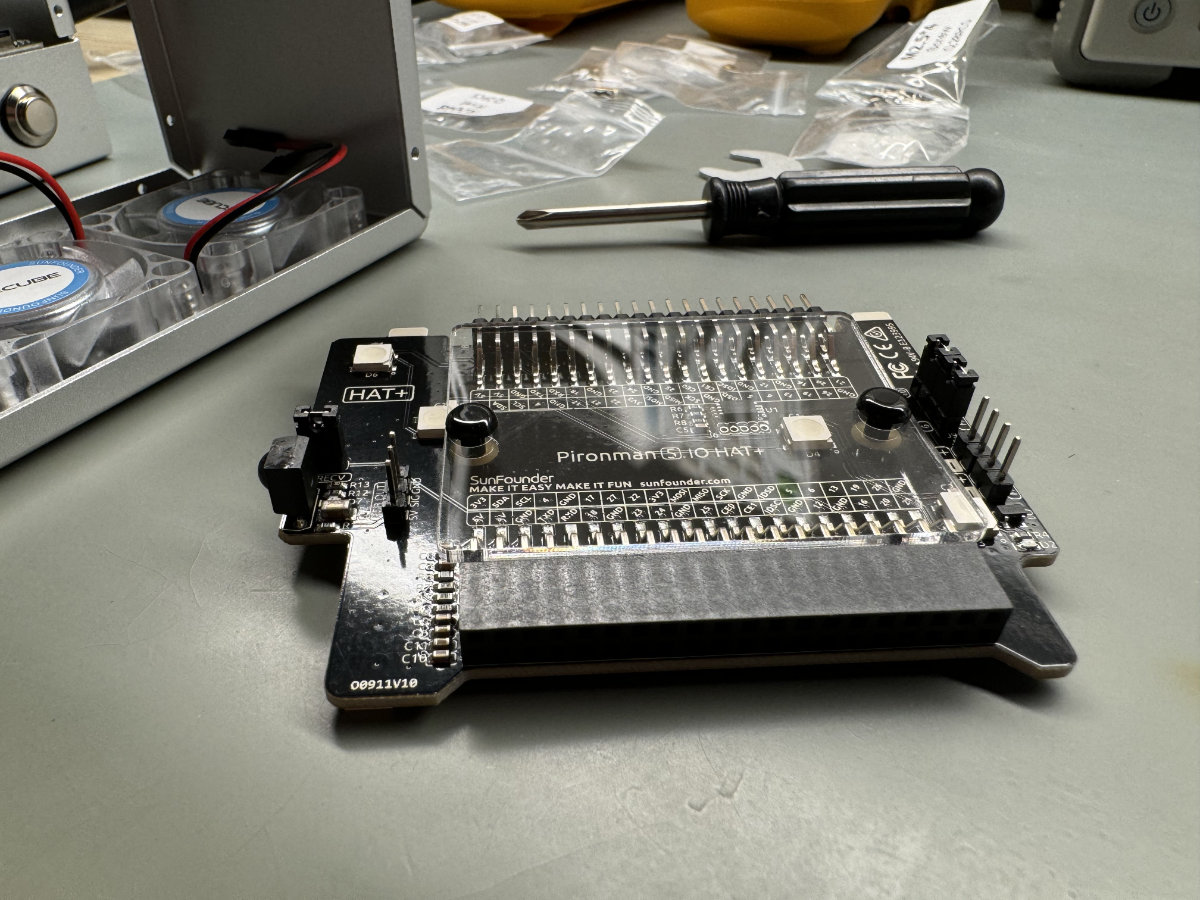
By this point, the Raspberry Pi is buried pretty deep inside the case, and there’s no practical way of accessing the GPIO anymore. That’s where the final extension board comes into play – the IO Expander. This board serves double duty, both interfacing with the OLED info screen and providing power to the RGB fans, and bringing the GPIO lines out to the acrylic side panel. In order to prevent overheating issues due to the proximity of this board to the main heatsink, there’s an acrylic panel mounted to the board using two rivets. The way it’s held in place is a little lousy — it rests on the GPIO pin headers and is held in place with two plastic rivets which put just a little too much pressure on the acrylic, causing it to warp slightly, raising its edges. This wouldn’t be a big deal if the main IceCube heatsink wasn’t right next to — almost touching — this board. The little warp in the acrylic was enough to cause it to rub against one of the radiator fins, bending it a bit during installation. We managed to easily fix this after the board was in place using a pair of precise pliers, but still – perhaps a different rivet (or a different mounting style overall) would have been a better choice.
Finally, it was time to finalize the Pironman 5 build by putting the outer panels of the case together. The final two — large acrylic windows — were very easy to install and align perfectly thanks to little nubs featured on some of the extender boards which align with slits in the acrylic. It was really satisfying seeing it all come together so nicely. Avengers assemble!
On a side-note: the protective paper on the acrylic panels was oddly prone to tearing instead of coming off in one clean peel. This might be on us — but we’ve never encountered this before. The GPIO labels on one of the side panels were especially annoying, as the paper essentially disintegrated around the lettering, leaving little bits attached in the spaces inside closed letters, like o and d.
Still, we feel like these little issues can be overlooked, and a minor revision of some parts and slightly tighter QC could genuinely fix every singe one we mentioned so far. The building experience is, as we mentioned at the beginning of this whole section, quite enjoyable — and we wouldn’t object to doing it all over again if we had to.

The Pironman 5 hardware: more than a simple case
SunFounder calls the Pironman 5 a “Mini PC case”, and we feel like it’s a fitting descriptor. More than just a way to protect and cool a Raspberry Pi, the case also adds an NVMe slot and IR receiver, provides full-size HDMI ports and (definitely most importantly) adds some cool RGB lighting.
This NVMe slot nominally offers PCIe Gen 2 speeds (the Raspberry Pi 5 offers only a single PCIe lane certified as Gen 2, which works out to 500 MB/s), but the lane can be forcibly bumped up to PCIe Gen 3 speeds (1 GB/s) in the SBC’s firmware. Keep in mind that doing this may introduce stability issues. While these theoretical numbers are a good indicator of the sort of SSD speeds you should expect, we’ll test out real-world NVMe drive performance later in the review.
At the heart of the Pironman 5’s cooling system is an updated SunFounder IceCube tower cooler, designed for the Raspberry Pi 5. Oddly enough, even though SunFounder offers the older Raspberry Pi 4 version of this cooler as a standalone purchase (and yes, this older version was at the heart of the original Pironman V1.0/V2.0 units), there’s still no way, at least at the time of writing, to separately obtain the new model. The fan on the IceCube cooler is PWM-enabled this time around, and interfaces directly with the Raspberry Pi 5’s new fan port.
For additional cooling there are two RGB IceCube case fans. We’ve already seen these before in several SunFounder products. Here, they’re used for channeling additional air through the case should the temperatures rise above a certain threshold, which can be set in software (more on this later in the review). Even though RGB, these fans simply cycle an effect and don’t offer any control over lighting. There’s no PWM control here, either.
The Pironman 5 doesn’t add much in the way of external IO, but it does convert the two Micro HDMI ports into full-size ones, and throws in an IR receiver for media center usage. There’s also an RTC battery holder. The GPIO’s been brought out to the side panel (which might seem minor, but many cases end up just burying the GPIO and effectively rendering the header useless) and the rest of the Raspberry Pi’s ports all live on the back.
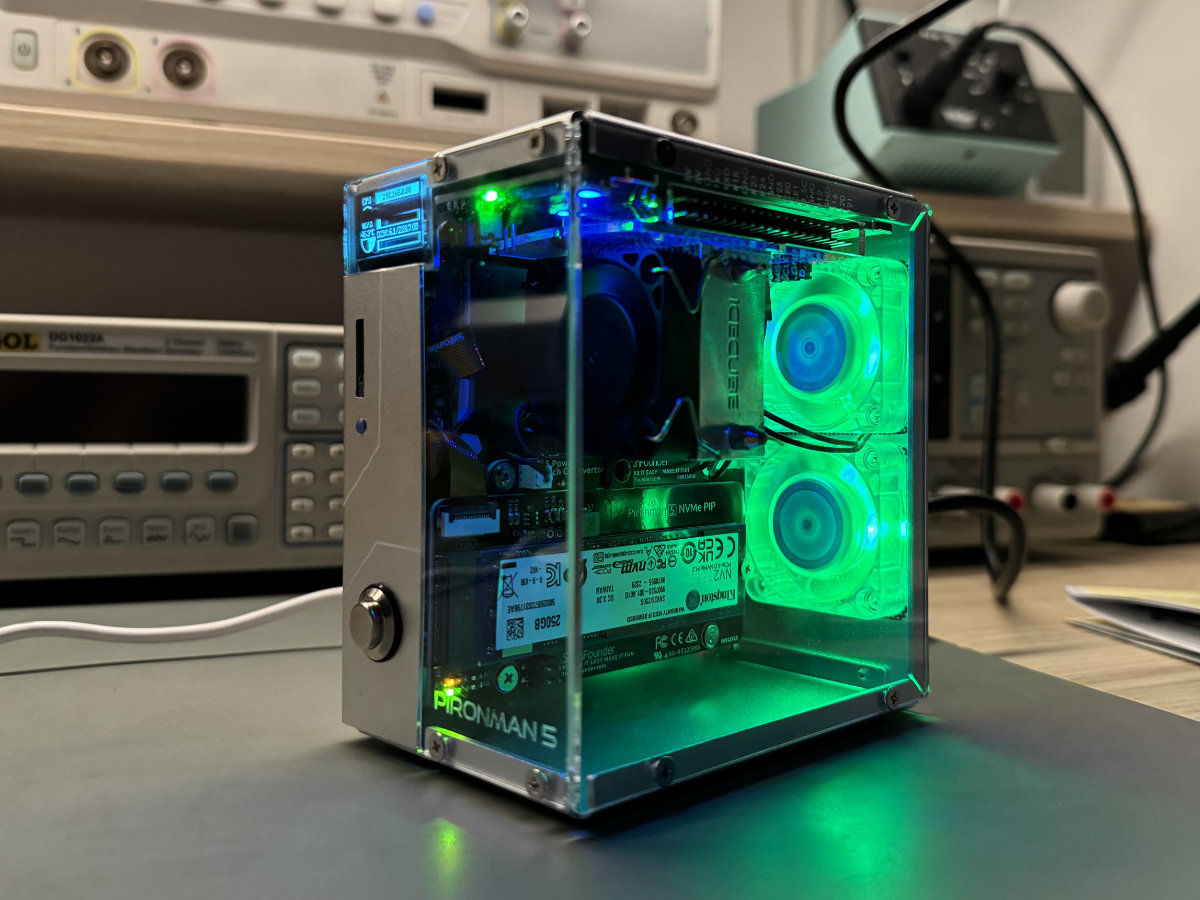
The front panel is pretty clean, featuring only the power button, microSD card slot and an OLED info display. This display works together with the Pironman software to constantly display the system’s IP address, temperature, CPU load and RAM and storage usage.
The Pironman 5 software: setup overview and features
There’s software install required for a Raspberry Pi case!? Well, yeah — but it shouldn’t come as much of a surprise given how much extra hardware has to get covered here. Even though some of the basic features will (somewhat) work right out-of-the-box, others, like the OLED info screen, fully rely on the Pironman software package being present.
But first, before installation, there are a few system settings to be tweaked. Firstly, if you chucked an NVMe drive into the case, you might want to copy over all your system data from the SD card over. Raspberry Pi OS now features a built-in utility for this — the SD Card Copier — which makes the procedure a breeze.
Remember to format your drive before copying any files, though, as the procedure can otherwise fail at times. This happened to us, so we ended up directly flashing an OS image to the NVMe using the Raspberry Pi’s network boot option.
After this, you’ll want to edit a config parameter in the Raspberry Pi’s EEPROM by running:
sudo rpi-eeprom-config -e
and making sure that the BOOT_ORDER parameter is set to:
BOOT_ORDER=0xf416
This tells the firmware to first try and boot off the NVMe drive, and if that fails, to attempt to boot from an SD card or a USB drive — in that order.
In order to force the Raspberry Pi to use PCIe Gen 3 speeds, you could also add:
dtparam=pciex1_gen=3
to the /boot/firmware/config.txt file. Keep in mind that this might lead to some system instability.
Finally, you’ll want to run sudo rpi-eeprom-config -e again, this time making sure that the POWER_OFF_ON_HALT parameter is set to:
POWER_OFF_ON_HALT=1
With all this setup out of the way, you can pull the Pironman 5 software from GitHub and install it:
cd ~
git clone https://github.com/sunfounder/pironman5.git
cd ~/pironman5
sudo python3 install.py
All that’s left now is to perform a system reboot. The software daemon will automatically launch during system startup. If you’ve done everything correctly, the OLED screen, as well as the controllable RGB LEDs inside the case should come to life.
The PWM fan on the IceCube cooler is controlled automatically by the Pi’s built-in thermal management system, but the two RGB case fans are controlled by the Pironman software. There are five profiles on offer, ranging from these fans being always on to them kicking in only after the BCM2712 reaches 70 °C. The control scheme is simple — these fans spin up at a certain temperature threshold and stop spinning once the heat sufficiently dissipates.
As we already mentioned, there’s no way to manually control the RGB fans’ lighting. However, the Pironman 5 case features multiple additional RGB LEDs. These can be manually set to any color desired, and there are also seven lighting effects to choose from.
All this customization can be done using terminal commands, but also using a very handy online dashboard hosted at http://localhost:34001 (naturally, also accessible on the local network using the local IP of your Raspberry Pi, which you can handily read off the little OLED info screen).
The terminal route does offer more granular control, and also several settings not otherwise accessible — but the dashboard presents a bunch of current and historical system data, as well as easy access to log files. Very handy!
Look and feel: A bite-sized gaming PC
Let’s state the obvious: the Pironman 5 is adorable. Deviating slightly from its predecessor’s chunky steampunk looks, the new model adopts sleek and clean lines and looks much more like a modern gaming rig than something out of a Marvel movie — which its name suggests.
Even the orientation of all the PCBs inside the case mimics a traditional PC build closely, with the Raspberry Pi 5 (the “motherboard”) mounted against a side panel and RGB LEDs lighting up the interior — and even the little OLED status display is actually a feature found on some premium desktop cases.
We were a bit surprised, though, that the Pironman 5 is still essentially the same size as its predecessor, as it did seem a lot larger (to us, at least) in promotional pictures. Don’t get us wrong, there was nothing in there that suggested it was larger (as most of the promo shots had no reference to compare the size against), but the design itself reminded us so much of high-end PC rigs that we simply assumed it’d be a bit chunkier than its predecessor.
As small as it is, the case does not feel flimsy at all. In fact, our only real complaint regarding the build quality is the noticeable wobble present on the HDMI and USB-C ports. It seems that the USB HDMI adapter is mounted in a way that allows for some wiggle room which we aren’t particularly keen on, especially given the way it’s connected to the Raspberry Pi (which we grumbled about already, so we won’t be repeating ourselves here). We tried tightening every screw and standoff holding this adapter board in place, but to no avail — the ports still wobbled. This likely won’t damage the Raspberry Pi, but exercising some caution while plugging and unplugging cables should go a long way in preventing any (however unlikely) mishaps.
Performance: Thermals and more
Solid software, decent build quality and sleek look are all nice-to-haves — but undoubtedly the most crucial aspect of any SBC case is solid cooling performance. With every new generation of SBCs released, this is getting more and more relevant, as there’s a general upward trend in the amount of heat produced by these little boards.
Having experience with several products based on the SunFounder IceCube design, we were more than confident, even before testing, that there wouldn’t be any nasty surprises here.
And we were absolutely right! We tested performance under load using s-tui, and configuring the case fans to always run. Albeit the ambient temperatures in our testing lab were a bit warm at 29 °C, we saw idle temps hovering around 35 °C, while — at a stock 2.4 GHz clock — temperatures under stress never reached above 56.2 °C during our hour-long test run. The system was surprisingly quiet, even with all of its fans on. The main PWM-enabled fan spun up to around 1200 RPM.

We also tried the test with the case fans set to balanced, in which case they activate at 67.5 °C. This let the temperatures climb up to around 65 °C within a few minutes. The main PWM fan spun up to 2300 RPM, but temperatures still kept slowly creeping up. Some 5 minutes in, the two case fans finally kicked in and lowered the temps back to 62.5 °C. This cycle then kept repeating every few minutes, with the case fans turning off after the temps stayed below the threshold for long enough — which in turn caused them to slowly start rising once more.
This is all pretty impressive — so we naturally had to also check how well the thermal system could handle a CPU overclocked to 3.0 GHz. If you’re unsure on how to safely overclock your Raspberry Pi 5, you can check out our handy how-to here.
This time around, we only tried the case fans in the always on mode, and ended up with a peak measurement of 63.4 °C after 40 minutes under stress. This is really impressive for such an intense OC — we’re running a whole 600 MHz above the base clock! These temps are well int he safe range. Given, the main PWM fan did exert itself a bit more this time around, having to spin up to 2300 RPM with the case fans on, which did lead to a bit more noise than usual.
We feel it’s safe to say that the Pironman 5 offers some of the best air cooling you can get for a Raspberry Pi 5. Naturally, it can more than handle some serious overclocking, even in the long term. In a way, it almost feels like a waste not to overclock your Pi when using a case like this (do keep in mind that any, even successful overclocking can lead to increased system instability when you least expect it).
With cooling performance out of the way, let’s cover NVMe speeds as measured by Gnome Disk Utility’s built-in benchmarking tool.
With the stock PCIe settings (that is, using PCIe Gen 2 speeds) our benchmark Kingston NV2 drive achieved a 463 MB/s read speed and a 385.2 MB/s write speed. However, by tweaking the /boot/firmware/config.txt file and enabling PCIe Gen 3 speeds, we were able to get a pretty substantial boost: a 900.8 MB/s read and a 734.4 MB/s write speed! This is a pretty great result — and is quite literally a tenfold increase over stock SD card speeds. For any sort of desktop usage, or even slightly more complex server tasks, we seriously recommend investing into a good quality SSD — it’s more than worth it.
Ultimately, there is one gripe when it comes to the Pironman 5, and it’s got nothing to do with the functionality of the case itself. Rather, it has to do with functionality the case inhibits a little — the Wi-Fi. See, it makes intuitive sense that surrounding a Raspberry Pi with layers of aluminum and several PCBs would affect wireless performance in some way, but we never expected it to be this dramatic.
Our issues first began during OS setup, when we realized that our Pi just would not connect to our 5 GHz Wi-Fi network. We shrugged this off as a software bug and kept going, only to discover that even after setup we still weren’t able to connect to 5 GHz Wi-Fi. While not in the review lab itself, our router is essentially a room away, which never presented issues for other devices. 2.4 GHz Wi-Fi did work, but speeds were quite low, only reaching around 12 Mbps for upload and 18 for download.
We decided to see if bringing the system closer to the router would help (and by “closer” we mean “some 20 cm away from it”), and it did somewhat. 5 GHz Wi-Fi actually worked this time around, and we measured 86 Mbps download and 94 Mbps upload speeds. However, this was an abysmal result for our network setup which is capable of comfortably delivering north of 1000 Mbps in both directions on higher-end devices. Even worse, we managed to get over 300 Mbps of both download and upload on the very same Raspberry Pi 5 once out of the case.
Ultimately, we have to recommend using an Ethernet cable or an external USB Wi-Fi dongle with the Pironman 5, the latter of which should have, perhaps, been included with the kit as it’s almost a necessity. Whether this is a dealbreaker depends on your intended usage, but we imagine it won’t be too big of an issue for most of those looking to use the case in a desktop environment, and even less so for those planning to setup a NAS or similar server.
Conclusion: who’s the Pironman 5 for?
The Pironman 5 is a well-designed and solid-feeling case which in many ways improves on its predecessor. The design is a notable step in the right direction, as is the decision to switch to an NVMe drive from whatever the clunky USB-facilitated SATA M.2 setup found in the original Pironman V1.0/V2.0 was. The OLED info screen has essentially been brought over as-is, but the RGB lights have undeniably suffered a bit of a downgrade.
The Pironman 5 takes the IceCube cooling setup we know and love and turns it up to eleven, bringing PWM control to the main fan and adding two additional case-mounted RGB fans. This is all due to the Raspberry Pi 5’s increased thermal requirements. As we’ve seen, this setup is as good as air cooling gets — and keeps the system pretty cool at all times.
The Pironman might not be for everyone, as it’s undeniably a bigger case than most. If the whole RGB aspect seems like a bit too much to handle, or small size is crucial, the official Raspberry Pi Case for Raspberry Pi 5 might be the better choice. It’s a significantly smaller and quite unassuming case with quite decent thermals.
The only two gripes big enough to be worth mentioning in this wrap-up, at least for us, are the wobbly HDMI and USB-C ports (yeah, we’re still a bit worried about them) and the Wi-Fi performance issues — and we had to knock some points off because of these. If you can overlook these, there’s little real criticism to be had. Fun to build and feature-rich, the Pironman 5 has just about everything you could want out of a desktop/server Raspberry Pi case. For just $79, it’s hard not to recommend, especially to those looking to dabble in overclocking or otherwise pushing their Raspberry Pi to its limits.